
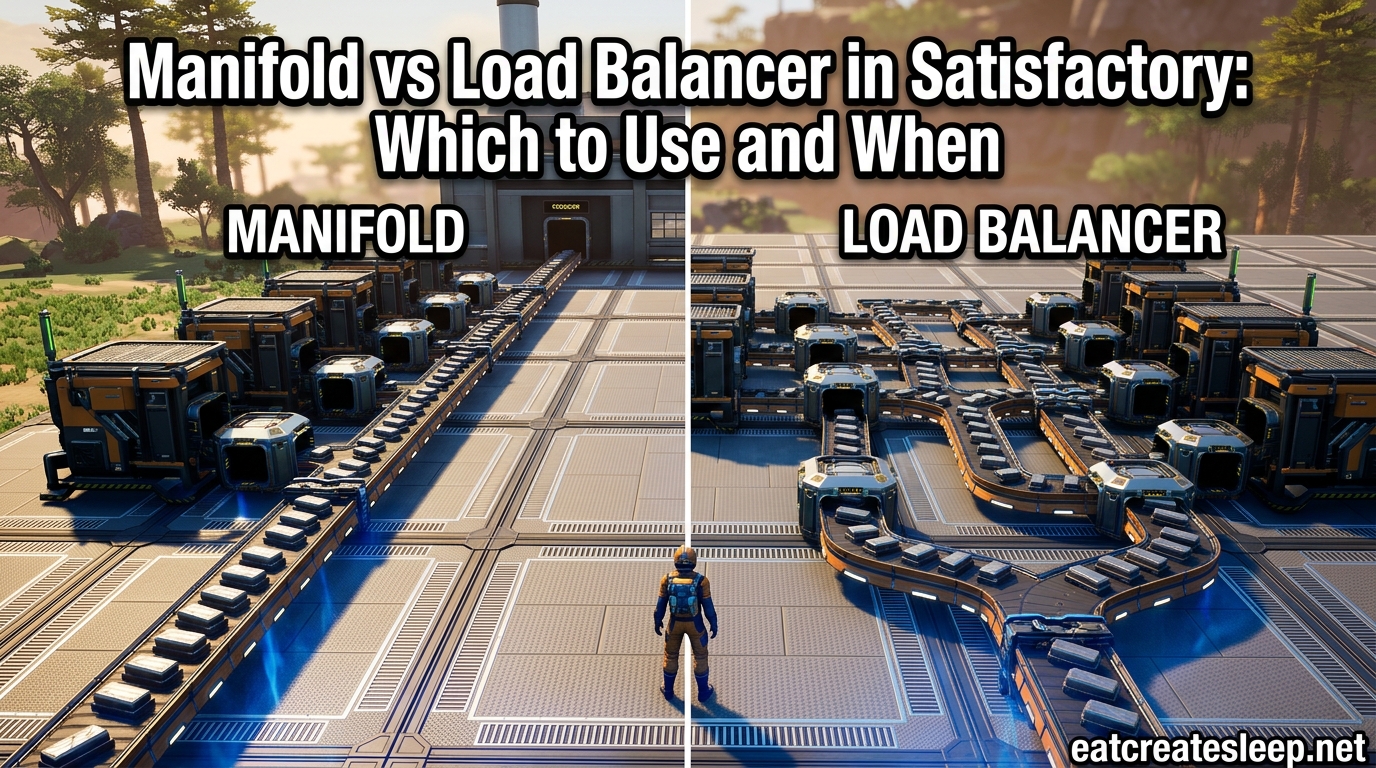
Every Satisfactory player eventually hits the same question: should you build a manifold or a load balancer? It is one of the most debated logistics choices in the game, and the answer shapes how your entire factory behaves. The short version is that a manifold feeds machines in sequence and lets overflow fill each station over time, while a load balancer splits resources equally across every output from the very first tick.
In this guide on Satisfactory manifold vs load balancer choices, I will break down exactly how each method works, where each one shines, and how to decide which fits your current project. Whether you are building your first coal power plant or optimizing a late-game nuclear setup, picking the right distribution method saves you time, space, and headaches.
By the end of this article you will understand the mechanical difference between both systems, know exactly when each approach is the better fit, and have practical tips for combining them. I will also cover advanced techniques like Smart Splitters, underclocking, and hybrid designs that most existing guides skip entirely.
Table of Contents
What Is a Manifold in Satisfactory
A manifold is a resource distribution method where a single input belt feeds a row of machines through a chain of splitters. Each splitter sends part of the flow into one machine and passes the remainder down the line to the next splitter. This continues until every machine on the line has been fed.
The defining feature of a manifold is the overflow principle. The first machine fills up completely before any resource reaches the second machine. The second machine fills before the third gets anything, and so on down the line. This creates a startup delay that scales with the number of machines you are running.
Players often call this the overflow method because of exactly this behavior. The belt keeps pushing resources forward, and anything a machine cannot consume spills past it to the next consumer downstream. Once every machine is full and running, the system reaches steady state and operates at maximum efficiency.
Building a manifold is straightforward. You place a constructor or refinery, attach a splitter before its input, run the overflow belt to the next splitter, and repeat. No complex math, no counting belt divisions, no worrying about whether you have split evenly. The layout is linear, predictable, and easy to expand.
Belt speed matters here. Your input belt needs enough throughput to feed every machine once the manifold saturates. If you are running ten constructors that each need 30 items per minute, your input belt must carry at least 300 items per minute. During startup the belt will look underutilized, but that is normal. Once the manifold fills, demand catches up to supply.
You should also think about output belts. A saturated manifold produces a steady stream of finished goods that needs somewhere to go. If your output belt cannot handle the combined throughput of every machine, the last machines in the line will back up and stall. Size your output belt to match total production, not just one machine’s output.
The trade-off is startup time. A manifold with twenty machines can take several minutes to fully saturate before the last machine starts producing. For most factory applications this is a non-issue, but it can be frustrating when you want immediate feedback on whether a line is working correctly.
One way to reduce startup frustration is to build in smaller modules. Instead of one massive manifold of forty machines, build two manifolds of twenty. Each one saturates twice as fast, and you get earlier feedback on whether the line is functioning. You can always merge outputs later.
What Is a Load Balancer in Satisfactory
A load balancer is a distribution system that splits an input belt into equal portions across every output using nested splitters. The goal is to ensure each downstream belt or machine receives the same share of the total input, regardless of how much material is flowing. A load balancer achieves balance through geometry rather than overflow.
The core building block is the splitter, which divides one input into three equal outputs. By nesting splitters in layers, you can split one belt into two, three, four, six, nine, or any number that factors cleanly. A two-way split uses one splitter with one output capped or merged back. A four-way split uses two layers. An eight-way split uses three layers. The pattern scales by powers and combinations of three.
For numbers that do not divide cleanly by three, you need creative arrangements. Splitting into five outputs requires merging partial flows and re-splitting them. Splitting into seven outputs is even trickier and often involves unused or looped outputs that consume part of the flow. These odd-number balancers are where most of the design challenge lives.
It is important to understand the distinction between a load balancer and a belt balancer. A load balancer takes one input and distributes it evenly to multiple outputs, typically feeding a row of machines. A belt balancer takes multiple input belts and redistributes them across multiple output belts, keeping throughput balanced even if one input backs up. Factorio players will recognize belt balancers from main bus designs, but in Satisfactory they are less common because the game handles material routing differently.
Constructing a load balancer requires careful planning. You need to know exactly how many machines you are feeding, work out the splitter tree, and often handle prime numbers that do not divide cleanly by three. Feeding five machines, for example, requires a more complex arrangement than feeding three or nine. Some designs use mergers to combine and re-split belts to hit odd ratios.
The big advantage of a load balancer is instant balance. Every machine starts receiving its share of resources from the moment the belt starts moving. There is no startup delay, no waiting for the first machines to fill before the last ones begin working. This matters when you need consistent throughput immediately or when you are feeding a system that cannot tolerate uneven supply.
The disadvantage is complexity. Load balancers take more space, more planning, and more belts to build. They are harder to modify after construction. If you decide to add three more machines to a perfectly balanced line of nine, you cannot just tack them on. You need to rebuild the splitter tree to handle twelve outputs, which may require a completely different layout.
Some players build belt compressors, which take an unbalanced set of belts and funnel them back into a single saturated belt before redistributing. These are advanced constructions that solve specific throughput problems but add even more footprint and complexity to a factory. They are useful when merging outputs from multiple production lines back onto a single high-speed belt.
It is worth noting that load balancers can suffer from throughput loss if not designed carefully. A balancer that splits one belt into three, then re-merges two of those outputs and splits again, can end up with uneven flow if the splitter geometry is wrong. Always trace your splitter tree from input to every output to confirm that each path carries the correct share.
Manifold vs Load Balancer: Key Differences
When comparing Satisfactory manifold vs load balancer systems, the differences come down to five factors: build complexity, startup behavior, space requirements, expansion flexibility, and throughput consistency. Here is how they stack up against each other.
Build complexity. A manifold is the simplest distribution system in the game. Drop a splitter, connect a machine, pass the belt along. Anyone can build one in seconds without calculating anything. A load balancer requires you to plan the splitter tree, count outputs, and often deal with awkward prime numbers. Beginners can build manifolds immediately. Load balancers take practice.
Startup behavior. Manifolds have a ramp-up period. The first machines fill before the last ones receive anything. A twenty-machine manifold might take five minutes to fully saturate. Load balancers split evenly from tick one, so every machine starts working immediately at its allocated rate. If instant startup matters, the load balancer wins.
Space requirements. Manifolds are compact and linear. The splitter chain sits directly in front of the machines, adding minimal width. Load balancers grow in both width and depth as you add layers. A balancer for twelve machines is a noticeable structure that eats real estate in your factory floor.
Expansion flexibility. Manifolds are trivial to extend. Add another splitter, drop another machine, connect the overflow belt. Done. Load balancers fight you on expansion because adding outputs means rebuilding the splitter tree to maintain balance. This is why most experienced players default to manifolds for anything that might grow.
Throughput consistency. Once saturated, both systems deliver identical results. The difference is purely in the startup phase. A saturated manifold and a balanced load balancer feed machines at the same steady rate. Neither has an advantage at steady state, which is why the manifold’s simplicity usually wins.
Quick comparison summary:
- Manifold: Fast to build, slow to start, easy to expand, compact footprint, overflow-based, great for beginners.
- Load balancer: Slow to build, instant start, hard to expand, larger footprint, equal-split-based, better for specific precision tasks.
The bottom line on differences is that manifolds trade startup time for simplicity, while load balancers trade simplicity for instant precision. For 90 percent of factory builds, that trade favors the manifold. The remaining 10 percent is where knowing how to build a load balancer pays off.
When to Use a Manifold
Manifolds are the right choice for the vast majority of Satisfactory builds. They are the default recommendation from experienced players on forums and in guides for good reason. Here are the specific scenarios where a manifold is the clear winner.
Coal power plants. This is the classic manifold use case. You have a set of coal generators that all need the same fuel input, and you do not need them to start simultaneously. A manifold feeds the first generator, overflows to the second, and so on. The plant ramps up naturally as coal flows in, and once saturated every generator runs at full capacity. No splitter tree needed.
Steel production lines. Steel factories typically involve rows of constructors or foundries processing ingots into beams, pipes, and other components. A manifold handles the distribution cleanly. You can start with five machines and add more as your iron supply grows, without redesigning anything.
Late game factories. When you are running massive production lines with dozens of machines per stage, manifolds keep the build manageable. A load balancer for thirty refineries would be enormous and fragile. A manifold for thirty refineries is just a belt and thirty splitters in a line. The simplicity scales better than any balancer can.
Main bus and production line designs. If you are pulling resources off a central bus to feed individual production lines, manifolds handle the distribution at each stage. The bus carries bulk materials, and manifolds split off what each row needs without complex balancing. This keeps your bus clean and your production lines modular.
Any situation where you might expand later. This is the killer advantage. Manifolds scale effortlessly. If your iron input doubles next tier and you want to add ten more constructors, you just extend the line. No math, no rebuild, no stress. Most players underestimate how often they will expand, and manifolds make that painless.
Beginner builds. If you are new to Satisfactory, start with manifolds. They teach you how splitters work, how overflow behaves, and how belt speed affects throughput, all without requiring you to calculate splitter ratios. Once manifolds feel natural, you can experiment with load balancers for specific cases.
Anything feeding into storage. When your goal is to fill containers or feed an Awesome Sink, manifolds are ideal because exact distribution does not matter. The overflow naturally routes excess material down the line until every container is full. You never need to balance anything when the destination is just storage.
When to Use a Load Balancer
Load balancers are the right tool for specific jobs where equal distribution from the start actually matters. They are not the default, but they solve problems manifolds cannot. Here is where they earn their place.
Train station inputs and outputs. When loading cargo cars or unloading them, you want every platform to receive or send material at an equal rate. A load balancer ensures the train fills evenly and unloads completely without one car sitting full while another starves. This keeps station throughput predictable and prevents bottlenecks.
Storage and sink setups. If you are routing surplus production into an Awesome Sink or a storage container array, a load balancer distributes evenly across all destinations. Every container fills at the same rate, and no single container hogs the flow while others sit empty. This is useful when you want consistent fill levels across a storage bank.
Mixed input ratios. Some recipes require multiple inputs at specific ratios. A load balancer can pre-balance those inputs so each machine receives the correct proportion from the start. This is useful when the ratio is awkward and a manifold would take too long to self-balance through overflow.
Situations requiring immediate full throughput. If you are feeding a system that must run at full speed the instant you connect it, a load balancer delivers. Manifolds need saturation time, which can be unacceptable for time-sensitive setups or when you are testing a line and want instant feedback on whether your ratios are correct.
Aesthetic and showcase builds. Some players enjoy the engineering challenge of a perfectly balanced splitter tree. If you are building a showcase factory for screenshots or video, a load balancer looks impressive and demonstrates mastery of the game mechanics. There is nothing wrong with building one for the satisfaction of it.
Splitting a single belt into specific equal outputs. When you need exactly two, three, or four equal outputs from one belt and want them balanced immediately, a small load balancer is clean and compact. These small balancers are quick to build and serve a clear purpose without the overhead of a full splitter tree.
Feeding multiple parallel production lines from one source. If you have one mining node supplying several factories, a load balancer ensures each factory gets its fair share from the start. This prevents one factory from monopolizing the supply while others wait. It is one of the few cases where balancing genuinely improves factory behavior.
Advanced Tips: Smart Splitters, Underclocking, and Hybrid Designs
Beyond the basic manifold versus load balancer choice, several advanced techniques can improve either system. These cover content gaps that most existing guides skip.
Smart Splitters in manifolds. The Smart Splitter, unlocked in the Caterium research tree, lets you set filters on each output. In a manifold, you can configure a Smart Splitter to send one output to the machine, set another to overflow, and route the overflow past any backed-up machines directly to the end of the line. This speeds up saturation significantly because later machines start receiving material sooner instead of waiting for every upstream machine to fill completely.
Underclocking to match ratios. Sometimes you have more machines than your input belt can fully supply. Instead of accepting uneven distribution, you can underclock each machine so that total demand matches supply. For example, if your belt provides 200 items per minute and you have ten machines that each want 30 per minute, underclock them all to 66 percent. Total demand drops to 200, and every machine runs evenly without needing a load balancer. This also reduces power consumption, since underclocked machines draw less energy per unit produced.
Loopback overflow belts. Some advanced manifold designs include a loopback belt that takes the final overflow and routes it back to the start or into a sink. This prevents the last machine from backing up and stalling the line. It also gives you a visual indicator of when the manifold is fully saturated, since the loopback belt only carries material once every machine is full.
Hybrid manifold-balancer designs. You do not have to pick one method exclusively. A common hybrid approach uses a small load balancer to split a main belt into two or three sub-belts, then runs manifolds off each sub-belt. This gives you faster startup than a pure manifold, because the load balancer divides the flow upfront, while keeping the easy expansion of manifolds on each branch.
Dimensional Depot considerations in Satisfactory 1.0. With the full release, the Dimensional Depot storage system changes how you think about sink and storage distribution. If you are uploading materials to the depot, a load balancer feeding multiple upload stations ensures even contribution from each. This is one of the few cases where balancing genuinely helps in the current game version.
Using containers as buffers. An industrial storage container placed between your input source and a manifold acts as a buffer that dramatically shortens startup time. Fill the container first, then connect the manifold. The stored material floods the line and saturates machines much faster than a trickle from a mining node. This is a simple trick that gives you load balancer-like startup speed with a manifold’s simplicity.
FAQs
Can someone explain load balancer vs manifolding?
A manifold feeds machines in a line using a chain of splitters, where each machine fills up before the next one receives material. A load balancer uses nested splitters to divide input equally across all outputs from the start. Manifolds are simpler but take time to saturate. Load balancers are more complex but distribute evenly immediately.
When to use manifolds over load balancers in Satisfactory?
Use manifolds when you want simplicity, easy expansion, and compact builds. They are ideal for coal power plants, steel production, large late-game factories, and any production line you might expand later. Most players default to manifolds for nearly everything.
What is the difference between manifold and load balancer in Satisfactory?
The core difference is distribution method. A manifold uses overflow, where machines fill in sequence until the whole line is saturated. A load balancer uses nested splitters to split input equally across all outputs from the first tick. Manifolds are easier to build and expand. Load balancers provide instant balance but are harder to modify.
Which is better: manifold or load balancer in Satisfactory?
For most players and most situations, the manifold is better because it is simpler to build, easier to expand, and performs identically once saturated. Load balancers are better for specific cases like train stations, storage arrays, and situations requiring immediate balanced throughput. The community consensus is to default to manifolds and use balancers only when you have a specific reason.
Conclusion: Manifold vs Load Balancer in Satisfactory
The Satisfactory manifold vs load balancer debate has a clear answer for most players: start with manifolds. They are faster to build, easier to expand, and perform just as well once saturated. Use load balancers for train stations, storage arrays, and any setup where immediate equal distribution genuinely matters. Hybrid designs using small balancers feeding manifold branches give you the best of both worlds when you need faster startup without sacrificing flexibility.
My recommendation for beginners is to build manifolds for everything until you hit a specific problem that a manifold cannot solve. At that point, you will know exactly why you need a load balancer and how to design one for your situation. That practical understanding beats any guide, including this one.
Remember that no choice is permanent in Satisfactory. You can always tear down and rebuild. Start simple with manifolds, learn the mechanics, and add load balancers only where they solve a real problem. Your factory will evolve naturally, and you will develop an intuition for which method fits each new project.