
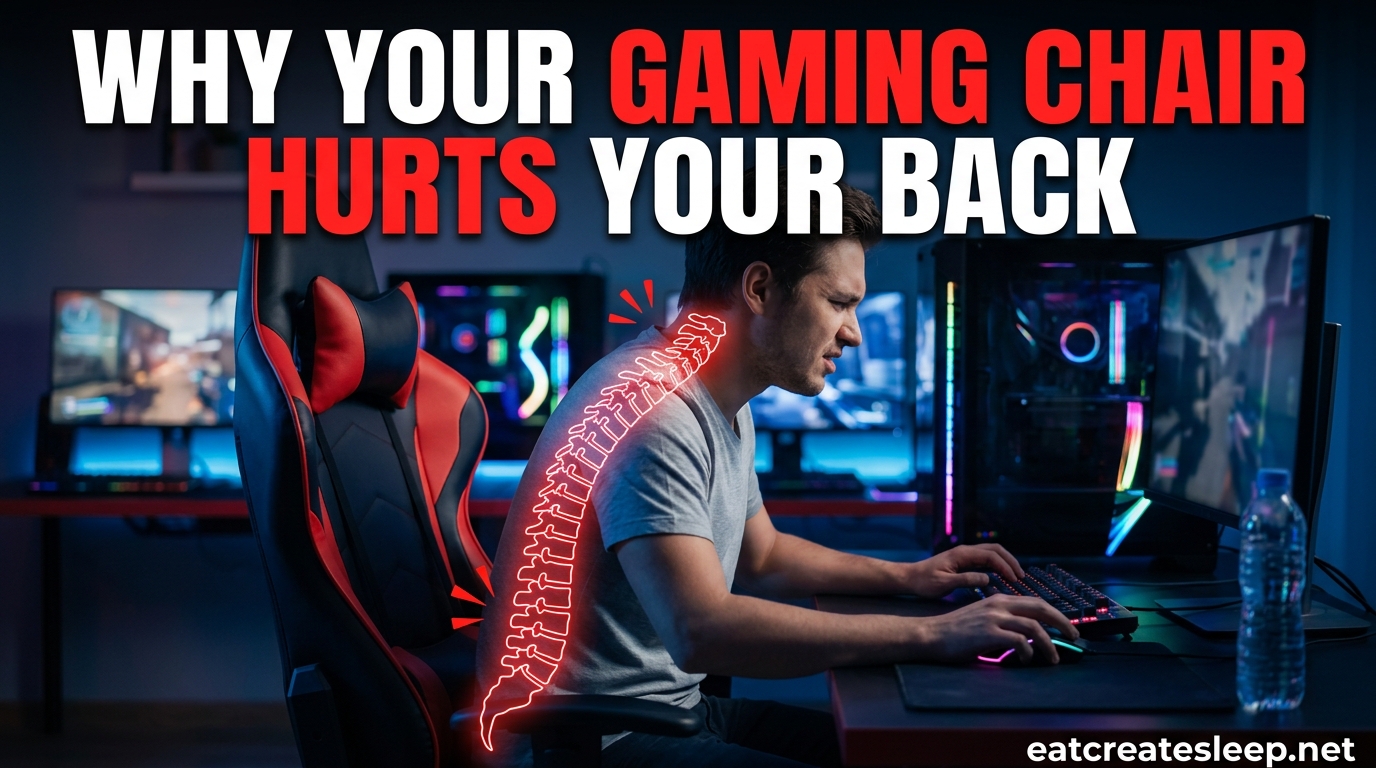
You spent good money on a gaming chair, and now your lower back is screaming after 40 minutes of play. Sound familiar? Across Reddit threads, dedicated forums, and product reviews, the same complaint shows up over and over: people drop hundreds on a chair marketed for “ergonomic comfort,” then end up with more back pain than they had before buying it.
This guide breaks down exactly why your gaming chair hurts your back, the most common setup mistakes causing that pain, and a step-by-step process to fix it without buying a new seat. Whether you are dealing with tailbone soreness, lower back stiffness, shoulder tension, or that nagging numbness in your legs, the fixes below address the root causes most gamers never think to check.
If you want the short version: gaming chairs hurt your back when the lumbar support misses your spine’s natural curve, the seat sits at the wrong height, or you stay locked in one position for hours on end. The setup section walks through seven adjustments that take roughly 15 to 20 minutes and can cut pain within the first sitting session.
None of this requires specialty tools, paid consultations, or a new chair. The adjustments work on nearly every gaming chair on the market, from $150 budget picks to $600 premium models. The difference between a chair that hurts and one that supports you usually comes down to how it is set up, not how much it cost.
Table of Contents
Why Your Gaming Chair Hurts Your Back
Gaming chairs hurt your back because most are built around a racing-style bucket shape that looks aggressive but does not match the human spine’s natural curves. The side bolsters force your shoulders inward, the deep seat tilts your pelvis, and the included lumbar pillow is rarely thick enough or positioned where your lower back actually needs support.
The result is what physiotherapists call the “gamer slouch”: hips tilted backward, lower back rounded, shoulders rolled forward, and head jutting toward the screen. Held for hours, this posture loads your spinal discs unevenly, fatigues the muscles meant to hold you upright, and compresses the nerves that run from your lower back down through your legs.
Here are the specific reasons your gaming chair causes back pain:
- Poor lumbar support alignment. The lumbar pillow sits too high or too low, missing your lordotic curve (the natural inward arch of your lower spine). Without that support, your pelvis tucks backward, your lower back rounds, and disc pressure spikes by as much as 40 percent compared to standing.
- Seat height set wrong. When the seat is too tall, your feet dangle and the front edge digs into the back of your thighs, restricting blood flow and causing leg numbness. Too low and your hips drop below your knees, tilting your pelvis backward and forcing your entire spine to slump.
- Seat depth that does not fit your legs. A seat pan that is too long presses into the back of your knees, restricting circulation and forcing you to slouch forward to relieve pressure. Too short and your thighs lose support, transferring load directly to your lower back muscles.
- Recline angle locked at 90 degrees. A perfectly upright seat looks “correct” but actually increases spinal compression. Research consistently shows a 100 to 110 degree recline reduces disc pressure by shifting some of your upper body weight into the backrest rather than straight down through the spine.
- Static posture for hours. Even a perfectly adjusted chair causes pain if you sit frozen in it. Your spine needs regular movement to keep discs hydrated, blood flowing to tired muscles, and joints from stiffening into one position.
- Headrest and armrest mismatch. Armrests that sit too high hike your shoulders toward your ears, creating neck and upper back tension within minutes. A headrest that pushes your head forward causes what physios call “gamer neck,” straining the cervical curve and radiating pain into your shoulders.
- Cushion too hard or too soft. A rock-hard cushion concentrates pressure on your tailbone and the bones of your pelvis. An overly soft cushion bottoms out, removing support entirely and letting your pelvis sink into the same slouched position as having no cushion at all.
One Reddit user in r/pcmasterrace summed it up bluntly: “Spent big on a Secretlabs chair and my lower back is killing me after two weeks.” Another in r/OfficeChairs added that they “can’t sit more than 40 minutes without the lower back going numb.” The problem is rarely the chair’s build quality. It is almost always the setup, the fit, or the assumption that one chair works for every body type.
This matters because back pain compounds. A sore lower back today becomes a stiff neck next week, then radiating pain into your shoulders the week after. Catching the cause early — meaning within the first month of owning a chair — prevents months of discomfort later.
Signs Your Gaming Chair Setup Is Wrong
Before adjusting anything, run through this diagnostic checklist. Most gamers discover three or four issues they never noticed before, even after months of using the same chair.
Pain and discomfort are signals, not background noise to ignore. Each symptom below points to a specific adjustment that is off:
- Your feet do not sit flat on the floor, or you feel pressure on the back of your thighs. (Seat height is wrong.)
- Your lower back feels hollow or rounded inward when you lean against the backrest. (Lumbar support is missing or misplaced.)
- The lumbar pillow presses against your mid-back or shoulder blades instead of your lower back. (Lumbar height is too high.)
- Your shoulders creep up toward your ears within 15 minutes of sitting. (Armrests are too tall.)
- Your tailbone aches after 30 to 60 minutes of sitting. (Cushion is too hard or seat depth is wrong.)
- You feel numbness or tingling in your legs or feet. (Seat edge is pressing into your thighs or your feet dangle.)
- Your neck tilts forward or down to see your monitor clearly. (Monitor height is too low.)
- You catch yourself slouching into the “gamer slouch” within 20 minutes of sitting down, even after resetting your posture. (Backrest angle or lumbar support is letting you collapse.)
- Your lower back pain eases the moment you stand up but returns within minutes of sitting back down. (Chair setup, not a medical issue.)
If you nodded along to three or more of these, your chair is not broken. Your setup is. The next section walks through every adjustment, in order, so you do not have to guess which one to fix first.
How to Set Up Your Gaming Chair Right: Step-by-Step Guide
This is the core fix. Work through each step in order, because each adjustment affects the next. Setting your seat height first changes where your knees sit, which affects seat depth, which affects where your lower back meets the backrest. Skip steps and you will undo your own work.
The whole process takes 15 to 20 minutes and works on nearly any gaming chair, from budget picks to premium models. You will need a tape measure (optional), your chair’s adjustment manual (if you still have it), and a few minutes of patience.
Step 1: Set Your Seat Height Using the 90-Degree Knee Rule
Stand in front of your chair and lower the seat until the highest point of the cushion lines up just below your kneecap. Sit down and check your knees. They should bend at roughly 90 degrees, with your feet flat on the floor and your thighs parallel to the ground.
If your feet dangle, lower the seat or add a footrest. If your knees sit higher than your hips, raise the seat. The 90-degree rule matters because it keeps your pelvis in a neutral position, which is what allows the rest of your spine to stack properly above it. Get this wrong and every adjustment that follows compounds the mistake.
A common mistake here is raising the chair to match the desk height, then hunching your arms up to reach the keyboard. Fix the desk height with a keyboard tray or lower the chair and use a footrest. Never sacrifice seat height for desk height.
Step 2: Adjust Seat Depth With the Fist Test
Sit all the way back against the backrest. Slide your hand, flat, between the front edge of the seat and the back of your knee. You should fit roughly three fingers, or about two inches of space. More than a full fist and the seat is too long for you. Less than two fingers and the seat is too short.
If your seat has a depth slider, use it. This is a feature most gaming chairs skip but many ergonomic office chairs include. If your chair does not have one and the seat is too long, add a lumbar cushion behind your back to push you forward into a better position. If the seat is too short, you may need a chair with a seat slider on your next purchase.
Seat depth matters because the back of your knee is full of blood vessels and nerves. Press on it for an hour and you get the numbness and tingling that so many gamers assume is just “normal gaming fatigue.”
Step 3: Position the Lumbar Support at Your Lower Back
This is the single most common mistake in gaming chair setup. The lumbar pillow needs to sit in the small of your lower back, roughly at belt line, where your spine naturally curves inward. Most people leave it too high, which feels comfortable for five minutes and then causes mid-back ache as the day goes on.
If your chair has adjustable lumbar support, raise or lower it until you feel gentle pressure against the curve of your lower spine, not your shoulder blades. If you use a removable pillow, sit against the backrest, find the natural hollow of your lower back, and tuck the pillow right there. The goal is to fill the lordotic curve so your spine does not have to round to fill it.
A good test: when the lumbar support is positioned correctly, you should be able to relax your lower back muscles and feel the chair holding you up. If you feel like you have to actively press backward, the support is in the wrong spot or not thick enough.
If your chair’s lumbar pillow is too thin to reach your lower back, replace it. A thicker aftermarket lumbar cushion under $30 fixes more back pain than any other single change.
Step 4: Set the Backrest Angle to 100 to 110 Degrees
A locked 90-degree backrest feels disciplined but actually loads more pressure onto your spinal discs. Reclining slightly, between 100 and 110 degrees, shifts some of your upper body weight into the backrest and reduces compression on your lumbar spine. This is one of the most researched findings in ergonomics.
Use the recline lever to tilt the backrest back two or three notches from fully upright. Lock it in place. If your chair has a tilt-lock or rocking mode, lock it for focused work sessions and unlock it for casual play to encourage the micro-movements your spine needs.
Avoid the temptation to recline past 120 degrees during active gaming. That much recline takes your lower back away from the lumbar support entirely and puts load on your neck instead.
Step 5: Tune the Armrests So Your Shoulders Relax
Drop your arms to your sides and let your shoulders fully relax. Bend your elbows to 90 degrees. That is the height your armrests should sit at. The pads should cradle your forearms without lifting your shoulders, and your wrists should hover just above keyboard or controller height.
If your chair has 4D armrests, also adjust the width so the pads sit roughly under your elbows when your hands rest on the desk or controller. Armrests that sit too wide force you to hunch inward to reach them. Armrests too high push your shoulders up and create neck tension within minutes.
Adjust armrests last. They depend on seat height, desk height, and how you type or hold a controller. Set everything else first, then dial in the armrests to match.
Step 6: Position the Headrest or Neck Pillow Lightly
The headrest should barely touch the back of your head when you sit up straight. It is a resting point, not a pusher. If the headrest forces your head forward, lower it or remove the neck pillow entirely and use it only when reclined for casual play.
For tall gamers, many gaming chair headrests sit too low and press into the cervical curve, creating forward head tilt. If that is you, position the neck pillow higher up against the backrest or skip it during upright play and use it only when reclined.
If your headrest cannot be adjusted high enough for your torso, an aftermarket magnetic or strap-on headrest can extend the height. Cheap fix, big difference for anyone over six feet tall.
Step 7: Match Your Monitor Height to Your Eye Line
Your chair setup is only half the equation. If your monitor sits too low, your neck tilts down, and the lower back follows within minutes. Set the top edge of your screen at eye level when you are seated and looking straight ahead. The screen should sit roughly an arm’s length away.
If you use a laptop, raise it on a stand and use a separate keyboard. Hunching over a laptop in a perfectly adjusted chair will still leave you with neck and upper back pain within an hour. This is the most common setup mistake for work-from-home gamers.
For dual-monitor setups, align the primary monitor directly in front of you and the secondary at a slight angle. Constantly twisting to look at an off-center screen is a leading cause of one-sided neck and shoulder pain.
Quick Fixes If You Cannot Buy a New Chair
Not ready to spend hundreds on a new seat? Most back pain from a gaming chair can be reduced with a few cheap add-ons. These fixes fill the gaps most guides skip because they are not selling anything.
- Add an aftermarket lumbar pillow. A memory foam lumbar cushion runs under $30 and fixes the most common cause of gaming chair back pain. Look for one with a strap so it stays in place on the backrest rather than sliding down every time you stand up.
- Use a seat cushion. If your tailbone hurts, a wedge or coccyx cutout cushion redistributes pressure off your sacrum. This single fix resolved the issue for several gamers on r/gamingchairs who were ready to throw out their chairs.
- Add a footrest. If your chair sits at the right desk height but your feet still dangle, a simple angled footrest keeps your knees at 90 degrees without forcing you to lower the seat too far. A stack of books works in a pinch.
- Set a movement timer. Every 30 to 45 minutes, stand up for two minutes. Stretch your hamstrings, roll your shoulders, walk around. Movement keeps spinal discs hydrated and resets tired muscles. Use your phone, a smartwatch, or a free Pomodoro app.
- Raise your monitor on books or a stand. A free fix that prevents the forward neck tilt responsible for most upper back pain. The top of the screen should sit at eye level when you look straight ahead.
- Try a standing desk converter. If you alternate between sitting and standing every hour, neither position has time to cause pain. Even a $50 desktop riser breaks up long sitting sessions.
These solutions do not replace a properly adjustable chair, but they buy you time and often cut pain by 50 percent or more within a week. Start with the lumbar pillow and the monitor raise. Those two changes alone solve most of the complaints we see in forums.
Gaming Chair vs Office Chair for Back Pain
This comparison comes up constantly in forums, and the answer depends on how you use the chair. Here is the breakdown most guides gloss over because they are trying to sell you one or the other.
- Gaming chairs prioritize recline range, included lumbar pillows, and a deep bucket seat styled after racing car seats. They work well for casual play, reclined gaming, and shorter sessions. But they often lack seat depth adjustment, fine lumbar height control, and the long-term build quality needed for eight-hour work sessions.
- Ergonomic office chairs (Herman Miller Aeron, Steelcase Leap, HON Ignition, Branch Ergonomic) prioritize all-day adjustability. They typically offer seat sliders, dynamic lumbar support that moves with you as you shift, breathable mesh that prevents heat buildup, and a build quality that lasts a decade or more.
- The trade-off: Office chairs cost more upfront but tend to outlast gaming chairs by years and reduce back pain more reliably for full-day sitting. Gaming chairs win on style, deep recline, included accessories, and bundled headrest pillows at lower price points.
- The crossover option: Some newer gaming chairs borrow office chair features like adjustable lumbar height, seat depth sliders, and mesh backs. These bridge the gap but usually sit between the two price tiers.
If you sit in the chair more than six hours a day for work and gaming combined, an ergonomic office chair is the better long-term investment. If the chair is purely for evening gaming sessions under three hours, a well-adjusted gaming chair works fine and looks the part.
When to Replace Your Gaming Chair Instead of Adjusting It
Sometimes the chair is the problem, not the setup. No amount of adjustment can fix a chair that is the wrong size for your body or worn out past its usable life. Replace your gaming chair if you notice any of the following:
- The lumbar support has no height or depth adjustment and even a thick aftermarket pillow cannot reach your lower back.
- The seat pan is clearly the wrong size for your legs and there is no depth slider to compensate.
- The gas cylinder sinks on its own, the recline lock fails to hold, or the armrests wobble loose every few days.
- You have tried every adjustment in this guide and pain still hits within 30 minutes of sitting, even after a two-week adjustment period.
- The foam has compressed flat and you bottom out on the hard base of the chair when you sit.
- You are shorter than 5’2″ or taller than 6’2″ and the chair is sold as a one-size-fits-all model. Most gaming chairs are sized for an average male torso and will not fit extreme heights well.
A worn-out or poorly sized chair will fight every adjustment you make. If you have owned the chair more than three years and it shows these signs, the cheapest long-term fix is replacing it, not patching it.
When shopping for a replacement, prioritize these features over flashy marketing: adjustable lumbar height, seat depth slider, 4D armrests, breathable back material, and a recline lock that holds in multiple positions. Those five features cover 90 percent of the setup problems covered above.
Building Better Gaming Chair Habits
Setup gets you 80 percent of the way. Habits get you the rest. Even the best-adjusted chair causes pain if you stay frozen in it for six hours straight.
Simple changes that compound over weeks:
- Stand every 30 to 45 minutes. Two minutes is enough. Walk to the kitchen, stretch your hamstrings, roll your shoulders. Movement is what your spine needs to stay healthy.
- Reset your posture every 20 minutes. Glance at your reflection or set a posture reminder. Most gamers drift into the slouch within 15 to 20 minutes no matter how good their setup is.
- Vary your recline. Lock the backrest upright for focused work, recline for casual play. Staying in one recline angle for hours fatigues the same muscles repeatedly.
- Stay hydrated. Spinal discs are mostly water. Dehydrated discs compress more easily and recover more slowly.
- Strengthen your core off-chair. Five minutes of planks or dead bugs a few times a week gives your posture muscles the endurance they need to hold you up during long sessions.
These habits cost nothing and they work whether your chair cost $150 or $600. Pair them with the setup steps above and most back pain fades within two to three weeks.
FAQs
Why does my gaming chair hurt my back?
Your gaming chair hurts your back because the lumbar support is not aligned with your lower spine’s natural curve, the seat height puts your pelvis in a poor position, or you sit static for too long. Most pain comes from setup mistakes, not a defective chair.
How do I correctly sit in a gaming chair?
Sit with your feet flat, knees at 90 degrees, hips slightly above knee level, lower back pressed against the lumbar support, shoulders relaxed, and elbows bent at 90 degrees. Recline the backrest 100 to 110 degrees rather than sitting bolt upright.
How do I fix a gaming chair that keeps leaning back?
Tighten the tilt tension knob under the seat to add resistance, engage the tilt lock to hold the backrest in place, and check that the recline lever is fully locked. If the chair still leans, the gas cylinder or tilt mechanism may need replacement.
How long does it take to get used to a new gaming chair?
Most gamers need one to two weeks of daily use to adjust to a new gaming chair as their posture muscles adapt. If back pain persists after two weeks of proper setup, the chair likely does not fit your body size.
Is a gaming chair or office chair better for back pain?
For sessions under three hours, a well-adjusted gaming chair works fine. For all-day sitting of six hours or more, an ergonomic office chair with seat depth adjustment and dynamic lumbar support reduces back pain more reliably.
Final Thoughts on Fixing Gaming Chair Back Pain
Back pain from a gaming chair is almost always a setup problem, not a chair problem. Position the lumbar support at your lower back, set the seat height so your knees bend at 90 degrees, recline the backrest 100 to 110 degrees, and take movement breaks every 30 to 45 minutes.
Once you understand why your gaming chair hurts your back and how to set it up right, the fixes take 20 minutes and pay off every single day you sit down. Run through the step-by-step guide above, recheck the diagnostic checklist, and you should notice less stiffness, fewer aches, and longer comfortable sessions within the first week.
Start with the lumbar pillow and the seat height. Those two adjustments alone resolve most cases of gaming chair back pain. Everything else refines from there.