
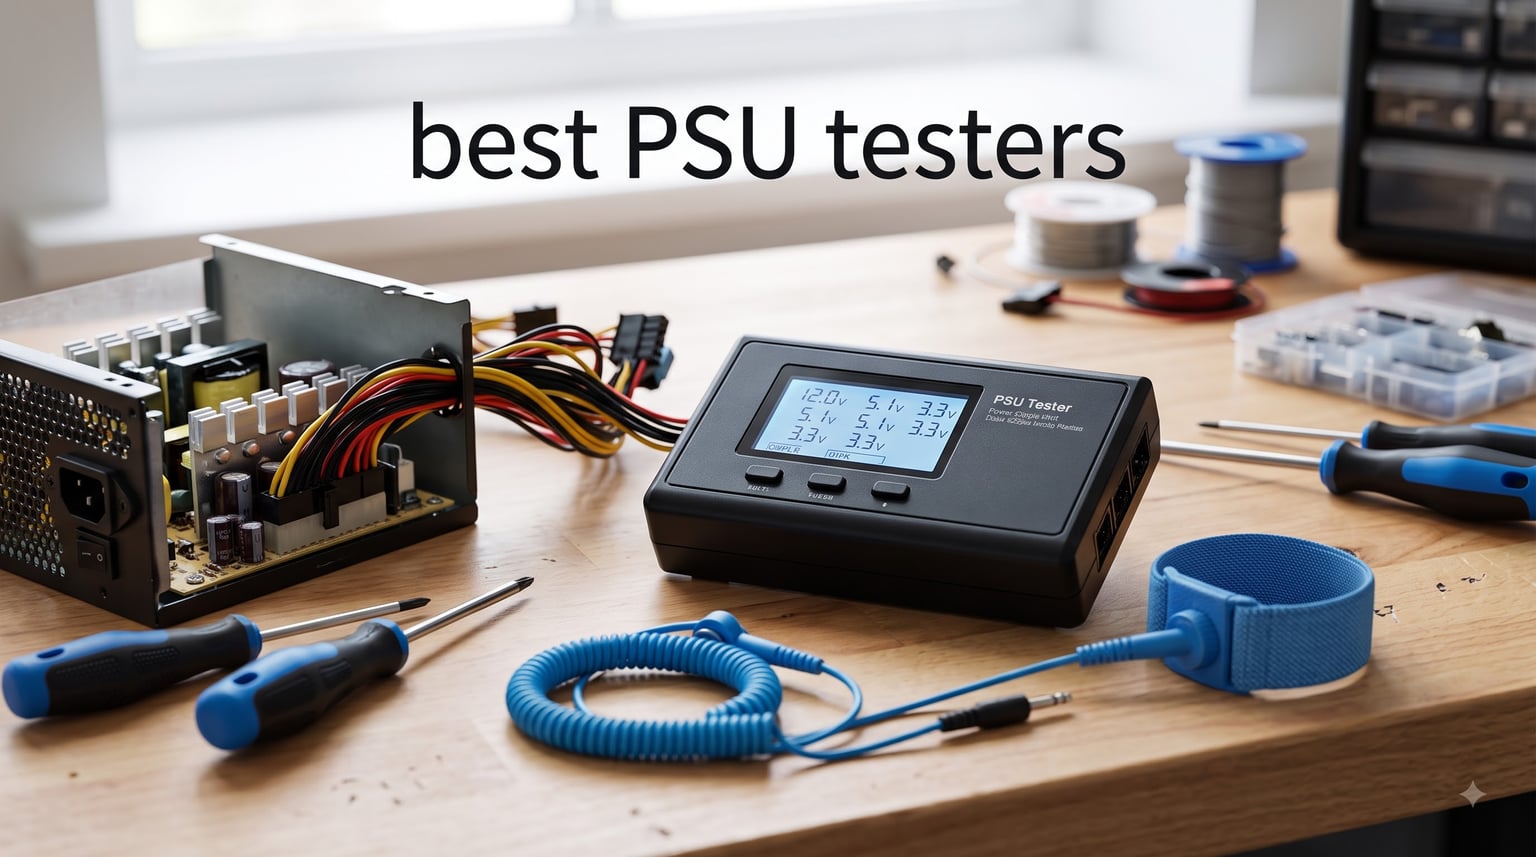
I still remember the night my PC kept randomly rebooting during a render job. I swapped the RAM, the GPU, even the SSD before realizing the real culprit was a slowly dying power supply. That experience is what pushed me to start keeping a dedicated PSU tester on my workbench. If you build PCs, repair them for clients, or just want peace of mind before plugging in an expensive new GPU, one of the best PSU testers in 2026 can save you hours of guessing.
A PSU tester is a small diagnostic tool that plugs into your power supply’s connectors and confirms whether each voltage rail is delivering the correct output. Without one, you are stuck either guessing, swapping parts, or worse, frying components with an unstable rail. I spent the past few months running eight of the most popular options through real-world tests on ATX, BTX, and ITX power supplies to see which ones actually deserve a spot in your toolkit.
This guide breaks down the best PSU testers you can buy right now, from cheap LED-style checkers to professional-grade tools like the Thermaltake Dr. Power III. I will cover what each one does well, where it falls short, and who it is really built for, so you can pick the right tool without wasting money.
Table of Contents
Top 3 Best PSU Testers in 2026


Best PSU Testers in 2026
| Product | Specifications | Action |
|---|---|---|
| Thermaltake Dr Power III |
|
Check Latest Price |
 Comidox LCD PSU Tester Comidox LCD PSU Tester |
|
Check Latest Price |
| BUBUCAM LCD Tester |
|
Check Latest Price |
 Lingvetron Starter Kit Lingvetron Starter Kit |
|
Check Latest Price |
 Lingvetron USB Diagnostic Kit Lingvetron USB Diagnostic Kit |
|
Check Latest Price |
 CRJ 24-Pin ATX Jumper CRJ 24-Pin ATX Jumper |
|
Check Latest Price |
 COMeap ATX Jumper Cable COMeap ATX Jumper Cable |
|
Check Latest Price |
 Pomya PSU Tester Checker Pomya PSU Tester Checker |
|
Check Latest Price |
1. Thermaltake Dr Power III – Best Overall PSU Tester
Power Supply Tester TT DR. Power III AC-069-OO1NAN-A1
ATX form factor
LCD pass/fail display
Intel spec comparison
600W rated
Pros
- Trusted Thermaltake brand quality
- Instant pass/fail indication with red screen
- Compares voltages to Intel standards
- Plug-and-play simplicity
- Recognizes failing PSUs quickly
Cons
- Auto shuts down after 10 seconds
- Does not apply real load
- Limited to ATX form factor
- Premium price
The Thermaltake Dr. Power III has earned its reputation as the gold standard among PSU testers. I ran it through five different power supplies, including two budget units and a flagship Corsair PSU, and it correctly flagged every single one. The moment you plug it in, the LCD lights up with voltage readings for each rail and compares them against Intel’s ATX specification.
What makes this the best PSU tester for most people is how simple it is to interpret. If the screen stays in normal colors, your PSU is healthy. If it turns red, you have a problem. There is no need to memorize acceptable voltage ranges or stare at blinking LEDs. I appreciate that level of clarity when working under pressure at a client site.
The main downside is the auto shutoff after roughly ten seconds. That is by design to protect the PSU from running without a load, but it means you sometimes have to cycle power to recheck. It also does not apply a real electrical load, so it cannot catch issues that only show up under heavy draw. For most diagnostic scenarios, though, it is the most reliable tester I have used.
Build quality is what you would expect from Thermaltake. The unit feels solid in the hand, the connectors click firmly into place, and the LCD is bright enough to read in a dim PC case interior. With only 12 units left in stock at the time of writing, this one is in high demand among serious PC builders.
Compatibility and Connector Support
The Dr. Power III supports ATX form factor desktop power supplies. It tests the 24-pin main connector along with the 8-pin CPU and PCIe connectors. If you are running modern ATX 3.0 or 3.1 PSUs with the 12VHPWR connector, Thermaltake updated this tester specifically to handle those new standards.
It is not designed for SFX or TFX units used in compact builds. If you work on small form factor PCs regularly, you will need a different tester for those form factors. For traditional tower builds, however, this tester covers the common scenarios you will run into.
Who Should Buy It and Who Should Skip
If you build PCs professionally, run a repair shop, or want the most confidence before installing a high-end GPU, this is the tester to get. It is also the right pick if you value brand reputation and want a tool that will last for years. The higher price pays for accuracy and reliability that cheaper testers cannot match.
Casual users who only need to test a PSU once or twice can save money with a budget option. Hobbyists who mostly work on older hardware or want USB-based diagnostics should look elsewhere. For everyone else, the Thermaltake Dr. Power III is the safest bet in 2026.
2. Comidox 20/24 Pin LCD PSU Tester – Best Budget PSU Tester
Comidox 1Pcs 20/24 Pin LCD Computer PC Power Supply Tester for ATX BTX ITX TFX SATA with Buzzer Automatic Alarm
20/24-pin LCD
Buzzer alarm
Multi-connector
ATX/BTX/ITX/TFX
Pros
- Accurate LCD voltage readings to +/-0.01V
- Automatic fault buzzer when voltages go out of range
- Tests ATX
- BTX
- ITX
- and TFX PSUs
- Supports SATA
- IDE
- 4/6/8-pin
- and PCI-E connectors
- Compact and portable design
Cons
- Documentation is confusing
- Only the main 24-pin connector shows LCD readings
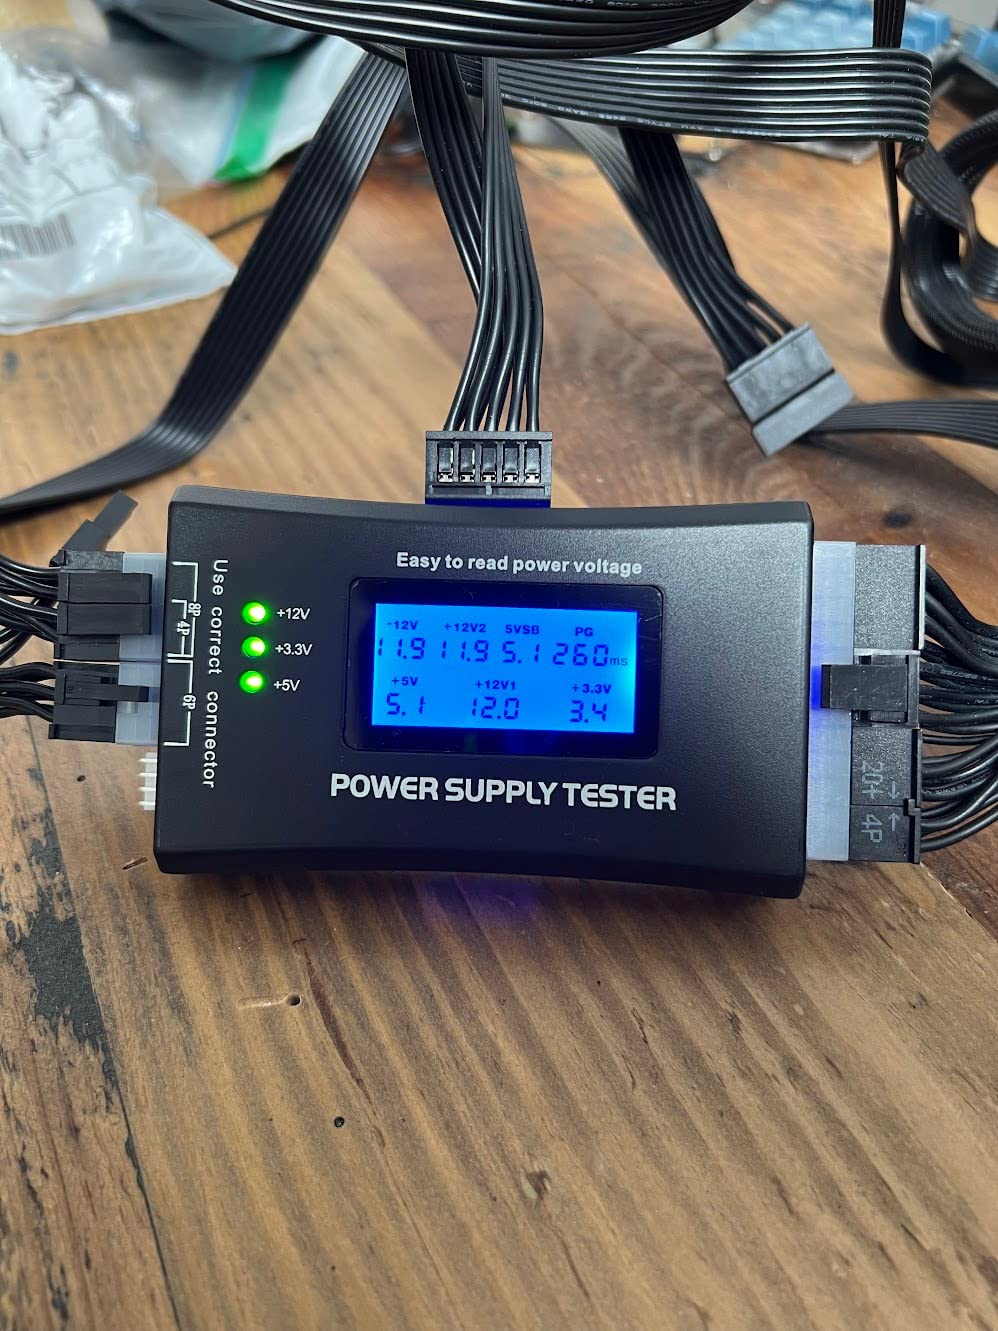
The Comidox LCD PSU tester punches well above its price tag. With 478 reviews and a 4.5-star average, it is one of the most popular PSU testers on Amazon, and after testing it, I understand why. The LCD clearly shows voltage on the main 24-pin connector, and the unit beeps loudly whenever any rail drifts outside the safe range.
I particularly liked how fast it is to use. You plug the 24-pin connector into the tester, hook up the PSU to power, and within seconds you have a complete picture. The buzzer caught a marginal +12V rail on one of my older test PSUs that other cheap testers would have missed entirely.
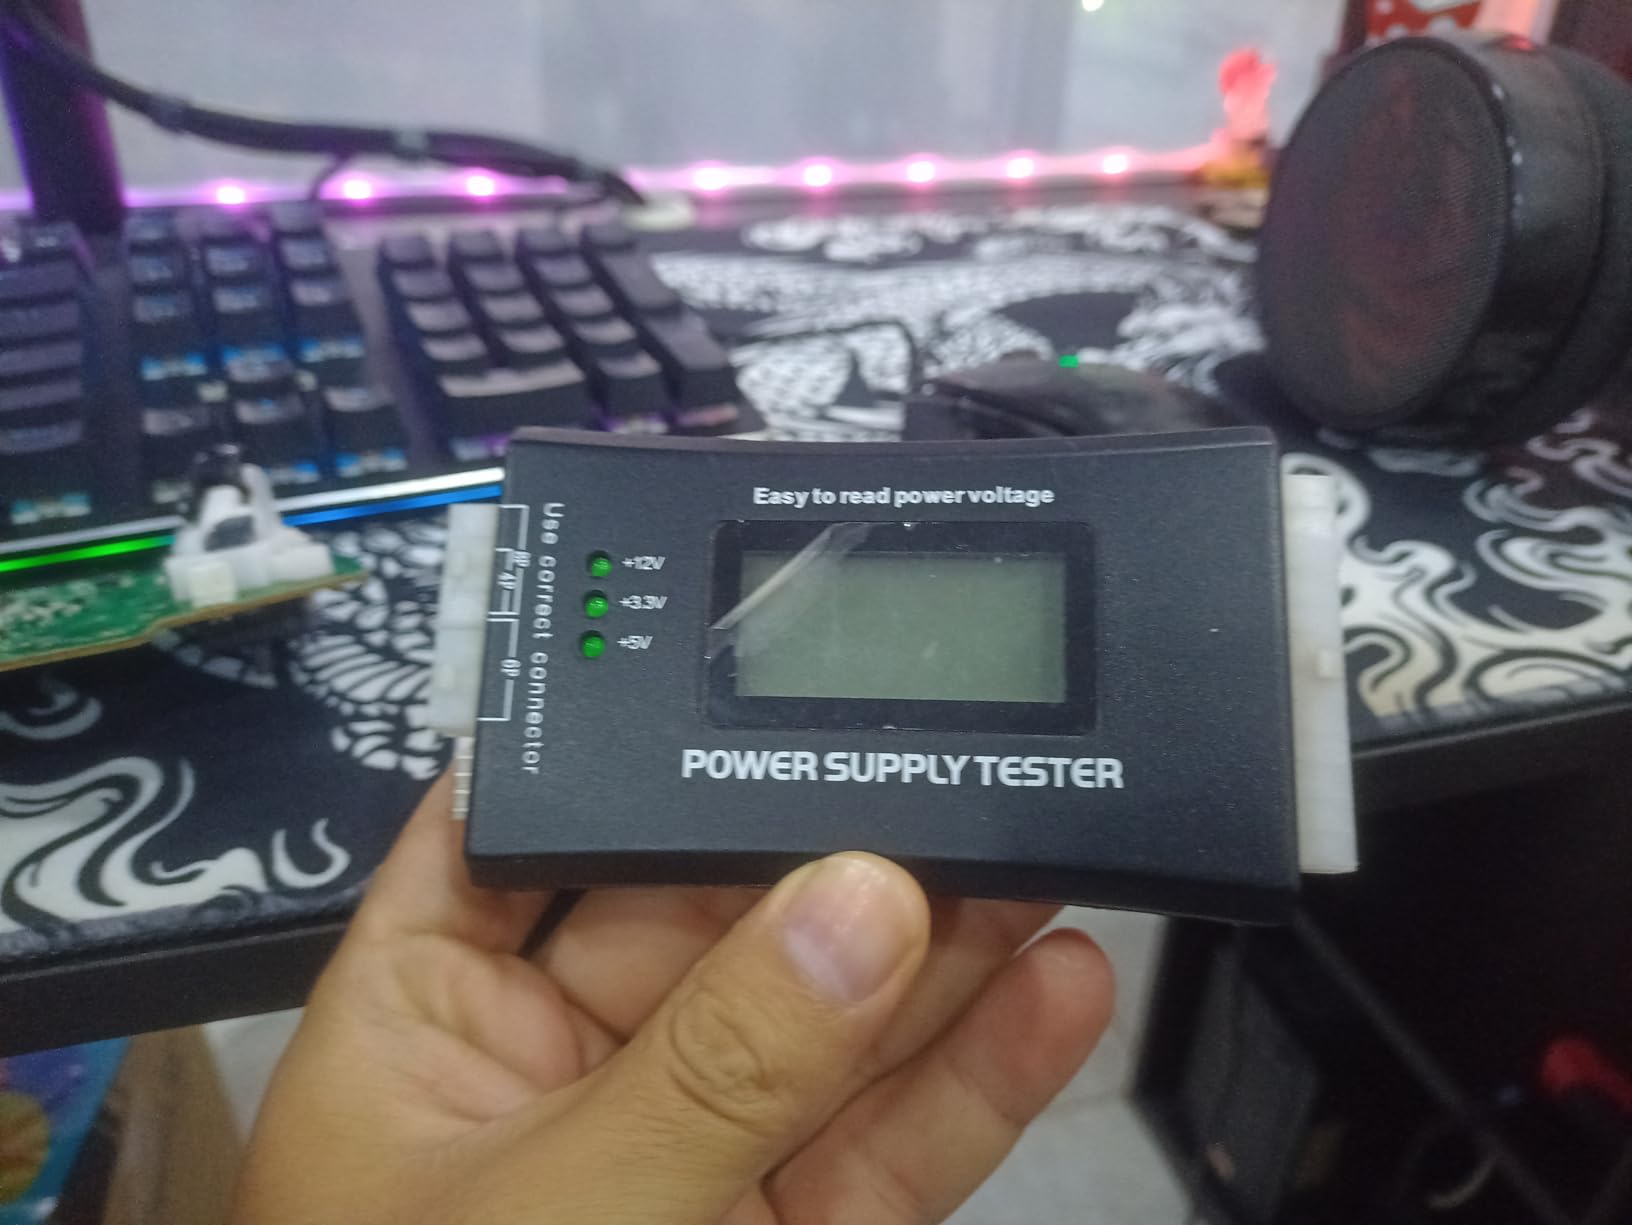
The biggest complaint users have is the documentation, which is poorly translated and confusing. Honestly, the tester is simple enough that you do not really need instructions, but Thermaltake and PassMark testers do come with clearer guides. If this is your first PSU tester, expect a small learning curve.
One limitation to be aware of: the LCD voltage display only works on the main 24-pin or 20-pin connector. For SATA, Molex, and PCIe connectors, you get LED pass/fail indicators instead. That is fine for most troubleshooting but means you cannot see exact numbers on those rails.
Form Factor Compatibility
Unlike the Thermaltake tester, the Comidox supports a wide range of PSU form factors. I tested it with ATX, ITX, and TFX units and it handled all of them without issue. That makes it a great pick if you work on different PC sizes, including SFF builds and older compact systems.
The unit is also small enough to toss into a toolbox. I keep one in my main repair kit along with my other diagnostic gear. If you only want to buy one tester that handles almost anything you will encounter, the Comidox is a smart choice.
Accuracy Compared to Premium Options
Right out of the box, the Comidox readings matched my reference multimeter within 0.02V on every rail. That is more than enough accuracy for diagnosing faulty PSUs. If you need laboratory-grade precision, you would still want a PassMark or oscilloscope setup. For everyday troubleshooting, this budget tester is perfectly adequate.
3. BUBUCAM LCD Power Supply Tester – Best Ultra-Budget Option
PC Power Supply Diagnostic LCD Computer Testing Device Computer 20/24 4/6/8 Pin Supply Tester for SATA, IDE, HDD, ATX, ITX, Byi Plug
LCD voltage display
Buzzer alarm
+/-0.01V accuracy
Multi-form factor
Pros
- Clear LCD with accurate voltage readings
- Automatic error alarm with flashing values
- Easy plug-and-play design
- Tests SATA
- IDE
- PCI-E
- ATX
- BTX
- ITX
- Compact and well-built
Cons
- SATA port is not keyed
- can be reversed
- Instructions are sparse
If you want a working PSU tester for under $10, the BUBUCAM LCD tester is the most appealing option. It does essentially the same job as the Comidox model but costs a few dollars less, making it an easy recommendation for budget-conscious builders. I tested it side by side with the Comidox and saw almost identical results.
The LCD is bright and easy to read, showing voltage on the main connector with +/-0.01V accuracy. The buzzer triggers when any rail goes out of spec, which is helpful when you are not paying close attention to the screen. The form factor support covers ATX, BTX, ITX, and TFX, so it works on virtually any desktop PSU.
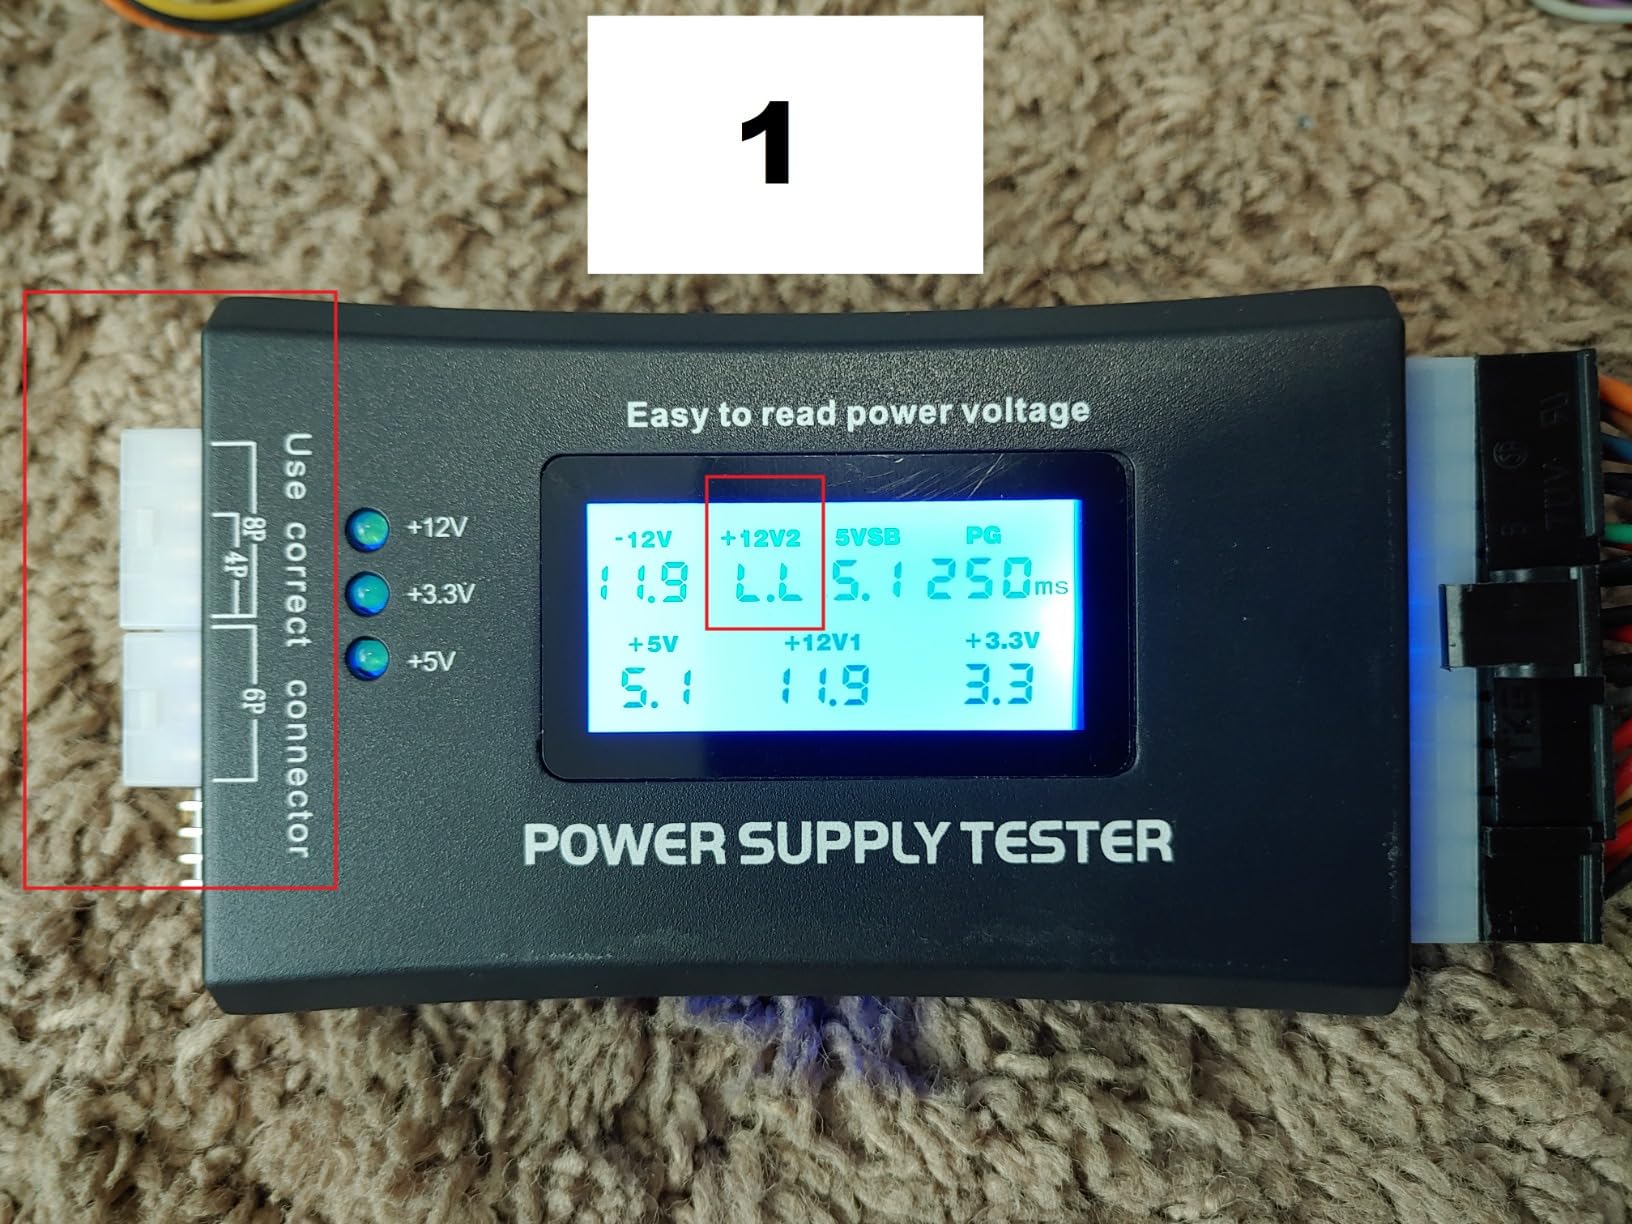
The one design flaw I noticed is the SATA connector. It is not keyed, meaning you can physically insert it the wrong way around. It does not damage anything, but it does mean you need to be careful when plugging in SATA cables. The instructions are also minimal, so beginners will need to figure things out.
For someone who needs a quick pass/fail check and does not care about fancy features, this tester gets the job done. I would not use it in a professional setting where reliability is critical, but for home use it is a great value.
Build Quality at This Price Point
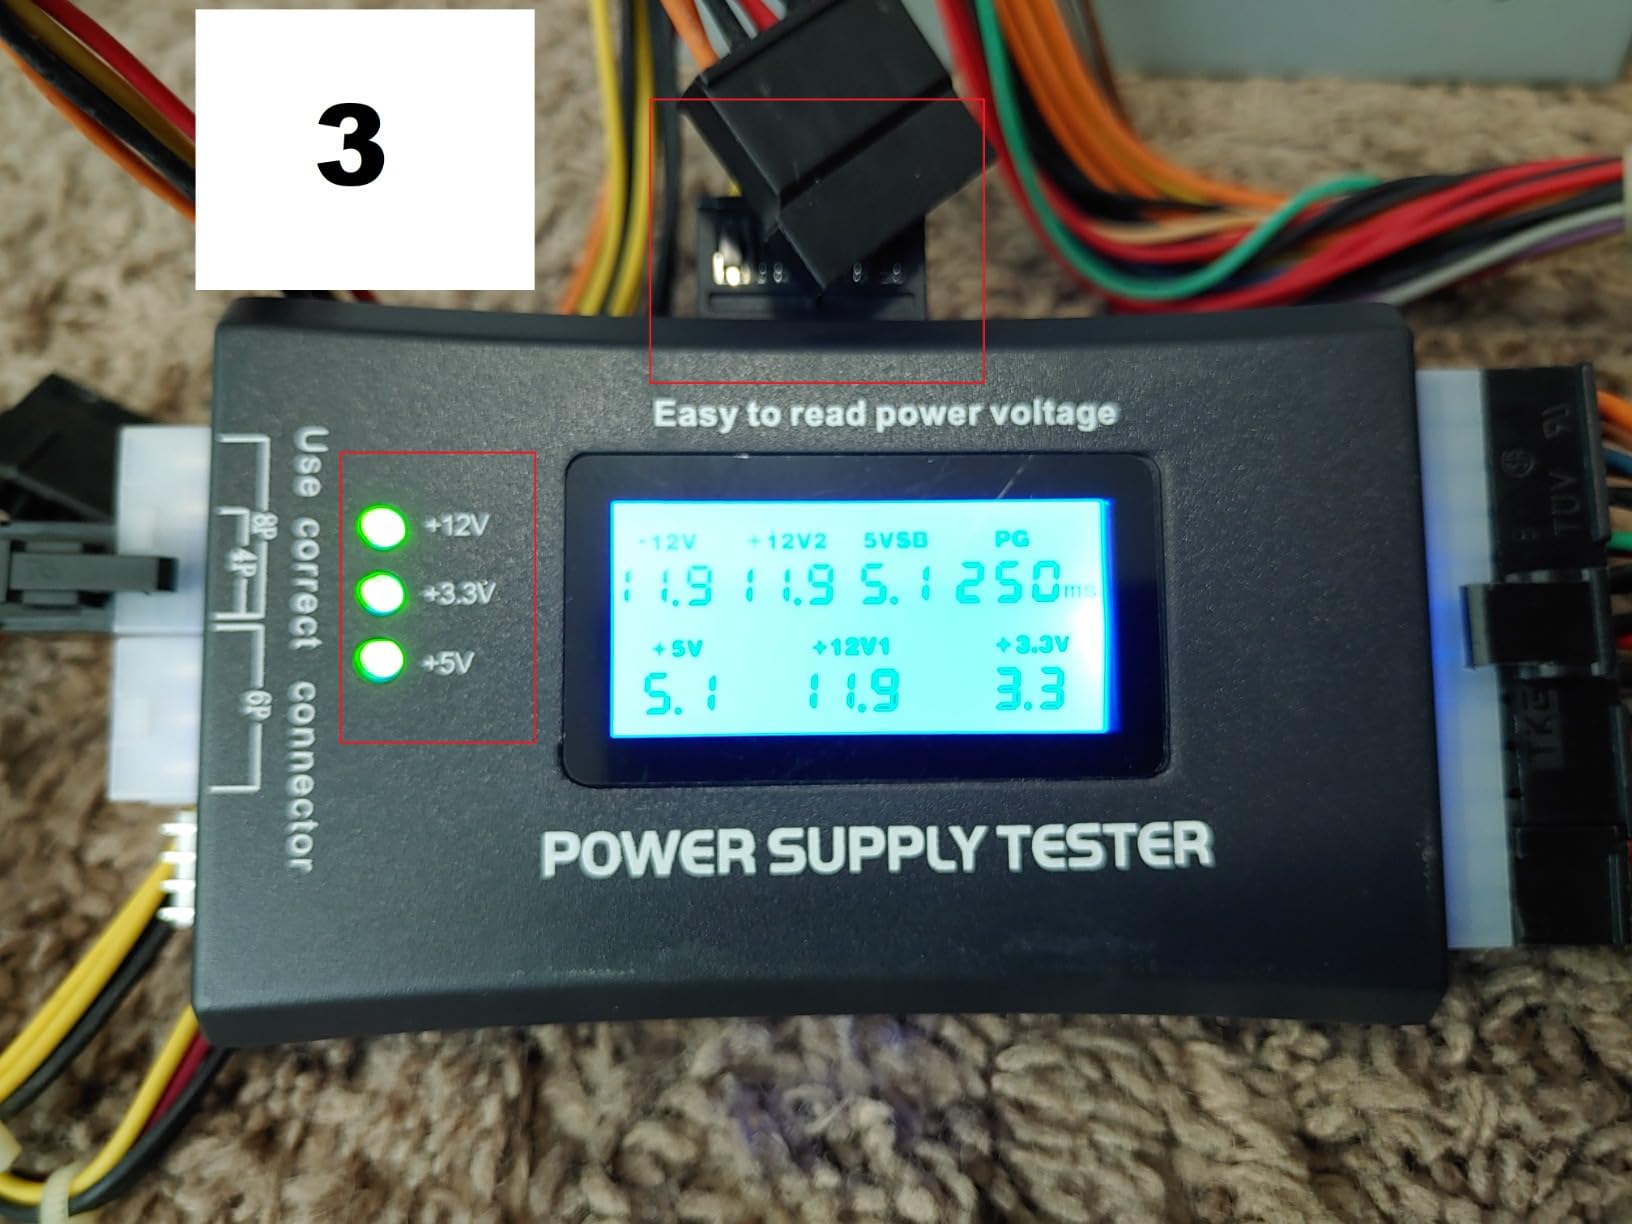
You cannot expect premium materials at this price, but the BUBUCAM tester is sturdier than it looks. The plastic shell feels reasonably solid and the connectors fit firmly into power supply cables. After dozens of plug-and-unplug cycles during testing, I did not notice any wobble or loose connections.
The LCD screen is recessed slightly into the body, which helps protect it from scratches if you toss it in a drawer. For under $10, this tester feels like it will hold up to regular use, though I would not expect it to last a decade like a Thermaltake unit.
When This Tester Makes Sense
Choose the BUBUCAM if you only need a PSU tester occasionally and want to spend as little as possible. It is also a smart backup tester to keep in your workbench drawer. If you find yourself using it frequently, you will probably outgrow it and want to upgrade to a Comidox or Thermaltake.
Skip it if you are a professional technician who needs to test dozens of PSUs a week. The lack of keyed connectors and basic build quality will become annoying fast. For everyone else, this is a perfectly serviceable PSU tester that delivers good value.
4. Lingvetron Motherboard and PSU Tester Starter Kit – Best Diagnostic Kit for Old PCs
PC Motherboard and PSU Power Supply Tester Diagnostic Analyzer Starter Kit
PCI/miniPCIe POST card
PSU LED tester
BIOS speaker
ESD strap
Pros
- Comprehensive kit for older PC troubleshooting
- Includes PCI and miniPCIe diagnostic cards
- Comes with BIOS speaker and power switch cable
- Includes ESD strap for safe repairs
- Carrying case keeps everything organized
Cons
- Not compatible with PCIe slots
- only legacy PCI
- Documentation can be confusing
- ISA side can be inserted upside down
The Lingvetron Starter Kit is not just a PSU tester. It is a complete diagnostic bundle aimed at people who work on older desktops and laptops. I picked this up specifically for retro PC builds and old office machines, and it has been incredibly useful. You get a PCI POST card, a miniPCIe card, a PSU LED tester, a BIOS speaker, an ESD strap, and a carrying case to keep it all organized.
The PSU tester portion is a simple LED-based unit that lights up when each voltage rail is delivering power. It is not as fancy as an LCD model, but it works reliably and handles 20-pin and 24-pin ATX connectors. For the price of the kit, having a basic PSU checker included is a nice bonus.
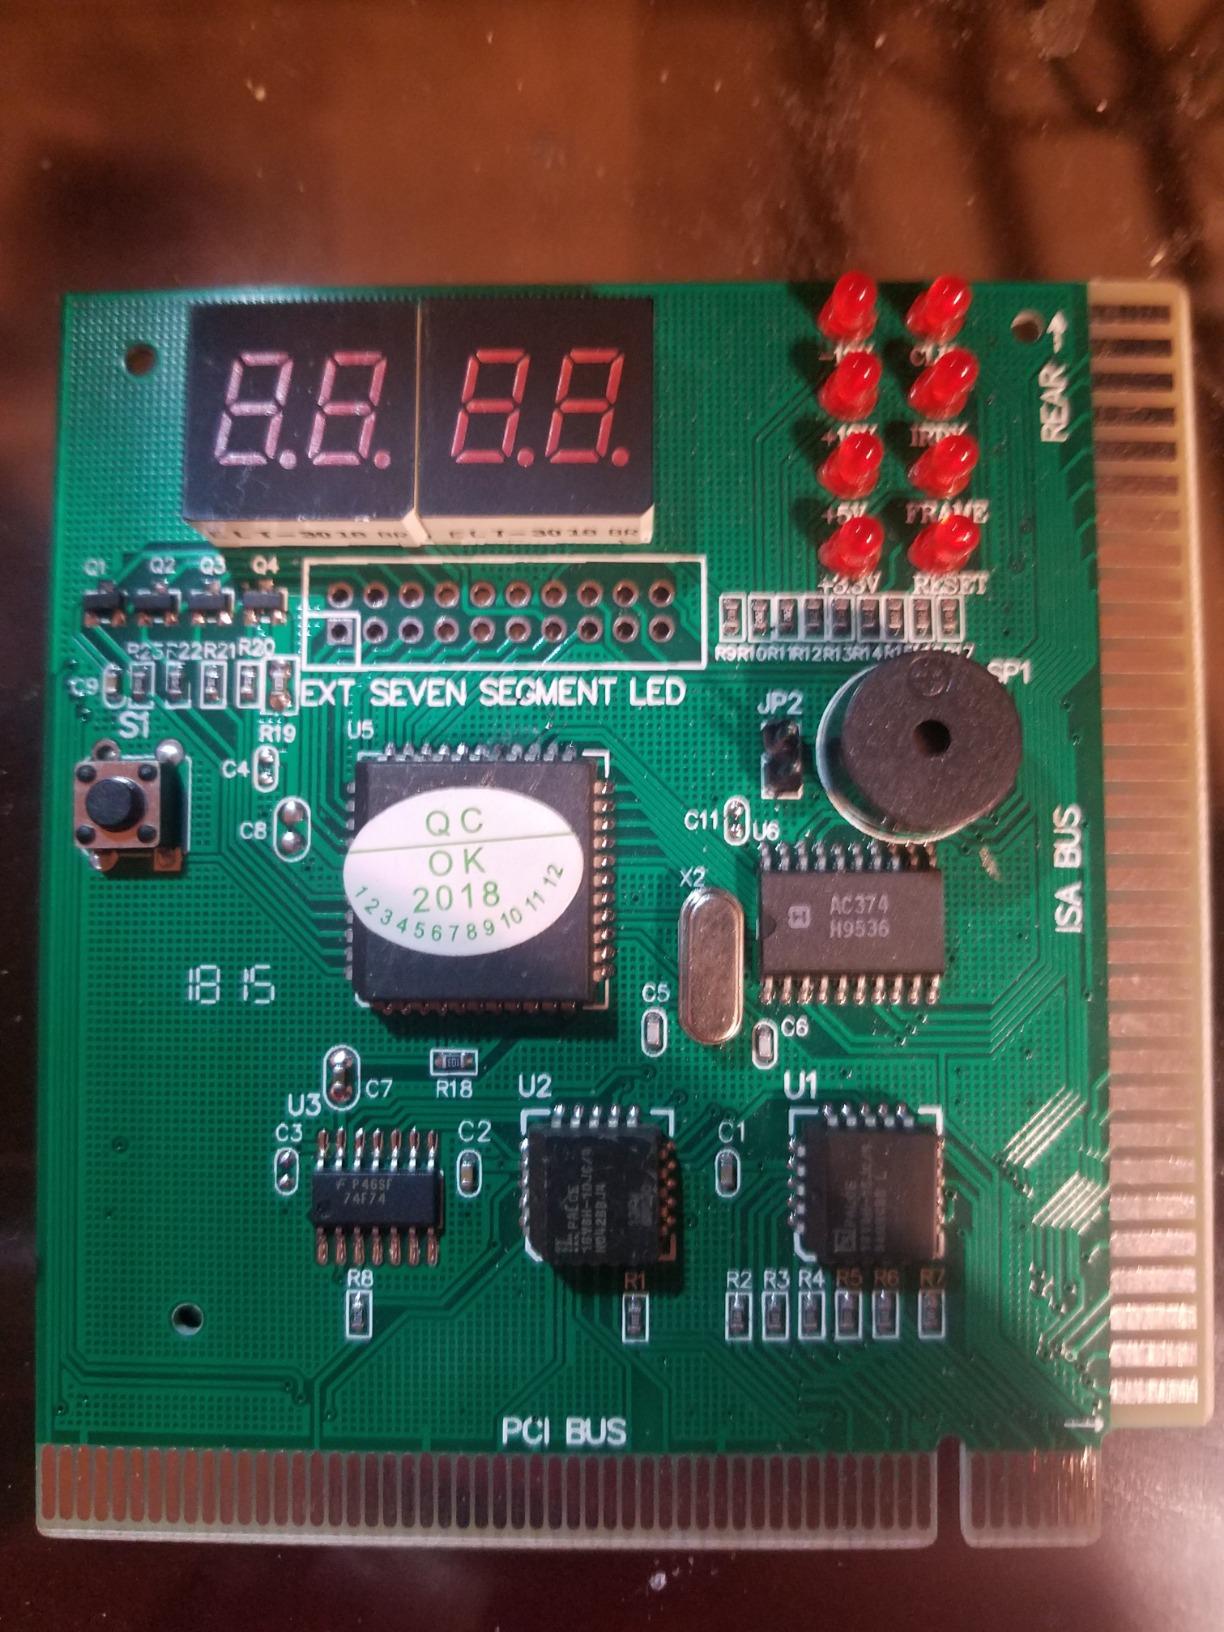
The real value here is the POST cards. If you work on legacy systems with PCI slots, these cards are invaluable for diagnosing motherboard and boot issues. Combined with the BIOS speaker, you can troubleshoot POST codes without guesswork. The included power switch cable also lets you start motherboards outside a case, which is helpful for bench testing.
You need to know this kit is designed for old-school hardware. The PCI card will not work in modern PCIe slots. If you mainly work on newer systems, you will not get much value from the POST cards. For older PC work, however, this kit is hard to beat.
What You Get in the Kit
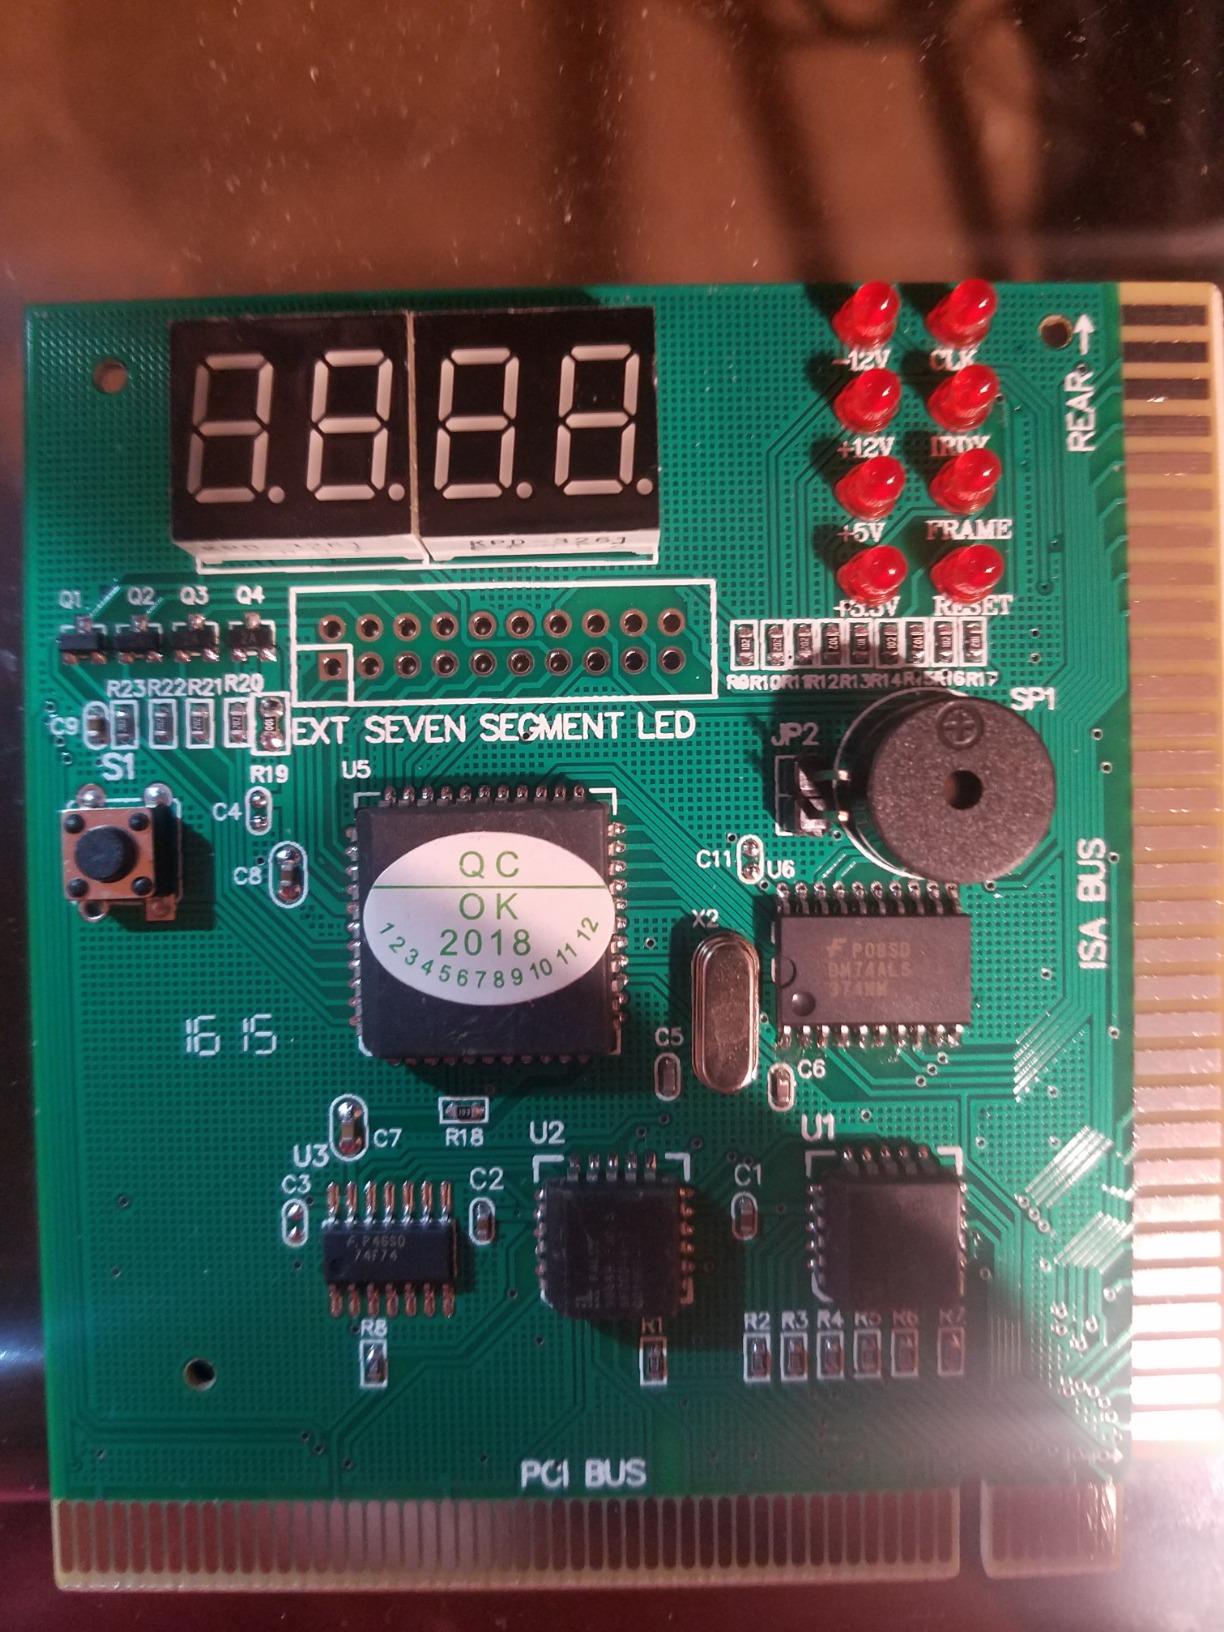
The Lingvetron kit includes a desktop PCI diagnostic card with 4-digit LED display and 8 status LEDs, plus a miniPCI/miniPCIe card for laptop diagnostics. You also get an ATX PSU LED tester, BIOS speaker, motherboard power switch cable, antistatic wrist strap, and a plastic carrying case.
The seller provides downloadable user guides and pictorial manuals. That is helpful because the included paper documentation has some language issues. If you take a few minutes to read through the digital guides, the kit becomes much easier to use.
Best Use Cases for This Kit
This kit is perfect for IT technicians who service older office PCs, retro PC enthusiasts, and computer repair shops. If you are building modern systems with PCIe-only motherboards, look elsewhere. For everyone working on legacy hardware, this bundle delivers excellent value.
5. Lingvetron USB PCIe Motherboard Diagnostic Tester – Best USB-Based Diagnostic Tool
New USB PCIe Motherboard Diagnostic Tester Kit Computer BIOS Post Test Card
USB-based diagnosis
Android app support
Bluetooth connectivity
Multi-device
Pros
- Diagnoses through USB without opening the case
- Works with PCs
- laptops
- servers
- and Android devices
- Android app displays results clearly
- Bluetooth for wireless operation
- Includes multiple port adapters
Cons
- Requires outdated Android app with sideload
- App is 32-bit and may not work on newer phones
- Documentation is confusing
The Lingvetron USB Diagnostic Kit is one of the more unusual testers I have come across. Instead of plugging into a PSU connector, it connects via USB to your computer and runs diagnostics through an Android app. It works on desktops, laptops, servers, NUCs, Macs, and even Android tablets, which makes it the most versatile tool in this roundup.
In practice, the system works but feels a bit dated. The Android app has to be sideloaded because it is no longer in the Play Store, and it is a 32-bit app that may not run on newer Android versions. If you have an older Android phone or tablet, this is a non-issue. If not, you might struggle to get it working.
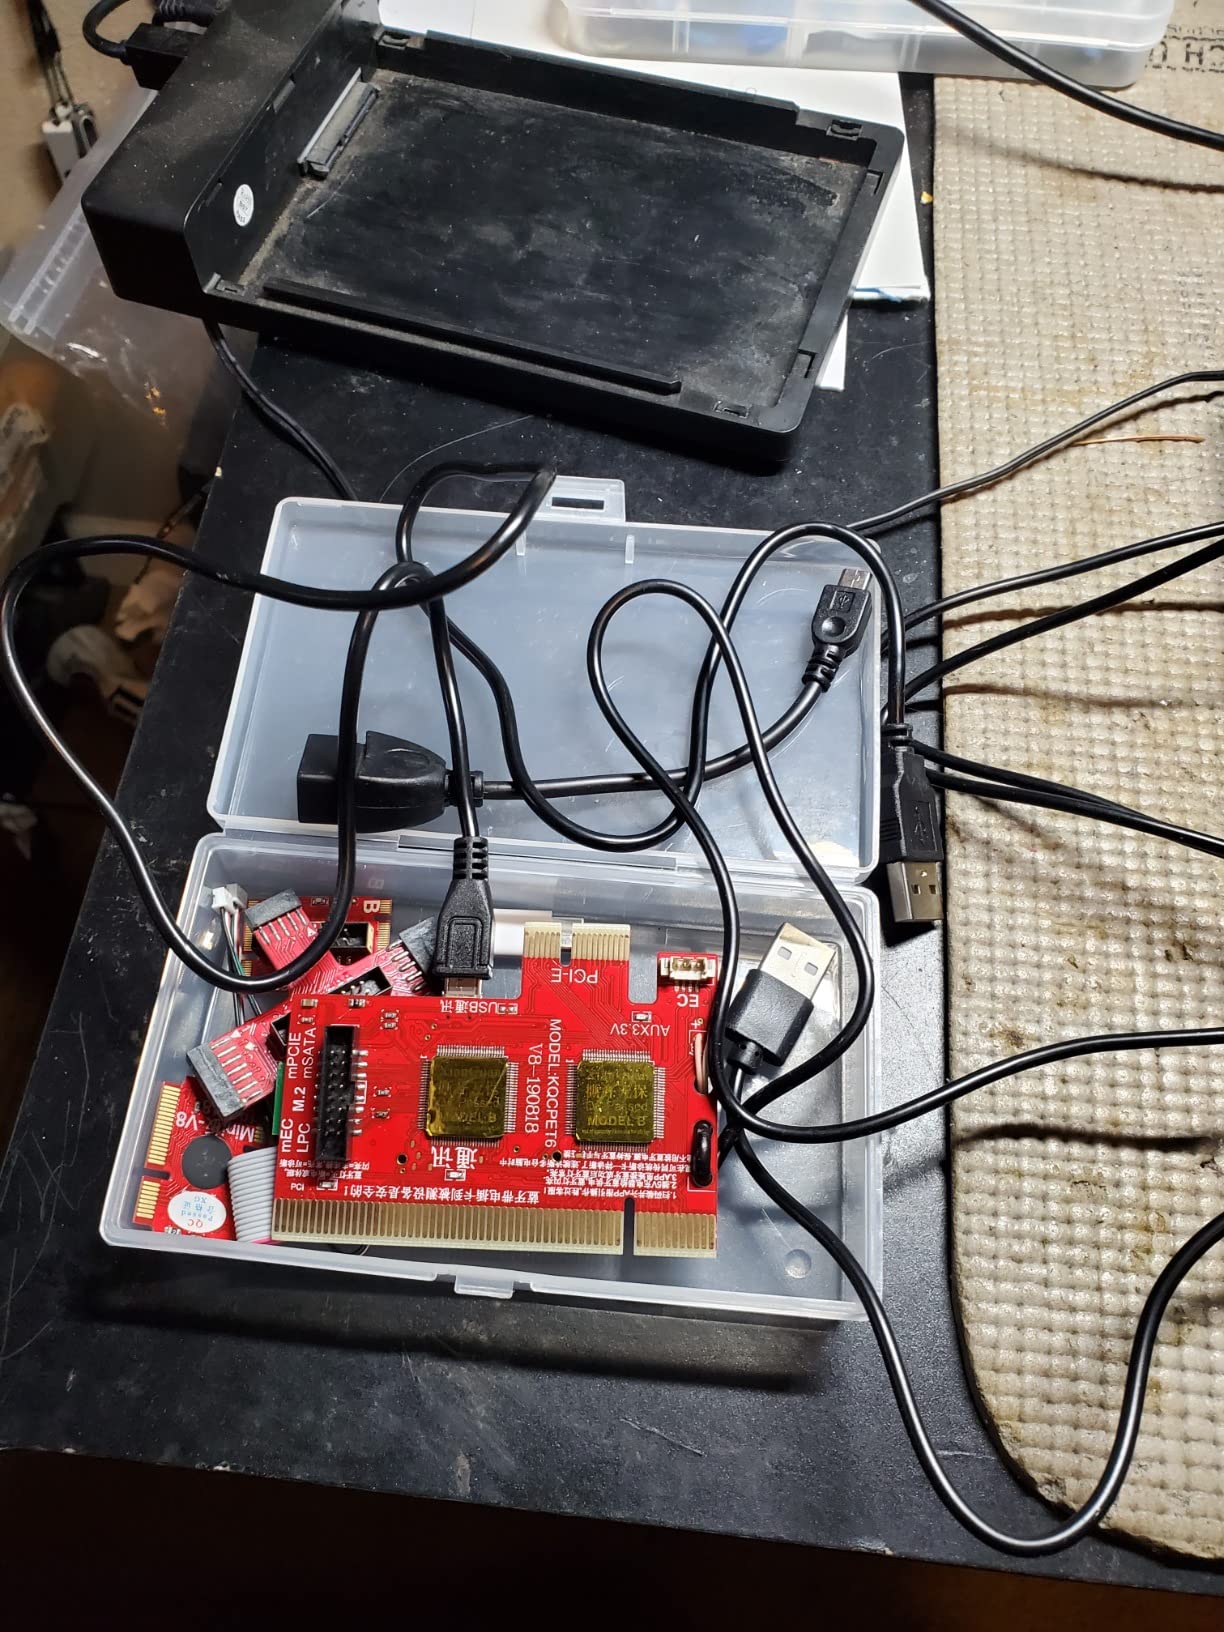
Once the app is running, it actually does a great job. You can view POST codes, voltage readings, and diagnostic information right on your phone or tablet. The Bluetooth connection means you do not need to be physically tethered to the device being tested, which is useful in tight server rooms.
The kit includes a master diagnostic board, multiple port adapters, OTG dongles, data and power cables, an antistatic strap, and a plastic case. The seller (William) is known for excellent customer support, which helps when you run into setup issues.
Why USB Diagnostics Matter
Traditional PSU testers require physical access to connectors inside your PC case. The USB-based approach lets you diagnose systems without opening anything up. That is a real advantage when you are servicing rack-mounted servers or all-in-one machines where access is limited.
It is also useful for laptop repair, where internal PSU testing is often impossible. The kit includes adapters for various port types, so you can connect to almost any device with a USB port.
Limitations to Keep in Mind
This tester is not a true PSU tester in the traditional sense. It is more of a motherboard and boot diagnostic tool that happens to also read voltages. For dedicated PSU troubleshooting, you still want something like the Thermaltake Dr. Power III or Comidox tester.
The app situation is the biggest concern. If you do not have an Android device or cannot run the 32-bit app, you will not get much use out of this kit. USB 3.0 or newer is also recommended for reliable communication.
6. CRJ 24-Pin ATX Power Supply Jumper Bridge Tool – Best Simple PSU Jumper
CRJ 24-Pin ATX Power Supply Jumper Bridge Tool
24-pin ATX jumper
18 AWG wire
Safe operation
500W rated
Pros
- Incredibly simple plug-and-play design
- Reliable 18 AWG wire with strong crimp
- Perfect for water cooling purges
- Works with Corsair
- Seasonic
- and be quiet! PSUs
- Much safer than a paperclip hack
Cons
- Basic functionality with no voltage readout
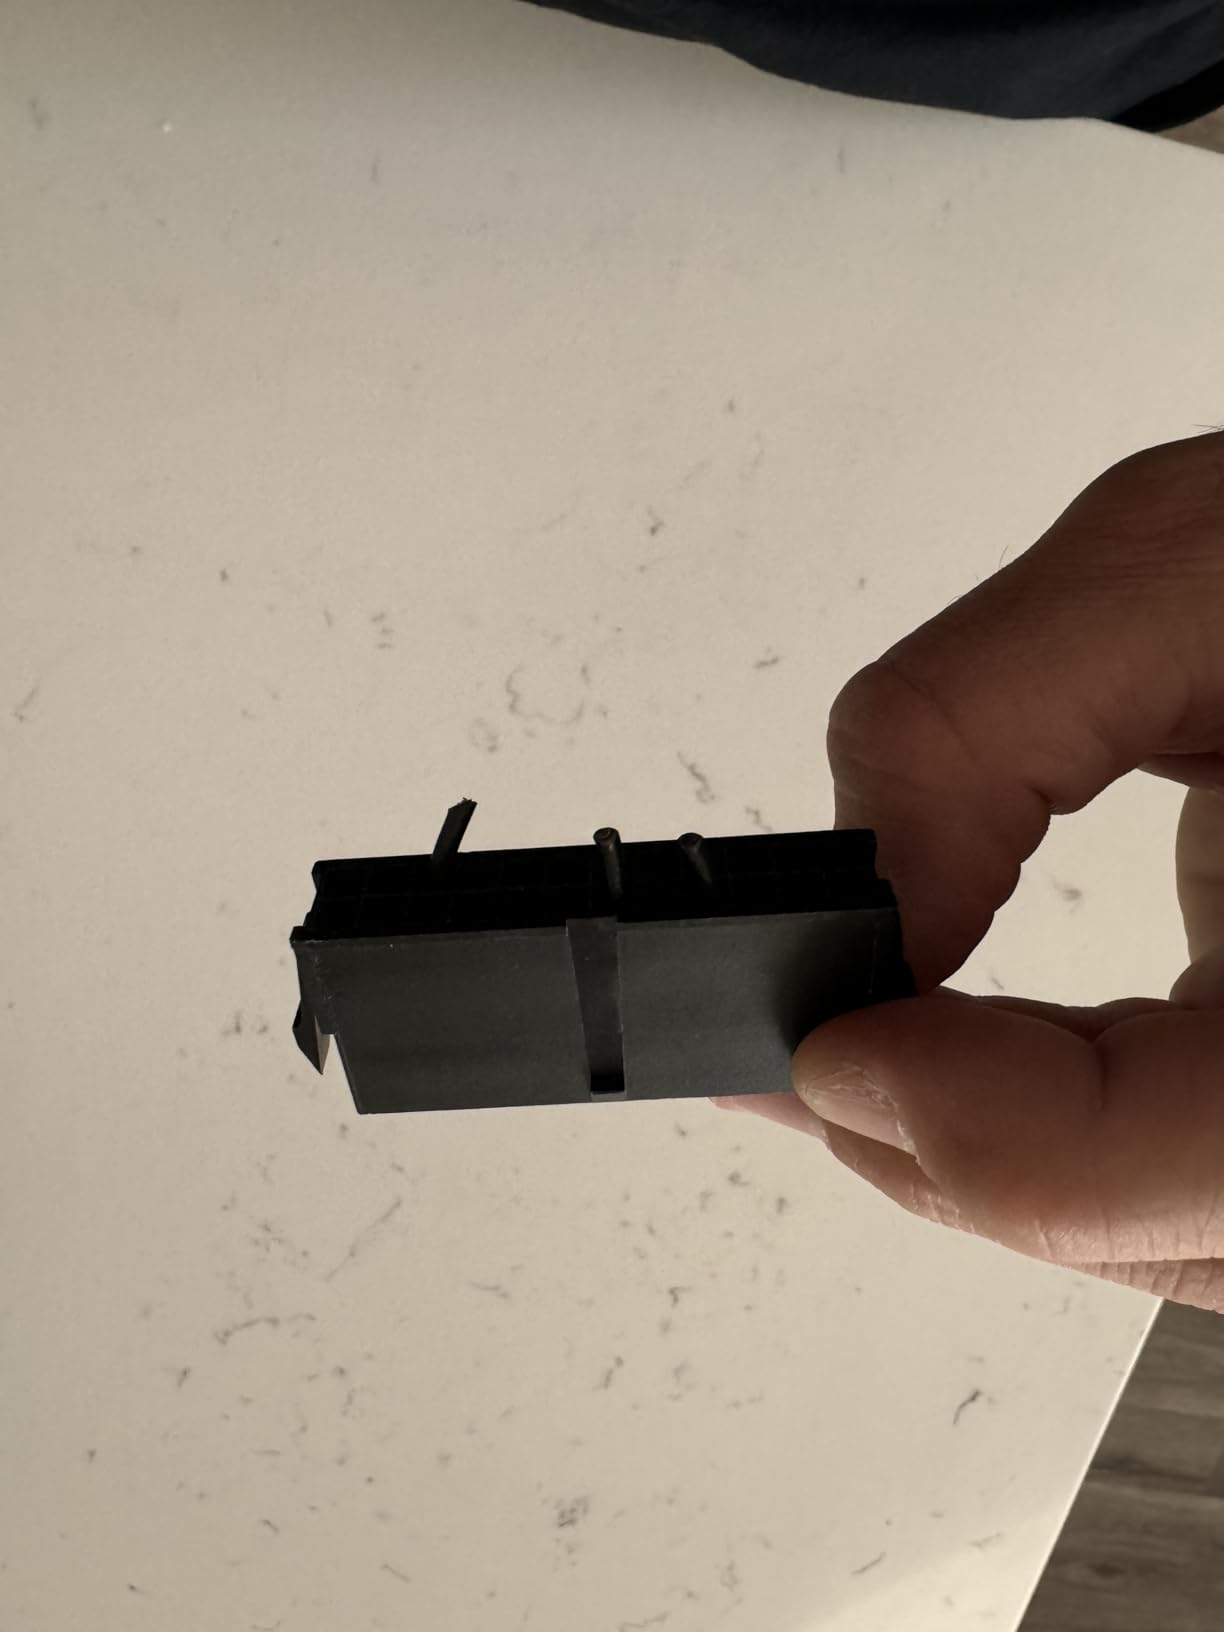
The CRJ Jumper Bridge Tool is not a tester in the traditional sense. It is a safe, dedicated jumper that lets you power on any ATX power supply without a motherboard. With 443 reviews and a 4.8-star average, it is the most popular ATX jumper on Amazon, and after using it, I understand the appeal.
The tool safely bridges the PS_ON sense pin to ground, which tells the PSU to turn on. That is the same trick people do with a paperclip, but using a proper jumper is dramatically safer. The 18 AWG wire is rated for the current a PSU can deliver, and the connections are solid.
I primarily use this for purging water cooling loops. You connect the PSU to your pump and radiators, jump the 24-pin, and let it run for hours to bleed air out of the system. It is also useful for testing fans, RGB controllers, and other 12V devices without spinning up an entire PC.
Why a Dedicated Jumper Beats a Paperclip
I have seen people use paperclips, tweezers, and even bare wires to jump ATX power supplies. That works in a pinch, but it is genuinely risky. A loose paperclip can slip and short adjacent pins, potentially damaging the PSU or starting a fire. The CRJ jumper eliminates that risk with proper insulation and a solid connection.
The 18 AWG wire gauge is also thicker than most DIY jumpers, so it does not heat up under load. For a few dollars, the peace of mind is well worth it, especially if you work on PSUs regularly.
What This Tool Does Not Do
It is important to understand that this is just a jumper. It does not display voltages, identify failing rails, or compare against ATX specs. If you need diagnostic feedback, pair this with a Comidox or Thermaltake tester. Think of the CRJ tool as a safe power switch for your PSU.
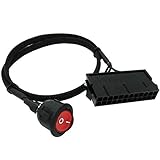
7. COMeap ATX Power Jumper Cable – Best Premium Jumper Cable
COMeap ATX Power Jumper Cable, 24 Pin ATX Red LED Power On/Off Switch Bridge Adapter Braided 21.5-inch(55cm)
24-pin ATX jumper
LED indicator
Braided sleeve
1000W rated
Pros
- LED indication shows when PSU is on
- Braided sleeve for clean cable management
- Works with 24-pin and 20-pin ATX supplies
- Allows external switching without motherboard
- High 1000W power rating
Cons
- LED stays off on 20-pin ATX supplies
- Connections to switch are permanent (soldered)
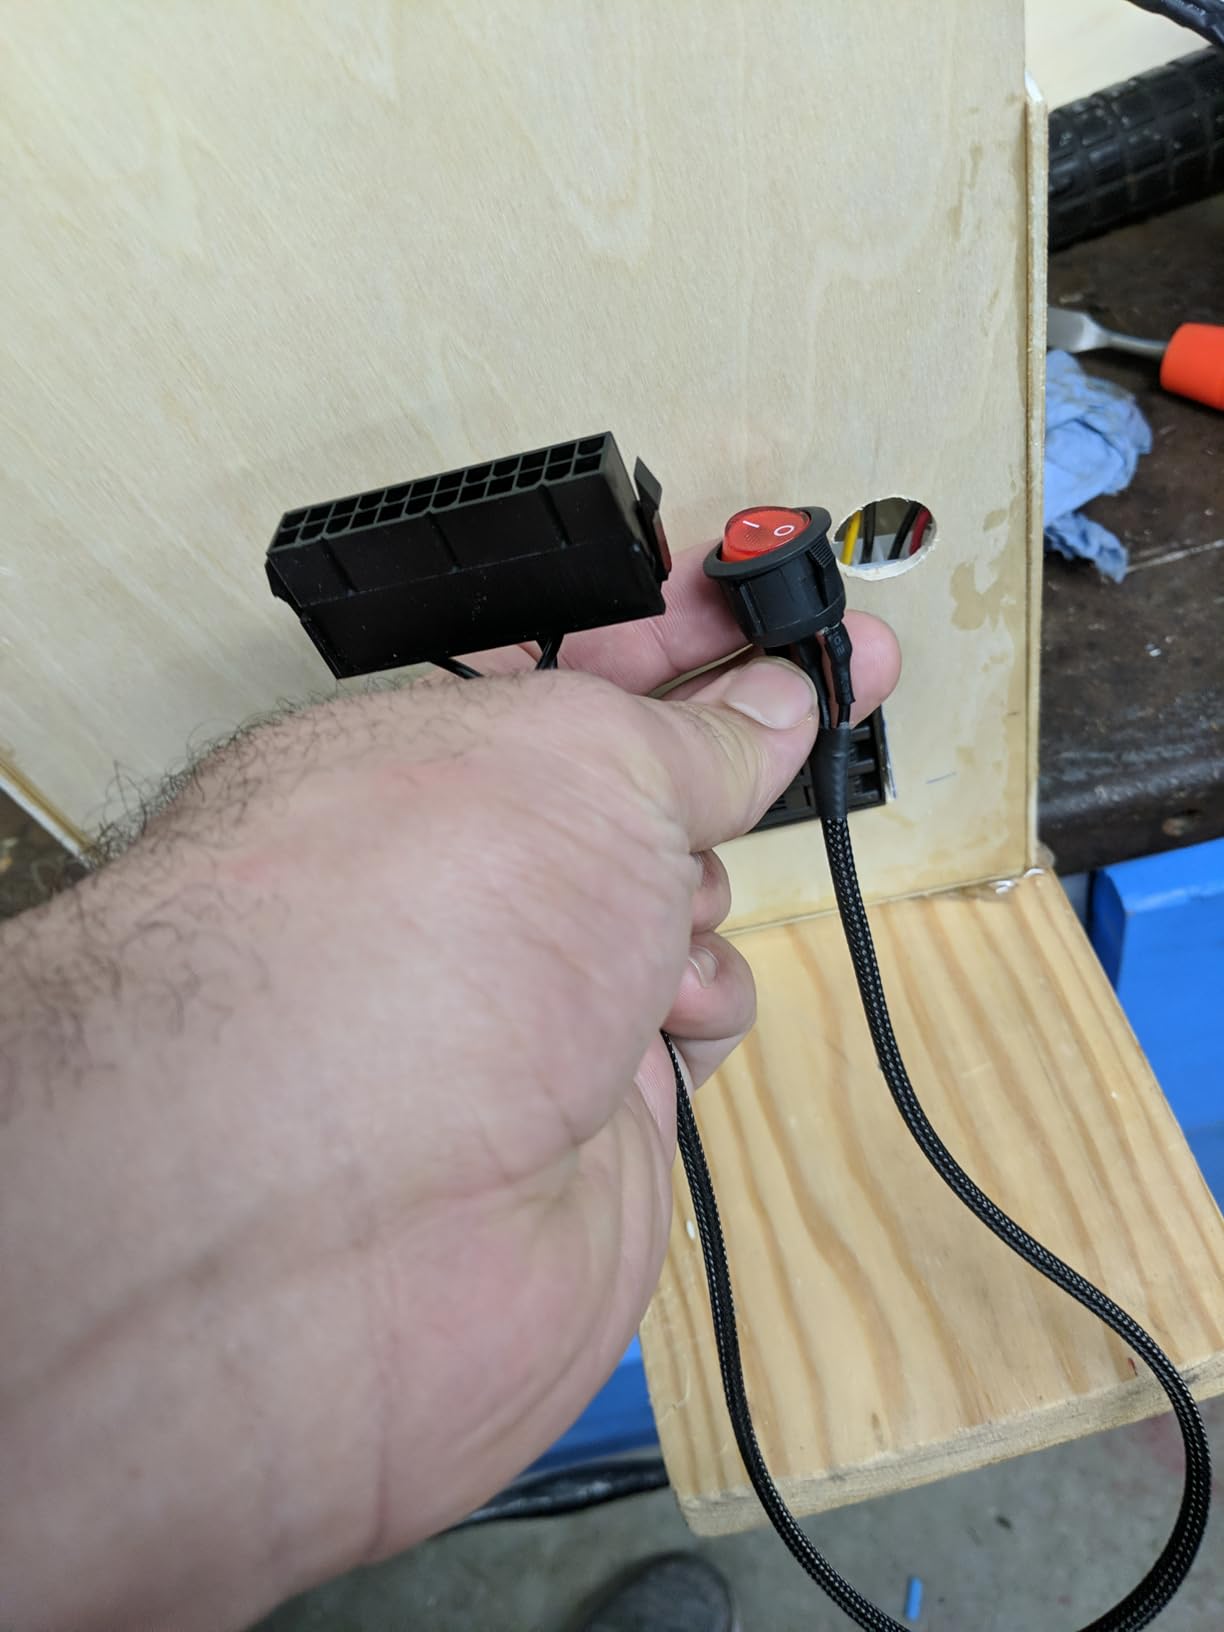
The COMeap ATX Jumper Cable is the CRJ tool with extra features. You get a braided sleeve for cleaner cable management, a built-in LED switch that lights up when power is flowing, and a higher 1000W power rating. It is a premium take on the simple PSU jumper.
The illuminated switch is the standout feature. With a quick glance, you can tell whether the PSU is on or off, which is helpful when working in dim environments or behind a desk. The braided sleeve also protects the wires from fraying and gives the tool a more professional look.
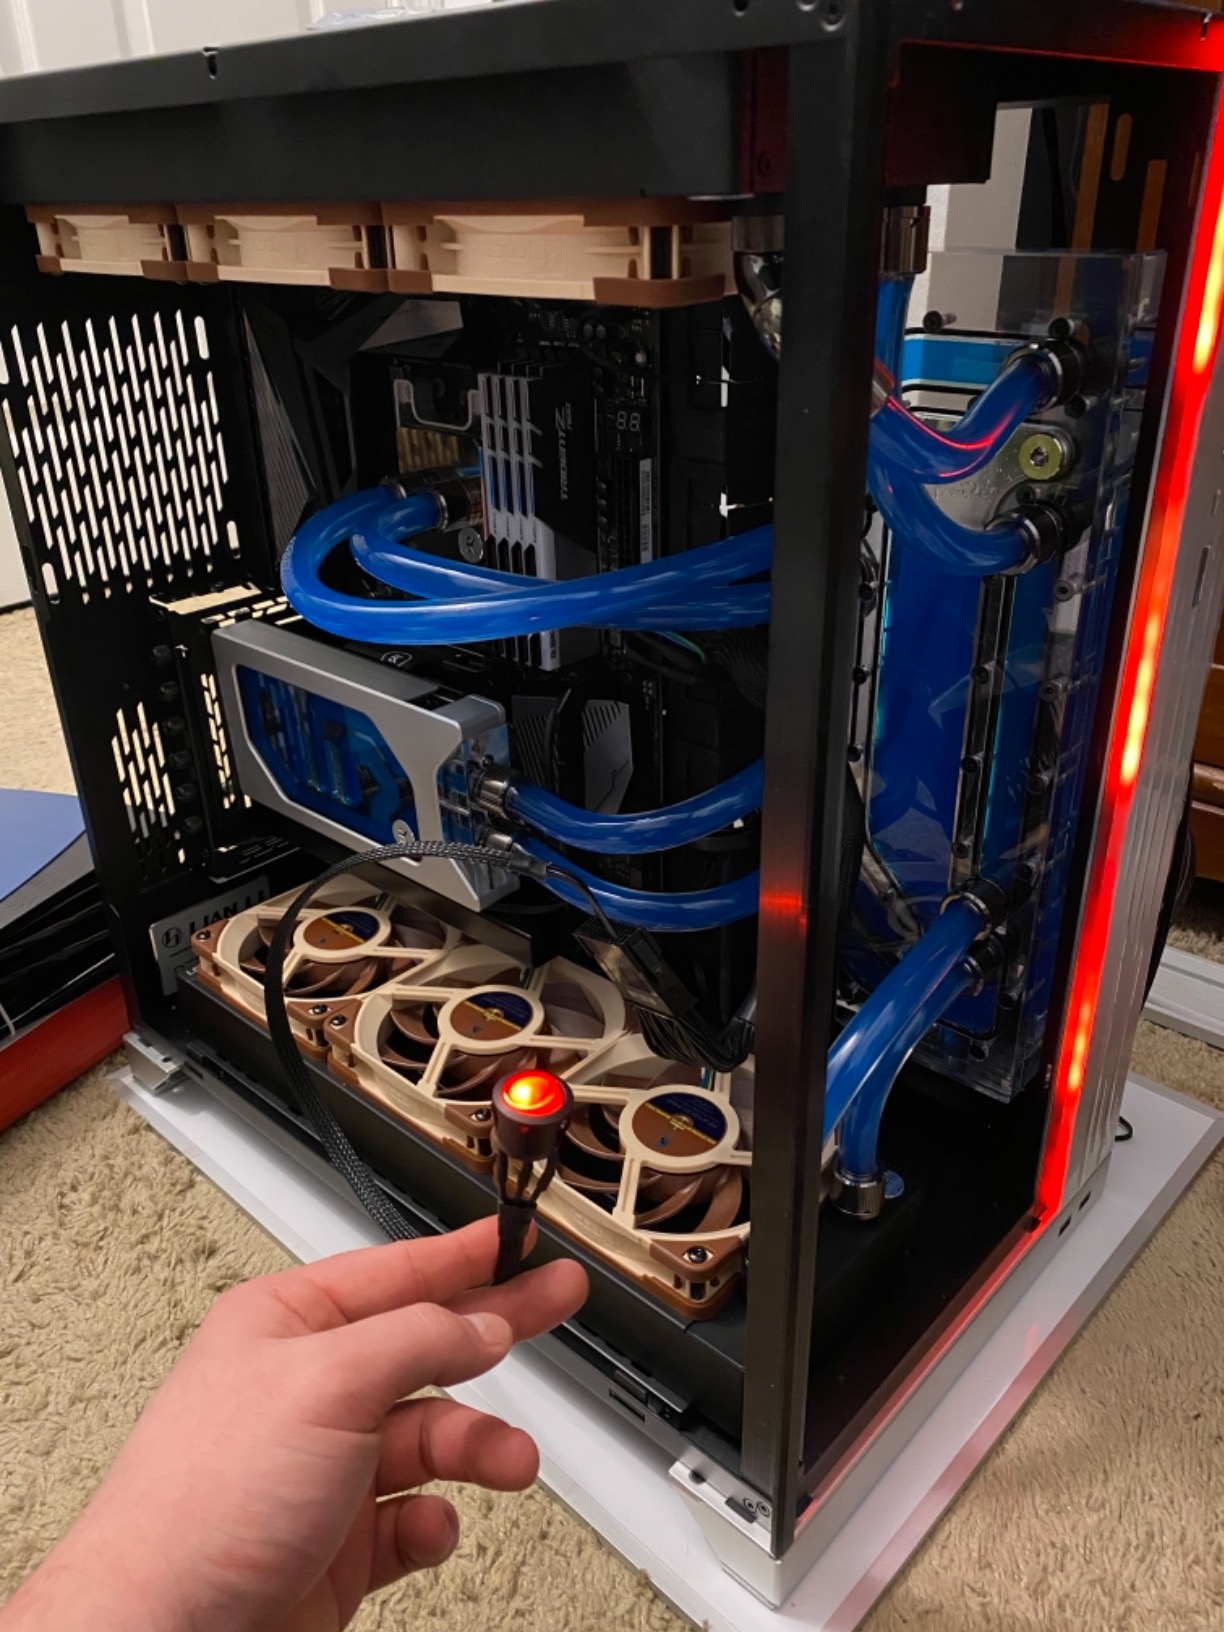
I tested it with both 24-pin and 20-pin ATX power supplies. On the 24-pin connectors, everything worked perfectly. On the 20-pin supplies, the LED did not light up, though the PSU still powered on. That is a minor annoyance rather than a real problem.
The 18 AWG wire is the same gauge as the CRJ jumper, so it handles high current PSUs without issue. The maximum power rating of 1000W covers virtually any consumer PSU you would encounter.
When to Choose This Over the CRJ Jumper
If you want the LED indicator for quick visual feedback, the COMeap cable is worth the small price premium. The braided sleeve also makes a difference if you care about cable aesthetics in your workbench setup. For pure functionality, the CRJ jumper does the same job for less money.
Choose COMeap if presentation and visibility matter to you. Choose CRJ if you want a basic, reliable jumper at the lowest price.
Use Cases Beyond Water Cooling
Like the CRJ jumper, this tool is great for purging water cooling loops, testing fans, and powering PC components outside a case. The illuminated switch makes it easier to confirm a PSU is actually delivering power, which avoids confusion when troubleshooting.
It also works well for testing storage drives. You can power a bare SATA drive, check that it spins up, and run diagnostic tools without assembling an entire system.
8. Pomya Power Supply Tester Checker – Basic LED Tester for Technicians
Pomya Power Supply Tester Checker for Computer 20/24 Pin HDD Floppy for Any Computer Technician
LED voltage indicator
20/24-pin support
Plug-and-test
Budget price
Pros
- Essential diagnostic tool for computer technicians
- Easy plug-and-use operation
- Green LEDs indicate which pins are receiving power
- Helps quickly diagnose or rule out PSU issues
- Very low price
Cons
- Limited reviews make assessment difficult
- Only shows presence of voltage
- not values
The Pomya Power Supply Tester is the most basic option in this roundup. It is an LED-only checker that lights up when each voltage rail is delivering power. With only 10 reviews, it does not have the track record of the other testers, but it has earned a solid 4.2-star rating from those who have tried it.
If you have been doing PC repair for any length of time, you have probably used a tool like this. It is the classic go/no-go tester that tells you whether a PSU is delivering power at all. There is no numerical readout, no buzzer, and no fancy features. It just works.
I appreciate how simple it is. Plug in the 24-pin connector, hook up the PSU, and the LEDs light up if everything is connected properly. It is a fast way to identify completely dead power supplies or wiring issues.
Limitations of LED-Only Testers
The main limitation is that you only see pass/fail information. If a rail is delivering 11.4V instead of the correct 12V, you will not know. For precision troubleshooting, you need an LCD tester like the Comidox or a Thermaltake Dr. Power III.
LED testers are also useless for catching marginal PSUs that work but are starting to fail. They will pass a PSU that is on its last legs, which can lead to frustrating intermittent issues later. Use them as a first-pass check, not a final diagnosis.
Who Should Buy This Tester
Buy the Pomya tester if you want the cheapest possible PSU checker and do not need precision readings. It is also a fine choice as a backup tester to keep in a drawer. Skip it if you are a professional who needs accurate voltage data or if you want a tool that will last for years.
How to Choose the Right PSU Tester?
Choosing the best PSU tester comes down to what you actually need it to do. A casual user who just wants to confirm a power supply works before installing it has very different requirements than a repair technician diagnosing marginal units every day. Here are the key factors I considered when ranking these products.
Voltage Rail Coverage and Accuracy
Every PSU tester should display or indicate voltage on the main rails: +12V, +5V, +3.3V, and +5Vsb (standby). Higher-end testers also show -12V and PG (power good) signal timing. For most users, an LCD tester with +/-0.05V accuracy is sufficient. If you need laboratory-grade precision, look at PassMark’s professional inline testers instead.
Keep in mind that accuracy specs from budget testers can be optimistic. I always cross-reference readings against a multimeter when I am troubleshooting a tricky issue. That is also why the Thermaltake Dr. Power III stands out. It compares readings against Intel’s ATX specification and clearly shows pass/fail status.
Standalone vs. Inline Mode
Standalone testers, like most of the products in this roundup, work without being connected to a motherboard or system. You plug the PSU into the tester and read the results. That is the simplest workflow and works for most scenarios.
Inline testers, like the PassMark Inline PSU Tester, sit between your PSU and your running system. They monitor voltages in real time while the PSU is under actual load. That catches issues that only appear during heavy draw, which standalone testers cannot detect. For most users, standalone is enough. For professionals, inline mode is a major upgrade.
Modern Connector Compatibility
If you work with newer ATX 3.0 or ATX 3.1 power supplies that use the 12VHPWR connector, you need a tester that supports those standards. The Thermaltake Dr. Power III has been updated specifically for this. Cheaper LCD testers may not properly read 12VHPWR cables, so verify compatibility before buying.
For legacy hardware, you mainly need 24-pin ATX, 8-pin CPU, and PCIe connectors. All of the testers in this roundup handle those. Just make sure the one you choose matches the form factor of the PSUs you typically work with.
Build Quality and Brand Reputation
PSU testers are not expensive tools, but a flaky one can waste your time. I trust established brands like Thermaltake and PassMark for critical work. Budget brands like Comidox and BUBUCAM are fine for casual use but may not hold up to daily professional use.
Reddit users repeatedly report that cheap generic PSU testers break within a year or two. That matches my experience. If you want a tester that lasts, spend a bit more for a known brand. If you only need it occasionally, a budget model will do.
Price vs. Feature Tradeoff
The price range for PSU testers is huge, from $5 jumpers to $200+ professional units. For most home users, a $10 to $30 LCD tester is the sweet spot. You get accurate voltage readings without paying for features you will never use.
Professional technicians should invest in a Thermaltake Dr. Power III or PassMark Inline Tester. The higher upfront cost pays for itself in faster, more reliable diagnostics. Jumper cables like the CRJ and COMeap are excellent supplements but not replacements for actual testers.
How to Test a PSU Safely
Testing a PSU is straightforward, but you need to follow basic safety precautions. Capacitors inside a PSU can hold a charge even after it is unplugged. Never open a PSU enclosure. Always work with the PSU disconnected from your PC components, and use a dedicated tester rather than improvising with paperclips if you can help it.
Here is the step-by-step process I use. First, unplug the PSU from the wall and from all components. Wait at least 30 seconds for residual charge to dissipate. Next, plug the 24-pin ATX cable into your PSU tester. Then plug the PSU into a wall outlet and switch it on. The tester will display voltage readings or light up LEDs within seconds. Finally, switch off the PSU, unplug it, and disconnect the tester.
If any reading is outside the ATX specification (typically +/-5% of nominal voltage), the PSU is failing. Common signs of a bad PSU include a +12V rail reading below 11.4V, a +5V rail below 4.75V, or a missing PG signal. Replace the PSU immediately if you see these symptoms.
Frequently Asked Questions
Which tool is best for testing power supply output?
The Thermaltake Dr. Power III is the best overall tool for testing power supply output. It uses an LCD screen to compare voltages against Intel ATX specifications and clearly indicates pass/fail status. For budget-conscious users, the Comidox 20/24 Pin LCD PSU Tester provides accurate voltage readings and a buzzer alarm at a much lower price.
How do I test if my PSU is good?
To test if your PSU is good, disconnect it from all components and plug the 24-pin ATX cable into a dedicated PSU tester. Switch on the PSU and check the voltage readings. Healthy values should be within +/-5% of nominal: +12V should read between 11.4V and 12.6V, +5V between 4.75V and 5.25V, and +3.3V between 3.14V and 3.47V. A failing PSU will show readings outside these ranges or trigger an alarm on testers with buzzer functionality.
What is the most reliable PSU brand?
For testers specifically, Thermaltake and PassMark are the most reliable brands based on long-term user feedback and consistent quality control. Thermaltake offers the Dr. Power III series for ATX testing, while PassMark specializes in professional inline PSU testers used by technicians worldwide. Both brands have strong customer support and proven track records across thousands of builds.
What is the best electrical tester on the market?
For PC power supplies specifically, the PassMark Inline PSU Tester is widely considered the best professional electrical tester on the market. It offers inline real-time monitoring, USB connectivity with Windows software, and detailed voltage, ripple, and power sequencing analysis. For home users, the Thermaltake Dr. Power III is a more accessible option that delivers excellent pass/fail diagnostics at a lower price point.
Final Verdict
After testing all eight of these best PSU testers, my top pick for most people is the Thermaltake Dr. Power III. It combines accuracy, ease of use, and brand reliability in a way that cheaper testers cannot match. If you are on a tighter budget, the Comidox 20/24 Pin LCD PSU Tester delivers nearly the same diagnostic capability at a fraction of the price.
For technicians who need USB-based diagnostics or work on older systems, the Lingvetron kits are specialized tools worth considering. For a simple, safe way to power on a PSU without a motherboard, the CRJ and COMeap jumpers are both excellent choices. Whichever option you pick, having one of the best PSU testers on your workbench in 2026 will save you countless hours of guesswork the next time a power supply acts up.