
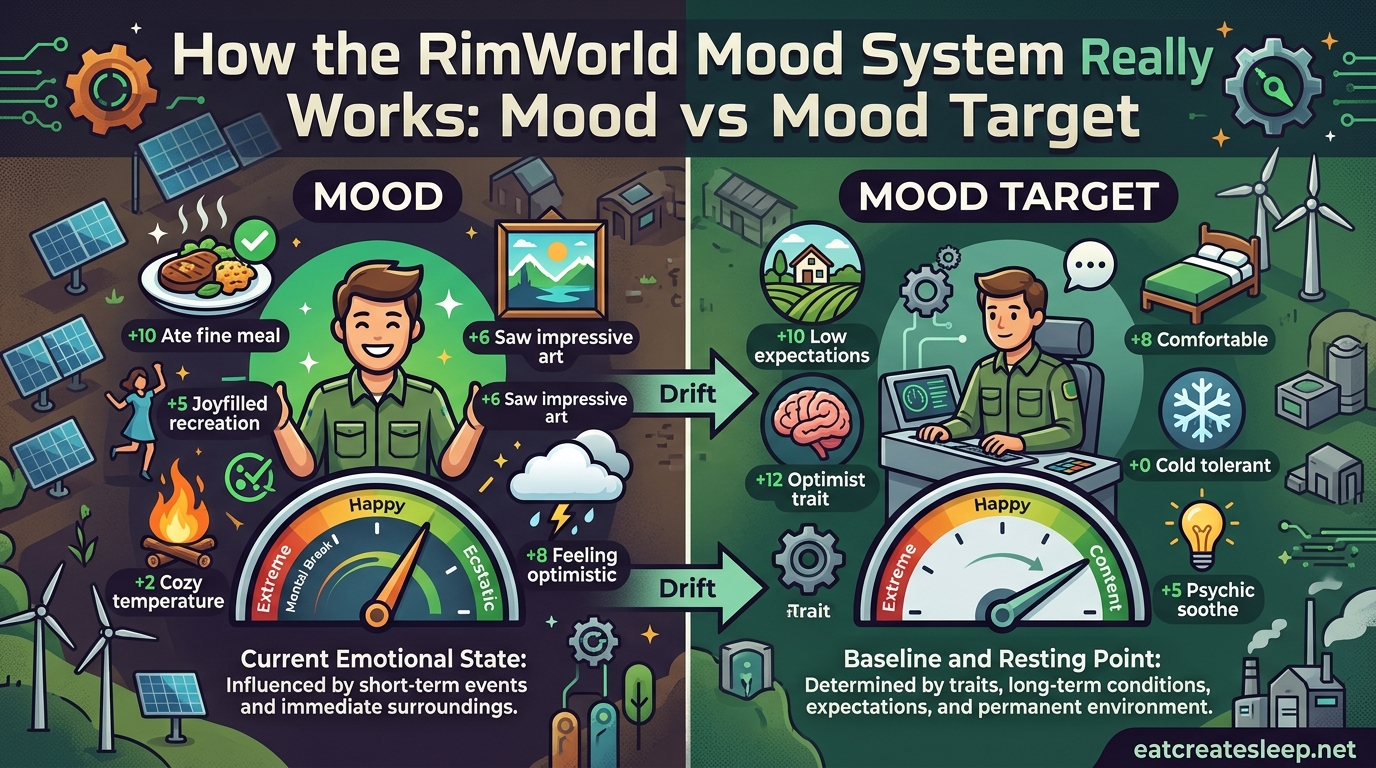
If you have ever stared at a colonist in RimWorld, watched them snap into a berserk rage over what looks like a tiny -3 moodlet, and wondered what is actually happening under the hood, you are not alone. The RimWorld mood system is one of the most misunderstood mechanics in the game, and the confusion almost always comes down to one distinction: mood versus mood target. In this guide I am going to walk you through exactly how colonist mood works, why your colonists break when you think they should be fine, and what you can do to keep your colony stable in 2026.
We will cover the difference between the mood bar and mood target, the mental break threshold zones, how difficulty changes the math, the specific positive and negative factors that move the needle, and the advanced tactics that experienced players use to keep even difficult colonists productive. By the end, you will understand how the RimWorld mood system really works in a way that most players never fully grasp.
Table of Contents
What Is the RimWorld Mood System?
The RimWorld mood system is the mechanic that tracks how each colonist feels based on their environment, experiences, and current thoughts. It is represented by a blue bar in the Needs tab of every colonist, ranging from 0 to 100%. Mood is not just a flavor stat. It is the single most important number for keeping your colony running, because when mood drops too low, colonists suffer mental breaks and can derail an entire save.
The system is built on two related but separate values that the UI shows together: the actual Mood bar and the Mood Target. The Mood bar is what your colonist is feeling right now. The Mood Target is what they should be feeling based on the sum of every positive and negative thought applied to them. The difference between these two numbers is where most player confusion comes from, and it is the core of what we will dig into next.
How the RimWorld Mood System Really Works: Mood vs Mood Target
This is the section most players actually need. The mood system really works by tracking two separate numbers and slowly drifting the first one toward the second one over time. The Mood Target is recalculated instantly whenever a colonist gains or loses a thought. The Mood bar, the blue bar you actually see, moves gradually toward that target at a fixed rate.
Specifically, the mood bar increases at +12 per in-game hour when the target is above the current mood. It decreases at -8 per in-game hour when the target is below the current mood. This asymmetry matters: good moods take longer to decay than bad moods take to recover, but a sudden negative thought still drags the target down immediately, and the visible bar takes time to follow. That lag is why a colonist can look fine for an hour after eating a lavish meal and then suddenly spiral.
The Mood Target is the sum of every active thought modifier on the colonist. Base mood (set by difficulty) plus every positive moodlet minus every negative moodlet equals the target. If a colonist has a base mood of 35, plus a +5 from a fine meal, plus a +12 from an impressive bedroom, minus a -3 from tattered apparel, their mood target is 49. The mood bar then crawls toward 49 at 12 points per hour.
This is the answer to one of the most common questions on the RimWorld subreddit: “Why is target mood so low when the only bad thing happening is a -3 debuff?” The answer is that players often miss accumulated small penalties. A colonist sleeping on the ground, eating raw food, wearing tainted gear, sitting in an ugly room, and missing recreation can easily be sitting on -40 of stacked negative thoughts without any single one looking dramatic. The mood target sums all of them.
One more mechanic worth knowing: mood freezes while a colonist sleeps in a bed. The bar stops moving toward the target during sleep, which is why a colonist who went to bed angry will wake up still angry, even if the negative thought has expired. This is also why “sleeping with a smile” is not a guaranteed protection against mental breaks, as community testing has confirmed. The mood bar resumes drifting toward target the moment the colonist wakes.
Mental Break Thresholds Explained
Mental breaks are the consequence of low mood, and they are calculated against the current Mood bar, not the Mood Target. This is a critical distinction. A colonist whose target just dropped to 10 will not immediately have a mental break. They will only break if the actual mood bar drifts down below one of the threshold lines.
There are three soft threshold zones, and the exact percentages shift based on difficulty and colonist traits, but the general structure is consistent across playthroughs.
The Minor Mental Break Threshold (Around 35%)
Below roughly 35% mood, a colonist enters the minor break risk zone. At this level they have a small chance of suffering a minor mental break, which includes behaviors like sad wandering, insulting spree, or hiding in their room. Minor breaks are annoying but rarely colony-ending. They usually resolve themselves within a few hours.
The Major Mental Break Threshold (Around 20%)
Below around 20% mood, the risk jumps to major mental breaks. These are more serious and include things like food binges, fire-starting tantrums, destroying furniture, or going on a destructive rampage. A major break can wound other colonists, burn down a stockpile, or waste scarce resources. This is the zone where most preventable colony damage actually happens.
The Extreme Mental Break Threshold (Around 5%)
Below roughly 5% mood, colonists enter the extreme break risk zone. Extreme breaks include berserk rampages, catatonic states, and run-wild episodes where the colonist effectively leaves the colony. A berserk colonist will attack anyone nearby, often with lethal results. A catatonic colonist is removed from play for a long time. This is the zone you want to avoid at all costs.
The thresholds are lower on easier difficulties and higher on harder ones, which means the same mood number is more dangerous on Losing is Fun than on Community Builder. Traits also adjust these lines: a Sanguine colonist has higher thresholds (they are easier to keep happy), while a Pessimist or Depressive colonist has lower thresholds (they break sooner).
Base Mood by Difficulty Level
One of the biggest levers in the mood system is your difficulty setting. Each difficulty level assigns a different base mood, which is added to the mood target calculation before any thoughts are applied. Higher difficulty means a lower base mood, which means your colonists start closer to the break thresholds before any negative events even occur.
The base mood range runs roughly from 27 to 42 depending on difficulty. On the easiest settings, base mood is high enough that you can absorb a few stacked debuffs without anyone breaking. On the hardest settings, base mood is low enough that even a small stack of negative thoughts can push a colonist into the danger zone.
Here is how the base mood scales across the difficulty spectrum, in roughly increasing order of difficulty:
- Peaceful: Highest base mood. Mental break thresholds are also significantly lowered, so breaks are extremely rare. This is the mode for learning the game without mood pressure.
- Community Builder: Still very forgiving. Base mood is high enough that stacked negatives rarely cause breaks unless you actively ignore colonist needs.
- Adventure Story: The default middle ground. Base mood sits around the middle of the range, and you will start needing to actively manage mood to prevent breaks during hard events.
- Strive to Survive: The standard challenge difficulty. Base mood drops noticeably, and you can no longer get away with stacking several negative thoughts on the same colonist.
- Blood and Dust: Base mood is low. You need to actively chase positive moodlets to keep the mood target above the break thresholds.
- Losing is Fun: Lowest base mood, around 27. Every stacked negative matters. Even well-fed colonists with good bedrooms can sit close to the threshold lines, and a single bad event can chain into a colony-wide mental break cascade.
The practical takeaway is that difficulty does not just make raids bigger. It silently shifts the entire mood math under your colony. A colony that runs fine on Adventure Story can collapse on Losing is Fun without you changing anything about how you build, simply because the base mood floor dropped out from under your colonists.
Positive Mood Factors: Adding the Good
The most reliable way to keep mood high is to stack positive moodlets on every colonist. The RimWorld mood system rewards you for investing in quality of life, and the buffs add up fast. Here are the strongest positive factors, in roughly the order I prioritize them in my own colonies.
Food Quality
Food is the single biggest lever in the early game. A colonist eating nutrient paste gets a small negative moodlet. A colonist eating simple meals gets nothing. A colonist eating fine meals gets a +5 mood buff. A colonist eating lavish meals gets a +12 mood buff. Switching your cook from simple to fine meals is often the cheapest +5 mood you will ever buy, and lavish meals are worth the extra ingredients on high-difficulty colonies.
Bedroom and Dining Room Quality
Room stats apply mood buffs based on the wealth, beauty, and spaciousness of the room a colonist is standing in. A colonist eating in an impressive dining room gets a mood buff. A colonist sleeping in an impressive bedroom gets a mood buff. These buffs stack, and they last for hours after the colonist leaves the room. Investing in sculptures, good floors, and decent beds pays back in mood every single day.
Comfort
Comfort is tracked separately from mood, but a colonist at high comfort gets a sustained mood buff that can climb into double digits. Armchairs, royal beds, and good recreation furniture push comfort up. A tired colonist in an armchair recovers comfort fast, and the mood buff follows them for hours.
Recreation
Recreation need fills from activities like hoopstone ring, chess table, horseshoes, television, and various joy sources. A colonist with full recreation gets a sustained positive moodlet. Letting recreation drop adds a negative moodlet, which is one of the most common preventable debuffs in the game.
Social and Relationships
Colonists in relationships get a sustained mood buff from being near their partner. Spouses and lovers stack the buff higher. Even friendships help, because a colonist chatting socially gains a small positive moodlet. Isolated colonists, by contrast, can stack a negative moodlet from being alone too long.
Traits and Permanent Buffs
Some traits give permanent positive mood modifiers. Sanguine gives a flat +6 mood. Optimist gives a smaller permanent buff. Ascetic colonists get a mood buff from eating simple food in a plain room, which can be leveraged if you build them a tiny bedroom. Greedy and jealous colonists, on the other hand, want fancy rooms and will punish you with negative moodlets if they do not get them.
Negative Mood Factors: Removing the Bad
Removing negatives is more impactful per effort than adding positives, because the mood target sums them all together. A -20 moodlet cancels out a lot of fine meals and good bedrooms. Here are the negatives I see most often in struggling colonies, and how to fix them.
Sleeping on the Ground or in the Cold
Sleeping on the ground is one of the heaviest early-game moodlets, often -8 or worse. Building a bed and a roofed room fixes it instantly. Sleeping in the cold or extreme heat also stacks negative moodlets, so climate control in bedrooms is a high-priority research goal.
Tattered and Worn Apparel
Clothes degrade over time, and a colonist wearing tattered apparel stacks a growing negative moodlet that gets worse as the clothing hits zero HP. The fix is a tailor bench set to produce replacement clothes whenever an item drops below 50% HP. This is one of the easiest large negatives to remove, and players consistently miss it.
Raw Food and Hunger
Eating raw food applies a negative moodlet. Being genuinely hungry applies a worse one. A simple auto-cook setup producing fine meals removes both, and it is one of the highest-ROI changes you can make in the first year of a colony.
Death and Witnessed Death
Colonist deaths and witnessed deaths apply heavy debuffs, often in the -15 to -25 range, and they decay slowly. Battlefield cleanup, quick burial or stripping, and isolating colonists from corpses all help reduce these penalties. The psychite or luciferium paths exist, but the clean fix is avoiding corpse stacking in your base.
Psychic Drone and Anomaly Events
Psychic drones apply a colony-wide negative moodlet for the duration of the event. There is no way to remove the source directly, but you can stack positives to outlast it. The psychic suppressor helmet from later research removes the drone effect for the wearer, which makes it a strong tool for protecting high-value colonists during drone events.
Stacked Small Debuffs
This is the trap that catches almost every new player. A -3 moodlet looks trivial. Five stacked -3 moodlets are -15, which is enough to push a marginal colonist into break range. Common small debuffs include mild pain, minor illness, being drafted too long, wearing tainted apparel, eating without a table, mild darkness, and minor complaints about room size. Individually they are noise. Together they are the reason your colonist snaps.
The practical approach is to periodically open the Needs tab for any colonist hovering near a break threshold and read every active moodlet. The UI shows them all, and the fix is usually obvious: replace the clothes, cook the food, build a chair, or assign a better bedroom.
Advanced Mood Management Strategies
Once you have the basics locked in, the RimWorld mood system has a deeper layer of tactics that experienced players use to handle problem colonists and late-game colonies.
The Maslow Hierarchy Approach
The mood system roughly follows a tiered hierarchy similar to Maslow’s. At the bottom are survival needs: food, sleep, temperature, safety from raids. If any of these are unsatisfied, no amount of art or recreation will stabilize mood. Above that sits comfort and social needs. Above that sits aesthetic and self-actualization needs like beauty, recreation variety, and passion for work. Fix bottom tiers before chasing top-tier buffs, because a hungry colonist in a beautiful room is still going to break.
Trait Interactions
Traits modify the mood math in ways that can completely change how you treat a colonist. Sanguine, Optimist, and Iron-Willed colonists are easy to keep stable. Pessimist, Depressive, Nervous, and Volatile colonists are ticking time bombs that need extra care. Ascetic colonists want bare rooms; Greedy colonists want fancy rooms; Jealous colonists want the fanciest room in the colony. Matching colonists to the right roles based on their trait profile is one of the most underrated skills in the game.
Inspirations
Inspirations are the upside of the mood system. When a colonist is in a high-mood state, they have a chance to gain an inspiration, which gives a temporary buff like inspired creativity, inspired recruitment, or inspired surgery. High mood is not just damage control. It is the trigger condition for some of the best positive events in the game.
Extreme Measures
For genuinely unmanageable colonists, the game offers extreme options. The joywire installs a permanent massive positive moodlet at the cost of consciousness, effectively removing the colonist from productive work but keeping them docile. Cryptosleep caskets freeze colonists in time, which can be used to park a problem colonist until you can deal with them. The psychic harmonizer, when implanted in a high-mood colonist, broadcasts their mood to nearby allies, which can stabilize a whole squad during a fight. None of these are first-line solutions, but they exist for a reason.
Bionics and Augmentation
Bionic body parts reduce pain, which removes a common negative moodlet stack. A colonist with a bionic jaw, bionic eyes, and bionic legs is faster, more capable, and in less pain than a baseline colonist, and the mood math reflects that. Augmentation is expensive, but in the late game it is one of the cleanest mood upgrades available.
Quick-Reference Mood Checklist
If a colonist is hovering near a mental break and you need to triage fast, run this list in order. Each item removes a common negative or adds a reliable positive.
1. Check the Needs tab and read every active moodlet. The biggest negatives are usually visible immediately.
2. Replace any tattered apparel. Set a tailor bench to auto-produce replacements at 50% HP threshold.
3. Switch from simple or paste meals to fine meals. The +5 buff is instant on the target.
4. Make sure the colonist has a bed in a roofed, climate-controlled room.
5. Top up recreation need. Draft them off work for an hour at a hoopstone ring or chess table.
6. Move them to an impressive room (dining room or rec room) for a few hours to pick up room-based buffs.
7. If pain is the issue, treat the wound or give them smokeleaf or penoxycyloine as a stopgap.
8. For psychic drones, equip a psychic suppressor helmet or stack positives until the event ends.
Frequently Asked Questions
How do you keep mood high in RimWorld?
You keep mood high in RimWorld by stacking positive moodlets and removing negative ones. The biggest wins are fine or lavish meals, impressive bedrooms and dining rooms, high comfort from good furniture, topped-up recreation, and replacing tattered apparel. Trait selection also matters – Sanguine and Optimist colonists are much easier to keep stable.
What is the difference between mood and mood target in RimWorld?
Mood is the actual blue bar in the Needs tab showing how a colonist currently feels. Mood Target is the ideal mood calculated by summing base mood plus all positive thoughts minus all negative thoughts. The mood bar drifts toward the target at +12 per hour when rising and -8 per hour when falling, which is why visible mood lags behind sudden thought changes.
How do I boost my colonist mood quickly in RimWorld?
The fastest mood boosts are eating a lavish meal for +12, sitting in an impressive dining room for a room-based buff, replacing tattered apparel to remove a stacking negative, and topping up recreation need. For emergencies, smokeleaf or psychite tea can apply a quick positive moodlet, though they carry their own risks.
How do I stop mental breaks in RimWorld?
Mental breaks are triggered when the mood bar drops below threshold lines at roughly 35%, 20%, and 5%. To stop them, keep mood above those thresholds by removing stacked negative moodlets, especially small ones that add up. Mental breaks use the current mood bar, not the mood target, so you have time to react after a thought changes before the bar actually drops into break range.
Why is my colonist in a bad mood when the only debuff is small?
Small moodlets stack. A single -3 looks harmless, but several stacked small negatives – mild pain, slight hunger, tainted apparel, eating without a table, mild darkness – can easily sum to -20 or more. Always open the Needs tab and read every active moodlet, not just the biggest one. The mood target sums every modifier on the colonist.
Conclusion
Understanding how the RimWorld mood system really works comes down to one core idea: mood and mood target are two different numbers, and the gap between them is what produces surprises. The mood target reacts instantly to thoughts, while the mood bar drifts toward it at +12 per hour up and -8 per hour down. Mental breaks trigger off the actual bar, not the target, which gives you a window to react before things go wrong.
Start with food, bedrooms, and apparel – those three fixes remove most stacked negatives in any struggling colony. Read the Needs tab on problem colonists before you assume they are randomly upset, because the mood target always tells the truth. Master that habit, and the RimWorld mood system stops being a source of chaos and becomes one of the most rewarding mechanics in the game.