
You built or bought a powerful gaming PC, the FPS counter says 120, and yet the game feels choppy. That disconnect between what the numbers show and what your eyes see is one of the most frustrating problems in PC gaming. I have spent years tweaking systems, reading frame time graphs, and testing fixes across dozens of builds. The good news is that almost every case of micro-stutter is diagnosable and fixable once you understand what is actually happening on screen.
This guide covers what causes micro-stutter in PC games and how to diagnose it from the ground up. I will walk through the technical definition, the most common software and hardware culprits, a step-by-step diagnostic process, and the fixes that actually work in 2026. Whether you are running a brand new RTX 5090 rig or an older system that recently started hitching, the methodology below will help you isolate the problem.
One important note before we start: micro-stutter is rarely caused by a single broken component. It is almost always an interaction between your GPU, CPU, drivers, Windows settings, and sometimes your monitor. That is why a systematic diagnosis matters far more than blindly applying fixes from a forum thread.
Table of Contents
What Is Micro-Stutter in PC Games
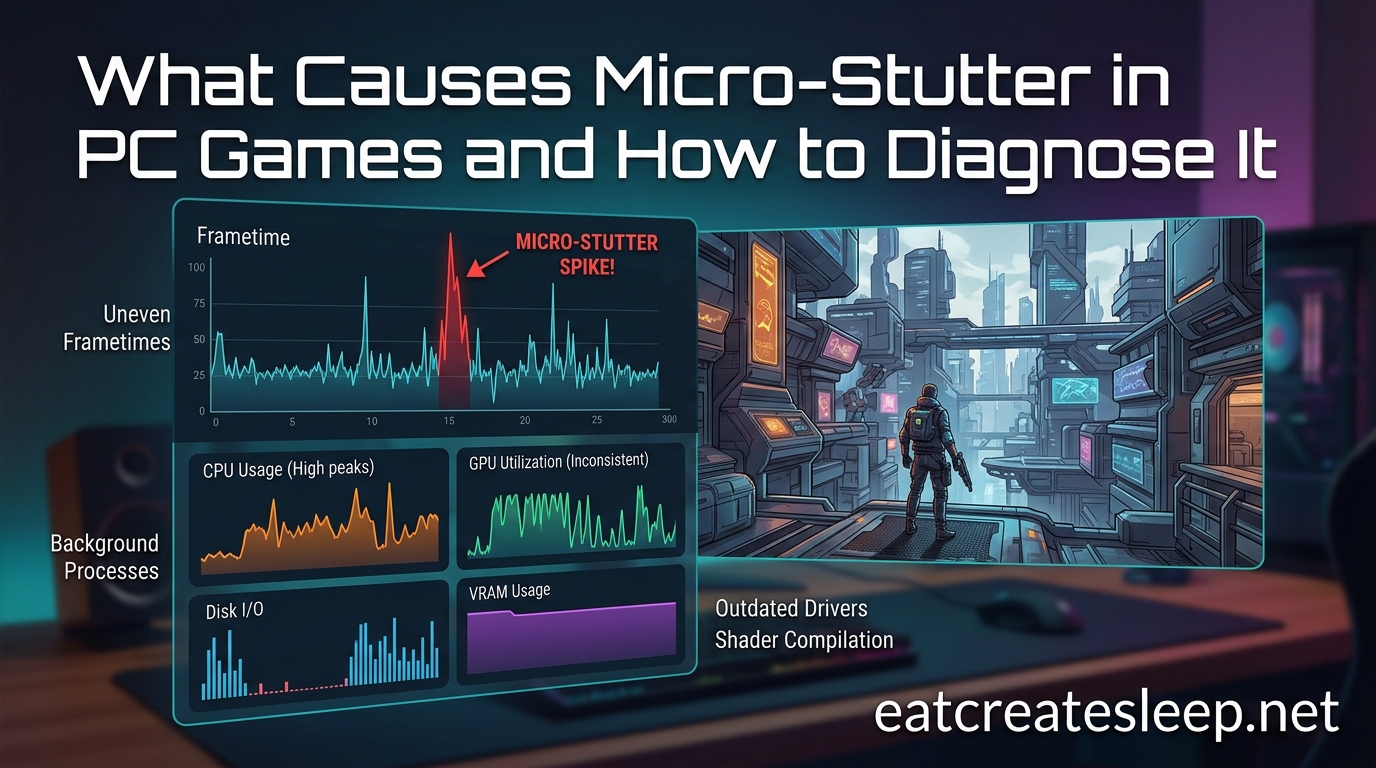
Micro-stutter is a frame pacing problem where your GPU delivers frames at uneven intervals, causing visible hitches even when your average FPS looks perfectly fine. Instead of frames arriving every 8.3 milliseconds for a steady 120 FPS, some frames arrive in 6 milliseconds and others in 14 milliseconds. Your brain notices those irregular gaps as stutter, judder, or a “choppy” feel, even though the FPS counter never dips.
This is the core difference between FPS and frame time. FPS is an average measurement taken over a full second. Frame time measures how long each individual frame takes to render and display. A game can average 120 FPS over a second while still having several frames that took 20 or 30 milliseconds to produce. Those outlier frames are what you see as micro-stutter.
Regular stuttering usually involves large FPS drops that are obvious on any monitoring overlay. Micro-stutter is sneakier because the FPS line stays flat. You need frame time data, not just FPS, to catch it. This is why so many gamers with high-end hardware spend months chasing a problem their monitoring tools are not even showing them.
Forum communities like r/buildapc and r/pcmasterrace see new micro-stutter threads every week from owners of RTX 5090 and Ryzen 9800X3D systems. The problem is not limited to budget builds. In fact, high refresh rate monitors at 144Hz and above make frame pacing issues more visible, not less, because your eyes expect a smoother baseline.
What Causes Micro-Stutter in PC Games
Micro-stutter in PC games is caused by a mix of software conflicts, Windows background processes, driver issues, hardware limitations, and display sync mismatches. The exact cause varies from system to system, which is why I break the common culprits into four categories below. Understanding which category your problem falls into is the first step toward fixing it.
Software and Driver Causes
Outdated, corrupted, or incorrectly installed GPU drivers are one of the most common causes of micro-stutter. Windows Update has a bad habit of silently replacing your Nvidia or AMD driver with an older generic version in the background. I have seen this happen dozens of times, and the user often has no idea until frame times start spiking.
Shader cache issues are another major software culprit. Modern games compile shaders on the fly and store them in a cache so they do not have to be recompiled next time. If that cache is corrupted, too small, or being constantly overwritten, you get hitching every time the game needs to load a shader. This is especially common in Unreal Engine 5 games using Nanite and Lumen, where shader compilation stutters can plague even the first few hours of gameplay.
Background applications fighting for CPU time also create frame pacing problems. RGB control software like iCUE, Armoury Crate, and Razer Synapse are notorious offenders. So are game launchers running multiple instances, browser tabs with hardware acceleration enabled, and overlays from Discord, Steam, or GeForce Experience.
Windows-Specific Causes
Windows 11 introduced several features that can quietly introduce micro-stutter. The biggest offender is Virtualization-Based Security, also known as VBS or Memory Integrity. VBS runs a virtualized layer underneath your operating system for security, and on some systems it adds latency to CPU-bound game workloads. Disabling Memory Integrity has resolved stutter for a significant number of users on Reddit and across hardware forums.
Xbox Game Bar, even when disabled in settings, can still inject overlay hooks into games. Fast Startup, which is enabled by default on most Windows installs, can cause driver initialization issues after a quick boot that a full restart fixes. Multi-Plane Overlay, or MPO, is a Windows display feature designed to reduce latency but it has been linked to flickering and stuttering on certain Nvidia and AMD driver versions.
Windows telemetry and background update checks also cause periodic hitches. I have seen systems stutter every 60 seconds on the dot until scheduled tasks were disabled. If your stuttering feels rhythmic or predictable, a Windows background task is almost certainly involved.
Hardware-Related Causes
Thermal throttling is a frequent hardware cause that many gamers overlook. When your GPU or CPU hits its thermal limit, it clocks down to protect itself. Those sudden clock drops create frame time spikes. The tricky part is that thermal throttling often only appears after 20 or 30 minutes of gaming, which matches the common forum complaint that stuttering gets worse the longer the PC is on.
RAM issues are another underdiagnosed cause, especially on Ryzen systems. Running memory at the wrong speed, using mismatched XMP profiles, or having unstable memory timings can cause intermittent frame time spikes. Multiple threads on r/AMDHelp trace persistent micro-stutter back to RAM configuration rather than GPU or driver problems. Dual-channel memory is also essential; running a single stick of RAM will cause frame pacing issues in almost any modern game.
Power delivery problems show up as micro-stutter too. If your power supply cannot hold stable voltage under load, or if your motherboard VRMs are overheating, components throttle unpredictably. Checking your BIOS power settings and ensuring your CPU is running at its rated boost clocks is a diagnostic step I always recommend.
Display and Sync Issues
VSync is one of the oldest causes of micro-stutter. When VSync is enabled and your frame rate exceeds your monitor refresh rate, frames queue up and get delivered unevenly. When your frame rate drops below the refresh rate, VSync snaps down to half the refresh rate, creating sudden halving from 60 to 30 FPS. Both scenarios produce visible stutter.
Variable refresh rate technologies like G-Sync and FreeSync solve most of this by dynamically matching your monitor refresh rate to your frame rate. However, if VSync is enabled in your GPU control panel at the same time as G-Sync, the two can conflict and reintroduce stutter. The recommended setup for Nvidia users is G-Sync enabled, VSync off in the control panel, and a frame rate cap set a few FPS below your max refresh rate.
Borderless windowed mode is another display-related cause. Running a game in borderless instead of exclusive fullscreen forces it through the Windows Desktop Window Manager, which adds a frame of latency and can cause stuttering on some systems. Exclusive fullscreen gives the game direct access to the display pipeline.
How to Diagnose Micro-Stutter
Diagnosing micro-stutter requires measuring frame times, isolating variables, and working through a systematic checklist. Randomly applying fixes wastes time and makes it harder to figure out what actually worked. The five-step process below is the same methodology I use on every system I troubleshoot.
Step 1: Measure Frame Times, Not Just FPS
Install MSI Afterburner with RivaTuner Statistics Server, or use CapFrameX with PresentMon for more detailed capture. Enable the frame time graph overlay, not just the FPS number. Play your game for at least 10 minutes and watch the frame time line.
A healthy frame time graph looks like a flat, thin line. Spikes, sawtooth patterns, or periodic jumps all indicate different problems. A single spike every 60 seconds points to a background task. Continuous jagged lines suggest a sync or driver issue. Gradual upward drift over time points to thermal throttling or a memory leak.
Step 2: Check for Background Interference
Open Task Manager and Resource Monitor before launching your game. Sort by CPU usage and watch what runs during gameplay. Pay attention to anything that spikes at the same moment your frame time graph spikes. Common offenders include antivirus scans, Windows Update, RGB software, browser hardware acceleration, and game launchers running in the background.
For a clean test, close every non-essential application and disable startup items temporarily. If the stutter disappears, re-enable applications one by one until it returns. This binary search approach isolates the offending software quickly instead of guessing.
Step 3: Test Thermals and Power
Monitor your GPU and CPU temperatures during a gaming session. HWiNFO64 is my preferred tool because it logs detailed sensor data over time. Watch for temperatures that climb steadily and then plateau alongside frame time spikes. GPU thermal throttling typically kicks in around 83 degrees Celsius on Nvidia cards and 110 degrees junction temperature on AMD cards.
Also check your CPU and GPU clock speeds. If clocks are dropping under load, your system is throttling. This could be thermal, power limit, or current limit throttling. Each has a different fix, from reapplying thermal paste to adjusting power limits in MSI Afterburner or your motherboard BIOS.
Step 4: Isolate Driver and Software Issues
Download Display Driver Uninstaller, known as DDU, and run it in safe mode to completely remove your current GPU driver. Then install the latest driver directly from Nvidia or AMD. This clean install eliminates corrupted files, leftover settings from previous driver versions, and conflicts caused by Windows Update silently swapping drivers.
If the stutter persists after a clean driver install, clear your shader cache. For Nvidia, this is in the NVIDIA App under Developer settings or by deleting the DXCache and GLCache folders manually. For AMD, clear the shader cache from the AMD Software app. The first launch after clearing will compile shaders fresh, which may stutter temporarily, but subsequent sessions should be smooth.
Step 5: Check DPC Latency
DPC latency is one of the most overlooked causes of micro-stutter and almost no competitor guide covers it in detail. Deferred Procedure Call latency measures how long your system takes to handle hardware interrupts. High DPC latency means a driver is hogging CPU time and delaying frame delivery.
Download LatencyMon and let it run while you game. If the red bar spikes or a specific driver is flagged as responsible for high latency, that driver is interfering with real-time audio and video processing. Network drivers, audio drivers, and chipset drivers are the usual suspects. Updating or rolling back the flagged driver often resolves the stutter.
You can also check DPC latency in Resource Monitor by looking at the CPU tab and sorting by DPC percentage. If any process shows consistently high DPC time, investigate it. This is an advanced diagnostic step but it catches problems that every other method misses.
Fixes and Solutions
The fixes below are ranked from easiest and most common to most advanced. Try them in order, and after each fix, test your game for at least 15 minutes with frame time monitoring active. Do not stack multiple fixes at once or you will not know which one actually worked.
The 5-Minute Quick-Fix Checklist
Before diving into advanced fixes, work through this checklist. These five steps resolve a large percentage of micro-stutter cases in under five minutes each.
1. Restart your PC fully. Do not use Fast Startup. Hold Shift while clicking Restart for a complete power cycle.
2. Update your GPU driver directly from Nvidia.com or AMD.com. Do not rely on Windows Update for drivers.
3. Close every background application, including RGB software, launchers, and browser tabs.
4. Switch your game from borderless windowed to exclusive fullscreen.
5. Disable VSync in your GPU control panel and enable G-Sync or FreeSync instead.
Clear and Expand Your Shader Cache
Shader cache corruption is one of the most common causes of micro-stutter in 2026, especially in Unreal Engine 5 games. Open your GPU control panel and find the shader cache size setting. Set it to 10 GB or unlimited if you have the disk space. Then manually clear the existing cache so the system rebuilds it fresh.
For Nvidia users, navigate to the NVIDIA App, go to Developer settings, and find Manage Shader Cache. Delete the cache, then restart your PC. For AMD users, open AMD Software, go to Settings, Graphics, and look for the shader cache reset option. The first gaming session after clearing will compile shaders on demand and may stutter briefly. This is normal and should disappear in subsequent sessions.
Disable VBS and Memory Integrity
Virtualization-Based Security adds overhead that can cause micro-stutter on CPU-bound games. To disable it on Windows 11, open the Start menu and search for Core Isolation. Turn off Memory Integrity. You will need to restart your PC for the change to take effect.
If the toggle is grayed out or will not stay off, you may need to disable related features first. Turn off Credential Guard and any third-party antivirus that relies on virtualization. Some users also need to disable Virtual Machine Platform in Windows Features before Memory Integrity can be turned off. Test your game after each change to confirm the stutter is gone.
Do a Clean Driver Install with DDU
Display Driver Uninstaller is the gold standard tool recommended across r/buildapc, r/AMDHelp, and every major hardware forum. Download it from the official Wagnardsoft site, boot into safe mode, and run DDU to completely remove your current GPU driver. Then install the latest driver from Nvidia or AMD.
This clean install removes corrupted files, leftover registry entries, and conflicts from previous driver versions. It also eliminates any damage caused by Windows Update silently replacing your driver. I recommend doing a DDU clean install at least once after any major Windows update that touches display drivers.
Configure G-Sync or FreeSync Properly
If you have a variable refresh rate monitor, enable G-Sync or FreeSync in your GPU control panel and in your monitor OSD. Then disable VSync globally in your GPU control panel, not just per-game. Set a global frame rate cap 3 to 5 FPS below your monitor max refresh rate. For a 144Hz monitor, cap at 140 FPS. For a 240Hz monitor, cap at 235 FPS.
This setup prevents your GPU from hitting the refresh rate ceiling, which is where G-Sync hands off to VSync and stutter returns. The cap keeps you inside the G-Sync range at all times. Use the Nvidia frame rate limiter in the NVIDIA App, or RivaTuner for finer control, instead of in-game limiters which can be less precise.
Use ISLC for Memory Management
Intelligent Standby List Cleaner, or ISLC, is a free utility that prevents Windows from holding standby memory too long. When the standby list fills up, Windows has to free memory mid-game, which causes frame time spikes. ISLC preemptively cleans the standby list before it becomes a problem.
Download ISLC, set it to start with Windows, and configure it to clear the standby list when it exceeds 1024 MB. This is especially helpful on systems with 16 GB of RAM or less running modern games that use a lot of memory. Forum users across r/buildapc consistently report ISLC as a reliable fix for persistent micro-stutter.
Disable MPO via Registry
Multi-Plane Overlay is a Windows display feature that can cause stuttering and flickering on certain systems. Disabling it requires a registry edit, so back up your registry first. Create a text file with the following content:
Windows Registry Editor Version 5.00, then on a new line, the path to the GraphicsDrivers MPO key with OverrideTestMode set to 1. Save the file with a .reg extension, double-click to merge it, and restart your PC. If stutter disappears after this change, MPO was the culprit. This fix is frequently cited in Nvidia and AMD support threads for users who have tried everything else.
Optimize Your Power Plan
Windows power plans can throttle your CPU to save energy, which causes frame time spikes when the CPU tries to ramp back up. Switch to the Ultimate Performance power plan or the High Performance plan. On Windows 11, you may need to unlock Ultimate Performance via PowerShell using the powercfg command.
Also check your BIOS power settings. Ensure your CPU is not being limited by Eco Mode or a low power limit. Some motherboards ship with conservative power settings enabled by default. Setting your CPU to its rated boost power limits ensures it can sustain performance during long gaming sessions without throttling.
Prevention Tips
Once you have fixed your micro-stutter, a few habits will keep it from coming back. Update your GPU driver monthly, but always use DDU for clean installs rather than installing over the top. Disable Windows from auto-updating your drivers through the Group Policy Editor or Registry on Windows 11 Pro.
Keep your system clean physically. Dust buildup causes thermal throttling over time, which is why stutter often appears months after a build was running perfectly. Repaste your GPU and CPU every 12 to 18 months if you game heavily.
Avoid installing bloatware and unnecessary background utilities. Every RGB controller, launcher, and overlay you install is a potential source of frame time interference. Run a lean system and only install what you actively use. Periodically check LatencyMon to catch driver issues before they become noticeable.
Frequently Asked Questions
How to fix micro stuttering in games?
Start with a full restart, a clean GPU driver install using DDU, clearing your shader cache, disabling VBS and Memory Integrity, closing background apps, and switching to exclusive fullscreen with G-Sync or FreeSync enabled. If those do not work, check DPC latency with LatencyMon and test your thermals with HWiNFO64.
Why does my PC stutter randomly in games?
Random stutter is usually caused by background applications, Windows scheduled tasks, thermal throttling, or Windows Update silently replacing your GPU driver. Less common causes include RAM timing instability on Ryzen systems, power plan throttling, and MPO conflicts.
How to find out what is causing stuttering on a PC?
Use MSI Afterburner or CapFrameX with PresentMon to monitor frame times. Watch for patterns like periodic spikes or gradual drift. Then use Task Manager and Resource Monitor to identify background processes, HWiNFO64 to check thermals and clock speeds, and LatencyMon to measure DPC latency from specific drivers.
Can bad RAM cause micro stutters?
Yes. Unstable RAM timings, incorrect XMP profiles, single-channel memory, and mismatched RAM sticks can all cause frame time spikes. Ryzen systems are particularly sensitive to memory configuration. Checking XMP profiles and running memory in dual channel resolves stutter for many users.
Conclusion
Understanding what causes micro-stutter in PC games and how to diagnose it transforms an invisible, frustrating problem into a solvable puzzle. The key insight is that FPS averages lie and frame times tell the truth. Once you start monitoring frame times with MSI Afterburner or CapFrameX, you can see exactly when and how your system stutters.
Work through the diagnostic steps in order, apply fixes one at a time, and test after each change. Most micro-stutter cases trace back to shader cache corruption, VBS overhead, dirty driver installs, background software, or sync misconfiguration. DPC latency and RAM timing issues account for most of the rest. With the methodology in this guide, you should be able to isolate and resolve the problem without guessing.
If you want to go deeper, keep LatencyMon and HWiNFO64 running during your sessions and check them whenever something feels off. A clean, lean system with current drivers, proper sync settings, and good thermal management will give you the smooth frame pacing that makes high refresh rate gaming actually feel the way it should.