
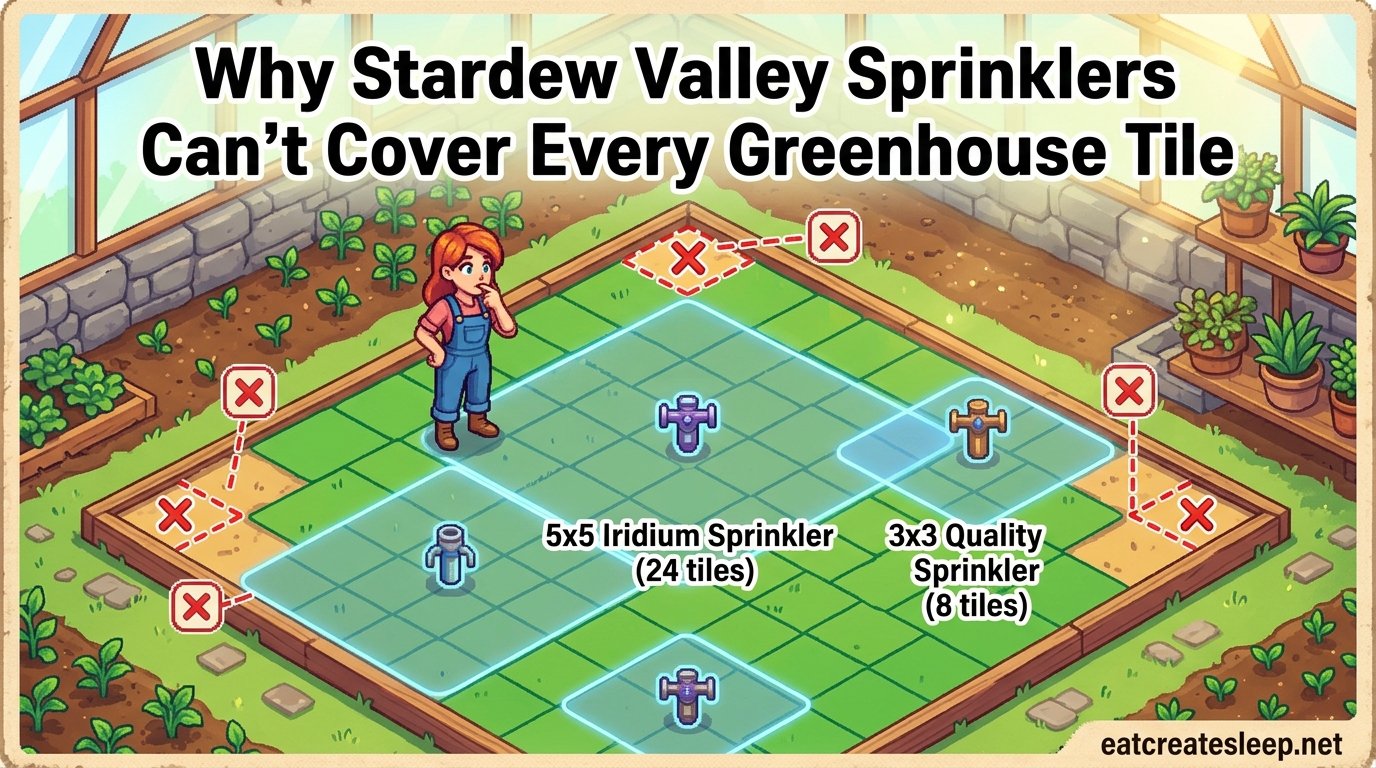
Every Stardew Valley farmer eventually runs into the same frustration inside the greenhouse. You craft your iridium sprinklers, place them carefully on the 10×12 plot, and then notice a few tiles still sit dry the next morning. It feels like a bug, but it is not.
The short answer is that Stardew Valley sprinklers water in perfect squares (3×3 or 5×5), while the greenhouse crop area is a 10-by-12 rectangle. No matter how you arrange square shapes inside a rectangle, the edges will never line up cleanly. Understanding why this happens helps you plan an efficient Stardew Valley sprinklers greenhouse coverage layout instead of fighting against the geometry.
In this guide I will break down the greenhouse dimensions, the coverage area for each sprinkler tier, the actual math behind the mismatch, and the best layouts for every stage of the game. By the end you will know exactly where to place each sprinkler and how many farmable tiles you keep in the process.
Table of Contents
Greenhouse Dimensions Explained
The greenhouse crop area is a fixed 10-row by 12-column rectangle of tillable soil. That gives you 120 total plantable tiles once the building is restored. A one-tile-thick wooden border surrounds the plot, but those border tiles cannot be planted or watered, so they do not count toward your crop space.
This rectangular shape is the root of the coverage problem. Sprinklers project their watering range in a square pattern centered on themselves. A rectangle measuring 10 by 12 is not a multiple of any square size the game offers, so perfect coverage with zero overlap or zero gap is mathematically impossible without upgrades.
Why does the game use a 10×12 plot instead of a clean 12×12 or 10×10? The greenhouse predates many farming updates in Stardew Valley, and ConcernedApe designed the interior to feel like a small conservatory rather than a perfect grid. The odd dimensions stuck, and every sprinkler layout strategy since has been a workaround for that original design choice.
It is worth noting that the greenhouse ignores seasons entirely once repaired. Crops grow year-round, including summer-only plants like starfruit and ancient fruit, which is why optimizing every single tile matters so much here compared to outdoor farming. A wasted tile inside the greenhouse is a wasted tile forever, not just for one season.
The wooden border around the crop area is also part of the strategy. Sprinklers placed on those border tiles still water tiles inside the crop rectangle, which means smart players use the border as free real estate for their irrigation setup. This is the key insight that makes the best layouts work.
Stardew Valley Sprinklers Greenhouse Coverage: How Each Type Waters
Before solving the layout puzzle, you need to know exactly what each sprinkler does. Stardew Valley has three sprinkler tiers, and each one waters a different number of tiles in a square centered on the sprinkler itself.
Basic Sprinkler
The basic sprinkler is unlocked at Farming Level 2 and waters the four adjacent cardinal tiles in a plus shape. Many new players assume this means a 3×3 area, but the basic sprinkler skips the diagonals, so it only covers four tiles total plus itself. In a 120-tile greenhouse, you would need dozens of these, and the crop-space sacrifice is enormous.
Basic sprinklers are crafted from one copper bar and one iron bar. That recipe is cheap, but the coverage is so limited that even free sprinklers would not justify the loss of plantable tiles. Save these for early-game outdoor fields where space is essentially unlimited.
Quality Sprinkler
The quality sprinkler unlocks at Farming Level 6 and waters a true 3×3 square, which is the eight tiles surrounding the sprinkler plus itself. This gives you eight watered tiles per sprinkler. It is a huge upgrade, but a 3×3 square still does not divide evenly into a 10×12 rectangle, so gaps remain at the edges.
Quality sprinklers cost one iron bar, one gold bar, and one refined quartz to craft. They are affordable by mid-game standards and offer a respectable balance between coverage and crop sacrifice. Most players run quality sprinklers in the greenhouse through their first couple of in-game years before graduating to iridium.
Iridium Sprinkler
The iridium sprinkler is unlocked at Farming Level 9 and waters a 5×5 square, covering the 24 adjacent tiles around the sprinkler plus itself. This is the most efficient option in the base game, but a 5×5 square fits into a 10×12 rectangle awkwardly. Two squares wide match the 10 rows perfectly, but the 12-column depth leaves a two-tile strip uncovered along one edge.
Each iridium sprinkler costs one gold bar, one iridium bar, and one battery pack to craft. That is a steep price early on, so most players supplement their supply by completing the Vault Bundles at the Community Center, which rewards four iridium sprinklers outright. You can also buy them from Krobus on Saturdays for 10,000 gold each.
Why Square Coverage Can’t Fill a Rectangular Greenhouse
This is the core question most guides skip. Why Stardew Valley sprinklers can’t cover every greenhouse tile comes down to simple geometry. A 5×5 square has an area of 25 tiles. The greenhouse has 120 tiles. Four iridium sprinklers cover 100 tiles of crop space plus the four tiles they sit on, totaling 104 covered tiles, but they overlap or leave gaps because the 5×5 squares cannot tile a 10×12 rectangle without wasted space.
Think of it like trying to tile a 10-by-12 floor with 5-by-5 rugs. You can fit two rugs side by side to cover 10 tiles wide, which gives you a 10-by-5 strip. Add another row of two rugs and you cover a 10-by-10 area. That leaves a 10-by-2 strip along the bottom with no coverage at all. There is no way to rotate or shift those 5×5 squares to fill the remaining 20 tiles without overlapping rugs you already placed.
The same math applies in-game. Four iridium sprinklers placed in a tight 2×2 grid cover a 10×10 region but leave a 10×2 strip dry. Spread them out and you start creating overlaps, which waste coverage area on tiles another sprinkler already waters. Shift them toward the edge and you lose coverage on the opposite side.
This is why no layout achieves 120 watered tiles with iridium sprinklers alone. The best layouts accept a small uncovered strip or sacrifice a few crop tiles by placing sprinklers directly on plantable soil. Either way, the rectangle wins.
The mismatch is not unique to iridium sprinklers either. Quality sprinklers face the same problem in a different shape. A 3×3 square divides into a 10×12 rectangle even less cleanly than a 5×5 square, since neither 10 nor 12 is a multiple of 3. The result is more overlap, more gaps, and a wider range of layout choices that each trade tiles differently.
One common misconception players bring from real-world sprinklers is that the watering range should be circular or adjustable. Stardew Valley treats sprinkler coverage as a hard square grid, not a soft radius, so tiles at the edge of the 5×5 area get the same treatment as tiles right next to the sprinkler. There is no falloff, no partial coverage, and no diagonal bonus.
Optimal Sprinkler Layouts for Every Tier
Now that you understand the math, here are the practical layouts players use. Each tier trades coverage efficiency for crop space, so pick the one that matches where you are in the game.
Basic Sprinkler Layout
I do not recommend basic sprinklers for the greenhouse. Each one only waters four tiles, so covering even half the plot would require placing roughly 15 sprinklers on plantable soil. That sacrifices 15 crop tiles out of 120, leaving you with 105 farmable tiles. Skip this tier inside the greenhouse and save your basic sprinklers for outdoor farming where space is less precious.
If you have no other option early in a new save, place basic sprinklers in a checkerboard pattern along the plot edges and water the center manually until you craft quality sprinklers. Treat the greenhouse as a low-investment project in year one and ramp up once better tools become available.
Quality Sprinkler Layout
Quality sprinklers do a much better job. The most common layout uses 12 quality sprinklers arranged in a tight grid. Each sprinkler covers a 3×3 area, and a careful pattern covers most of the 10×12 plot. You sacrifice 12 crop tiles to the sprinklers themselves, leaving 108 plantable tiles. Some players push this to 14 sprinklers for fuller coverage, which drops your crop space to 106 tiles but eliminates nearly every dry spot.
The trick is to stagger the quality sprinklers so their 3×3 squares overlap as little as possible while still covering the corners. A common pattern places them in three rows of four, offset by one tile each row, which hugs the rectangular shape and keeps dry patches confined to small edge strips.
Iridium Sprinkler Layout
The iridium sprinkler is the gold standard. The optimal layout uses four iridium sprinklers placed on the crop area. Three sit just outside or on the edge of the plot, and one lands directly on plantable soil near the center. This setup waters 116 of the 120 tiles, sacrificing only four crop tiles to the sprinkler sitting in the field.
That four-sprinkler layout is the one most Reddit and Steam community guides recommend. It maximizes automated watering while keeping the crop-space sacrifice to a bare minimum. You lose four tiles out of 120, which is roughly a 3.3 percent reduction in yield potential, a fair trade for never watering by hand again.
A popular alternative places all four iridium sprinklers directly on plantable soil in a tight diamond pattern. This sacrifices four crop tiles but delivers perfectly symmetrical coverage that many players find visually cleaner. The math is identical either way, so choose the layout that looks better to you.
Pressure Nozzle: The Coverage Upgrade
If you progress far enough into the game, Qi Gem rewards unlock sprinkler upgrades from Mr. Qi. The pressure nozzle is the upgrade that directly solves part of the greenhouse coverage problem. When applied to an iridium sprinkler, the pressure nozzle expands the watering range from a 5×5 square to a 7×7 square, covering 48 surrounding tiles plus the sprinkler itself.
With pressure nozzles attached, you can cover the entire 10×12 greenhouse plot with fewer sprinklers placed entirely off the crop area. A common setup uses two pressure-nozzle iridium sprinklers, one placed on the wooden border and another on the opposite side. Together they cover all 120 crop tiles with zero overlap on plantable soil, which means you sacrifice zero crop tiles.
Pressure nozzles cost 20 Qi Gems each at the Qi Walnut Room on Ginger Island, so this is an endgame solution. If you have not unlocked Ginger Island or are still building your Qi Gem stockpile, stick with the standard four-iridium layout until you can afford the upgrade.
The enricher is a separate Qi Gem upgrade that does not affect coverage. Instead, it lets the sprinkler apply fertilizer to the tiles it waters, which is useful for speed-gro or deluxe speed-gro setups. Most players grab the pressure nozzle first because it directly increases crop yield, then add the enricher later.
One important caveat: pressure nozzles and enrichers are permanent attachments. Once applied, they cannot be removed from a sprinkler, so only attach them to iridium sprinklers you plan to keep long-term. Attaching a pressure nozzle to a quality sprinkler is a waste, since quality sprinklers do not benefit from the upgrade enough to justify the Qi Gem cost.
Alternatives: Retaining Soil and Fruit Trees
Sprinklers are not the only way to handle greenhouse watering. Retaining soil is a fertilizer crafted from stone, fiber, and sap that gives each watered tile a chance to stay watered overnight. Quality retaining soil offers a 100 percent chance to stay watered, which eliminates the need for sprinklers entirely.
The trade-off is that you give up speed-gro or other fertilizers that boost growth rate. Retaining soil is best for players who want to maximize crop count without crafting iridium sprinklers. Spread it across all 120 tiles, water once, and the soil handles overnight moisture from that point forward.
The recipe for basic retaining soil unlocks at Farming Level 4, while quality retaining soil unlocks at Farming Level 7. Quality retaining soil requires three stone, five fiber, and five sap per craft, which is cheap enough to cover the entire greenhouse in a single session if your foraging and mining are in good shape.
Fruit trees are another option. They plant in the dirt border surrounding the crop area and do not need watering at all. Many players line the wooden border with fruit trees, which adds bonus income without consuming any of the 120 crop tiles. Just leave a one-tile gap on each side of every tree so it has room to grow.
A fully planted fruit tree border can fit roughly 18 trees, each producing one fruit per day in season. Since greenhouse fruit trees produce year-round, this is a steady passive income stream that stacks alongside whatever crops you grow in the central plot.
Practical Tips for Planning Your Layout
Pick your sprinkler tier before you start planting. Ripping up crops to place a new sprinkler wastes days of growth, so decide early whether you are running quality sprinklers, iridium sprinklers, or pressure-nozzle iridium sprinklers.
Place border sprinklers first. The wooden border around the crop area is dead space, so any sprinkler tile that can sit on the border instead of the crop area is a free coverage tile. Center your iridium sprinklers as close to the edge of the crop area as possible while still covering the most tiles.
Test your layout before committing crops. Tilled soil shows the watering animation the next morning, so till the entire 10×12 plot, place your sprinklers, sleep, and check which tiles glow blue at dawn. Adjust any sprinkler that leaves dry spots, then plant once you are happy with the coverage.
For new players, quality sprinklers are the sweet spot. They are cheap to craft, easy to place, and the 108-tile crop space is more than enough income for your first few greenhouse seasons. Endgame players should aim for pressure-nozzle iridium sprinklers, which give you every tile back and require no manual watering ever.
Pair your sprinklers with the right crops for maximum gold. Ancient fruit and starfruit are the two highest-value crops for greenhouse use, since they regrow without replanting and ignore seasonal restrictions indoors. Hops and blueberries are solid mid-tier options if you cannot afford ancient fruit seeds yet.
Keep one or two kegs or preserves jars near the greenhouse entrance. Processing your harvest into wine or jam multiplies the sale value, and having the processing equipment close cuts down on travel time during daily chores.
Common Layout Mistakes to Avoid
The most common mistake players make is assuming that more sprinklers means better coverage. In reality, every sprinkler you place on plantable soil steals a crop tile, so the goal is minimum sprinklers with maximum coverage per unit. Two well-placed iridium sprinklers on the border will outperform four poorly placed ones scattered across the field.
Another frequent error is forgetting that sprinklers water a square, not a plus shape. Players coming from other farming games sometimes expect basic sprinklers to cover diagonals, then wonder why their corner crops stay dry. The square rule applies at every tier, so always count tiles diagonally when planning a layout.
Many players also forget that the wooden border accepts sprinkler placement. Border tiles are not plantable, but they still host sprinklers, which means you can move up to four irrigation units off the crop area for free. Ignoring the border is the single biggest source of unnecessary crop sacrifice in new greenhouse layouts.
Finally, avoid the temptation of perfectly symmetrical layouts that prioritize looks over coverage. Reddit is full of gorgeous greenhouse screenshots with sprinklers arranged in neat patterns, but the most efficient layouts are often slightly off-center. Function beats form when every tile translates to gold.
FAQs
How many iridium sprinklers do you need to cover the greenhouse?
You need four iridium sprinklers to cover the 10×12 greenhouse plot. The optimal layout places three sprinklers on the wooden border and one in the center of the crop area, watering 116 of the 120 tiles while sacrificing only four crop tiles.
How many tiles do sprinklers cover in Stardew Valley?
Basic sprinklers cover four tiles in a plus shape. Quality sprinklers cover eight tiles in a 3×3 square. Iridium sprinklers cover 24 tiles in a 5×5 square. Pressure-nozzle iridium sprinklers cover 48 tiles in a 7×7 square.
Do sprinklers work inside a greenhouse in Stardew Valley?
Yes, sprinklers work inside the greenhouse exactly the same way they work outdoors. They water tiles automatically each morning based on their coverage area, and they function year-round because the greenhouse ignores seasons.
How many sprinklers do I need for the greenhouse stardew?
The number depends on your sprinkler tier. Four iridium sprinklers cover 116 of 120 tiles. Twelve quality sprinklers cover most of the plot. Two pressure-nozzle iridium sprinklers cover all 120 tiles. Basic sprinklers are not recommended for greenhouse use.
Conclusion
Why Stardew Valley sprinklers can’t cover every greenhouse tile is a question of geometry, not game design. The 10×12 rectangular plot cannot be perfectly tiled by square sprinkler coverage areas, no matter how cleverly you arrange them. Once you understand the math, every layout becomes a deliberate trade between coverage and crop space.
Your next step is simple. Decide which sprinkler tier matches your current game stage, till the full 10×12 plot, and test your layout overnight before planting. With the four-iridium or pressure-nozzle layouts above, you will keep watering chores to a minimum and maximize the gold your greenhouse produces.