
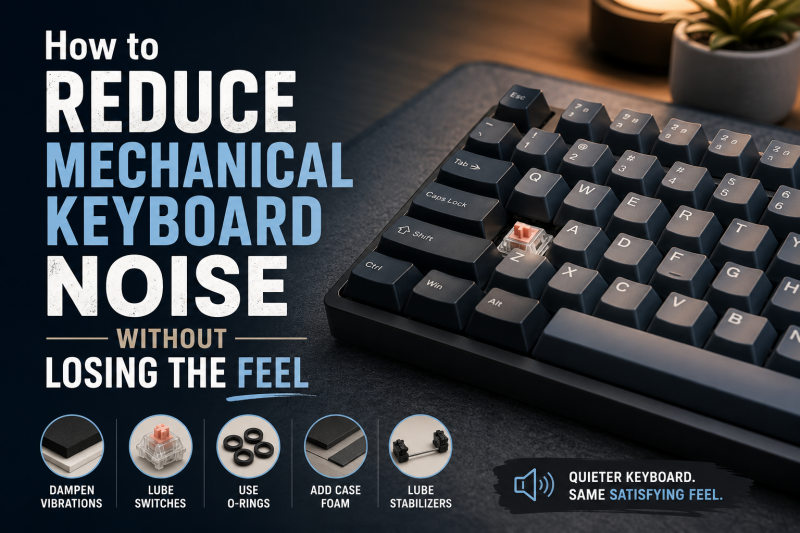
Mechanical keyboards sound amazing in an empty room. The deep thock, the crisp clack, the satisfying bottom-out on every key. Then you take that same board into a shared office, hit unmute on a video call, or try to type next to someone sleeping, and suddenly that same sound is a problem.
I have spent the last year testing quietening techniques on six different mechanical keyboards. Some worked brilliantly. A few made the keyboard feel like typing on wet cardboard. The goal of this guide is to help you cut the noise without losing the feel that made you buy a mechanical keyboard in the first place.
You will learn what actually generates the noise, which mods cut sound while keeping the tactile feedback, and which mods quietly destroy the typing experience. I have ranked every method by how much feel it preserves, because that is the part most guides leave out.
Table of Contents
What Makes Mechanical Keyboards Loud (and Where the Sound Actually Comes From)
Mechanical keyboard noise comes from four main sources, and identifying which one dominates on your board is the first step to fixing it. Switches make the impact noise. Stabilizers make the rattle. The case amplifies everything. Keycaps add a percussive top layer.
Here is the breakdown I use when I am troubleshooting a noisy board:
- Switch bottom-out is the sharp impact when the stem hits the housing on a full press. This is the loudest single event on most mechanical keyboards.
- Switch top-out is the smaller click when the keycap returns to its rest position. It is less loud but adds high-frequency harshness.
- Stabilizer rattle is the metallic buzz on the spacebar, enter, shift, and backspace. On most boards this is louder than the switches themselves.
- Case echo and PCB resonance is the hollow ringing you hear in a quiet room. The empty space inside the case vibrates like a tiny drum.
- Keycap material and profile add a percussive layer on top of the switch sound. Thin ABS sounds different from thick PBT.
Once you know what is loud, you can target the right mod. Most people reach for O-rings first, but on many boards the actual loudest source is the stabilizer rattle. Targeting the wrong source is why so many people report that their mods “did not really help.”
Here is the rule of thumb I use: if your spacebar sounds like a jar of coins, fix the stabilizers first. If the whole board has a hollow echo, fix the case. If every key has a sharp impact, then think about switches and O-rings.
O-Rings and Dampeners: How They Cut Bottom-Out Sound
O-rings are small rubber bands that slip over the stem of each switch, sitting between the stem and the keycap. When you press a key, the O-ring cushions the bottom-out and absorbs the impact. The result is a softer, quieter bottom-out sound.
They are cheap, fast to install, and you can apply them without opening the keyboard. For someone who wants a quick win, O-rings are the lowest-effort option on this list.
The trade-off is real, though. O-rings reduce your total key travel by a measurable amount. A typical 1.5mm O-ring cuts 0.5 to 0.7mm of travel, which is enough to change how the switch feels under your fingers. Heavier typists notice it most. On a tactile switch, the bump still fires correctly, but the bottom feels less defined. On a linear switch, the keyboard can start to feel slightly mushy.
Here is when O-rings make sense:
- You want a fast, reversible mod with no disassembly.
- You bottom-out hard when typing and that bottom-out is the main complaint.
- You are willing to trade a little travel for a noticeable drop in impact noise.
Here is when I would skip them:
- You love the full travel and crisp bottom-out of your current switches.
- You have a high-quality tactile or linear switch and you do not want to soften the feel.
If you do try O-rings, start with thinner sizes. A 0.4mm or 0.6mm ring gives you most of the noise benefit with very little travel loss. I tested 1.5mm rings on a Cherry MX Brown board and the feel change was obvious. On 0.4mm rings the same board felt 90 percent the same and was meaningfully quieter.
How O-Rings Compare for Feel Preservation
On my feel-preservation ranking, O-rings sit in the middle. They are not the worst mod for feel, but they are not the best either. They change the geometry of the keypress, which is the part of the switch experience your fingers feel most directly.
If your main goal is to reduce mechanical keyboard noise without losing the feel, O-rings are a backup option. Use them when other mods are not available, or layer them with lubing and foam for a compounded effect.
Lubing Your Switches: The Mod That Preserves Feel Best
Switch lubing is the single most effective mod for cutting noise while keeping the feel intact. I rank it first on every “feel preservation” list I build, and it is the only mod I have applied where the keyboard genuinely felt better after the change.
When you lube a switch, you are adding a thin layer of lubricant to the parts that touch each other inside the housing. This smooths out the scratch, kills the spring ping, and reduces the high-frequency components of the bottom-out sound. The switch still feels mechanical, but the noise profile becomes deeper and cleaner.
The two lubes I trust most are Krytox 205g0 and TriboSys 3204. Both are thick enough to stay in place but thin enough to feel like a normal switch. 205g0 is the community default and what I would recommend to anyone new to lubing. TriboSys 3204 is slightly thinner and gives a slightly more lively feel.
What Lubing Does to the Sound
Lubing does not eliminate the bottom-out sound. It refines it. The harsh ping at the bottom gets replaced with a softer thud. The spring stops producing that high-pitched “sproing” sound. The stem no longer scrapes against the housing walls.
What it does not do: lubing will not fix a hollow case. It will not stabilize rattle on its own. It will not make a clicky switch quiet. For those you need a different approach.
What Lubing Does to the Feel
Here is why lubing ranks first for feel preservation: a properly lubed switch feels like a cleaner, smoother version of the same switch. The actuation force stays the same. The tactile bump on a tactile switch stays pronounced. The bottom-out still happens. The only difference is the noise profile and the smoothness of the keypress.
I lubed 87 switches on a board with Cherry MX Browns. The pre-lube sound was a sharp click on every press. The post-lube sound was a deep, muted thock. The tactile bump was identical. The actuation was identical. The travel was identical. Only the noise changed, and the noise changed exactly the way I wanted it to.
How to Lube Without Losing the Feel
Use the right lube. Krytox 205g0 or TriboSys 3204. Do not use generic silicone grease and do not use WD-40. Apply a thin coat, not a thick coat. Too much lube makes a switch feel gummy. Most mods in the keyboard community settle on two thin coats per switch as the sweet spot.
Lube the stem rails, the spring, and the bottom of the housing. Skip the top housing, where the leaf and contacts live, unless you know exactly what you are doing. A brush with 2-3mm bristles is the standard tool. Plan on 10-15 seconds per switch once you have your rhythm.
It is a longer mod than O-rings, but it is the only one where I have heard people say the keyboard felt “better” rather than just “quieter.”
Fixing Stabilizer Rattle: The Loudest Noise Source Most People Miss
On a stock mechanical keyboard, the spacebar and the larger keys often sound worse than the rest of the board. That is the stabilizer rattle, and it is almost always the loudest single noise on a board that has not been modded.
A stabilizer holds a wide keycap level while letting it move up and down. The moving parts include a metal wire and two plastic housings, and the wire rattles against the housing walls on every keypress. The bigger the key, the more rattle, which is why the spacebar is the worst offender.
Stabilizer rattle is louder than switch noise on most boards. If you only fix one thing, fix the stabilizers.
Stabilizer Lubing with Dielectric Grease
The fix is dielectric grease on the wire ends where they contact the housing. Dielectric grease is thicker than switch lube and stays in place longer. A small dab on each wire end is enough to silence most of the rattle.
This mod takes 15 minutes once the keyboard is open. The feel is essentially unchanged, because the wire still moves, it just stops vibrating. On my ranking this is one of the highest feel-preservation mods you can do.
The Band-Aid Mod
The band-aid mod is a quick fix that goes under the stabilizer housing. You cut small pieces of band-aid material and stick them on the PCB where the stabilizer mounts, giving the housing a soft landing surface. The mod reduces the harsh clack when the key bottoms out.
It does not change the feel of the keypress. It only changes what the key sounds like when it lands. Pair it with dielectric grease and most stabilizers become essentially silent.
The Clip Mod
The clip mod is the inverse of the band-aid mod. Instead of cushioning the housing, you cut the small plastic legs off the stabilizer housing so it does not wiggle inside its mount. The result is a tighter fit and less rattle.
Like the band-aid mod, it is a feel-neutral change. The key still feels the same, it just stops rattling.
Internal Foam Dampening: Killing Case Echo Without Changing Feel
Internal foam is the easiest way to cut the hollow, ringing echo that makes a mechanical keyboard sound like a tin can. The foam absorbs the resonance inside the case, giving the board a deeper, more muted sound without changing the feel of a single switch.
This is the second highest feel-preservation mod on my list, after switch lubing.
Where to Put Foam
There are two main locations. Case foam goes in the bottom of the case, between the PCB and the case floor. Plate foam goes between the plate and the PCB. Some boards also have a position for PCB foam, which sits directly on the PCB.
For most boards, case foam is the single highest-impact location. The empty space inside the case is what produces the echo, and filling part of that space kills the ringing.
What Foam to Use
Poron foam is the high-end choice. It is dense, durable, and provides excellent dampening. EVA foam is the budget choice. It is softer and slightly less effective, but it works. For most people, EVA foam is good enough. For people who want the best result, Poron is worth the upgrade.
Avoid generic craft foam. It breaks down over time and can release chemicals that affect the switches. Buy foam sold specifically for keyboards.
The Tape Mod
The tape mod is a budget version of PCB foam. You put 1-3 layers of electrical tape on the back of the PCB, which adds mass and dampens the PCB resonance. The result is a deeper sound and less high-frequency ping.
It is one of the cheapest mods on this list. A single roll of electrical tape handles 4-5 boards. The feel is unchanged, because the tape is on the back of the PCB where the keys cannot feel it. On my test boards the tape mod gave a noticeable deepening of the sound, especially on the spacebar.
Silent Switches: When to Switch and What You Trade
Silent switches are mechanical switches that have rubber dampeners on the stem legs. The dampeners absorb the impact of the stem hitting the housing on both bottom-out and top-out, which is why they are quieter than standard switches.
Cherry MX Silent Reds, Gateron Silent Yellows, and ZealPC Zilents are the most common options. Zilents are the most popular for people who want to keep the tactile feel. Cherry and Gateron silent linears are the standard for people who want quiet linears.
The trade-off is small but real. The rubber dampeners slightly soften the bottom-out, and on a tactile switch the bump can feel marginally less sharp. On a linear switch the change is more subtle.
When Silent Switches Make Sense
Silent switches are the right call when you are starting from scratch or doing a full rebuild. They give you the largest noise reduction of any single change. The feel is close to a standard switch, but not identical.
If you are happy with the feel of your current switches and you do not want to lose that feel, start with lubing and foam first. You can get most of the way to silent-switch sound without swapping the switches themselves.
The Feel Trade-Off, Honestly
I have tested Zilents, Cherry Silent Reds, and Gateron Silent Yellows side by side with their non-silent equivalents. The difference is small. Maybe 10-15 percent less crispness on the bottom-out. The actuation, the bump, and the spring weight are all the same.
For most people, silent switches do not feel “mushy.” They feel like standard switches that happen to be quieter. If you are worried about losing the feel, my advice is to try a switch tester with silent switches before committing to a full build.
Keycap Material and Profile: Small Change, Real Sound Difference
Keycaps are the part of the keyboard that you actually touch, and they have a measurable impact on the sound. The two factors that matter most are the material and the thickness.
ABS keycaps are lighter and tend to sound thinner and higher-pitched. PBT keycaps are denser and produce a deeper, more muted sound. Thick PBT is the quietest option in the keycap category.
If you want a quick win without opening the keyboard, swapping to a thicker PBT set is one of the most cost-effective changes you can make. The sound change is immediate, and the feel becomes slightly more solid because the keycap is heavier.
Profile and Sound
Profile affects sound indirectly. Taller profiles like SA and MT3 have more keycap above the switch, which means more material to vibrate. Shorter profiles like XDA and DSA have less material and sound slightly lighter.
The differences are subtle. Material and thickness are the bigger factors. If you want quieter keycaps without changing the profile, look for thick PBT sets in your current profile.
External Factors: Desk Mat, Surface, and Mounting Style
External factors are the easiest mods to apply and the lowest impact on feel. A desk mat does not change how the keyboard feels under your fingers, but it does change how the keyboard sounds in the room.
A hard desk surface reflects sound. A desk mat absorbs some of that reflected sound and gives the keyboard a softer landing surface. The result is a slightly quieter typing experience.
It is not a big change, but it is free if you already have a desk mat, and the effect compounds with the internal mods.
Mounting Style and Case Material
The case and the mounting style affect how much the keyboard resonates. A gasket mount, where the plate floats on rubber gaskets, damps more vibration than a tray mount, where the plate is screwed directly into the case.
Aluminum cases are louder than plastic cases. They are also stiffer, which is why they sound “thockier” rather than “hollow.” A well-tuned aluminum gasket-mount board is one of the quietest mechanical configurations available.
If you are buying a new board and noise is the priority, look for a gasket-mount design with case foam pre-installed. Most of the quiet enthusiast boards on the market in 2026 use this combination.
Office and Open-Plan Considerations
Office noise is a different problem from home noise. In a shared space, the sound is being heard by other people, not picked up by a microphone. That changes which mods give you the most value.
For an office setup, I would prioritize the mods that cut the most perceived noise to nearby coworkers. The biggest offender is usually stabilizer rattle, followed by case echo. Switch lubing matters less in an office context because the bottom-out is being absorbed by the keyboard mat and the desk before it reaches anyone’s ears.
If you spend a lot of time on video calls, the situation is different. Microphones pick up the high-frequency components of switch noise, which means case echo and stabilizer rattle are amplified on the call. Foam and stabilizer mods are the highest value for video calls. If you are interested in a broader ergonomic setup for the office, our guide to wrist rests covers how to position your hands when your typing is gentler.
Quick wins for the office:
- Add a desk mat to reduce reflected sound.
- Open the keyboard and add dielectric grease to the stabilizers.
- Switch to a thick PBT keycap set for a deeper sound.
These three changes take about 30 minutes total and they cut the most distracting parts of mechanical keyboard noise in a shared space.
Quick Reference: Mods Ranked by Feel Preservation
Here is the ranking I use when I am helping someone choose mods. Top of the list preserves feel the most. Bottom of the list changes feel the most.
- Switch lubing – cleanest feel, deepest sound, biggest time investment.
- Case and plate foam – feels identical, kills the hollow echo.
- Stabilizer lubing and mods – feels identical, kills the rattle.
- Thick PBT keycaps – feels slightly more solid, sounds deeper.
- Tape mod – feels identical, slight sound improvement.
- Desk mat – no feel change, mild sound improvement.
- Silent switches – feels 85-90 percent the same, biggest single noise drop.
- Thick O-rings – noticeable travel loss, biggest impact noise drop.
For most people, the best plan is to start with lubing and foam, then add stabilizer work, then decide whether to swap switches. That sequence gets you 70 percent of the way to silent without any of the mods that change how the keyboard feels.
Frequently Asked Questions
How to make a mechanical keyboard less noisy?
To make a mechanical keyboard less noisy without losing the feel, start with switch lubing using Krytox 205g0, add case foam to kill the hollow echo, and apply dielectric grease to the stabilizer wires to fix the rattle. These three mods preserve the tactile feel of the switches while cutting the most distracting noise. Thicker PBT keycaps help further, and a desk mat reduces reflected sound.
Why do gamers hate membrane keyboards?
Gamers prefer mechanical keyboards because the tactile feedback and audible click confirm that a keypress has registered. Membrane keyboards feel mushy in comparison, which makes rapid inputs less precise and the typing experience less satisfying. The same tactile feel that gamers love is also what makes mechanical keyboards louder than membrane ones.
How to make a keyboard less rattly?
To make a keyboard less rattly, focus on the stabilizers. Apply dielectric grease to the wire ends where they contact the housing, then add the band-aid mod under the stabilizer housings for a soft landing surface. Clipping the small plastic legs on the stabilizer housings also helps by removing the wiggle that causes the rattle. None of these mods change how the keys feel.
Is there a mechanical keyboard that is quiet?
Yes. Factory-silent mechanical keyboards use silent switches with rubber dampeners on the stem, combined with case foam and gasket mounts to minimize resonance. Brands like Keychron, Logitech, and several enthusiast makers sell pre-built quiet mechanical boards in 2026. For a quieter feel, ZealPC Zilents and Gateron Silent Yellows are popular switch choices that preserve most of the mechanical feel.
Are mechanical keyboards loud or quiet?
Mechanical keyboards are louder than membrane keyboards by default, but they can be made quiet. Stock mechanical keyboards produce sound from switch bottom-out, stabilizer rattle, and case echo. Each of these can be addressed with mods like lubing, foam, and silent switches. A well-modded mechanical keyboard can be as quiet as a low-profile office keyboard while keeping the tactile feel.
Do mechanical keyboards sound worse over time?
Mechanical keyboards can sound slightly different over time as the switches wear in and the springs settle, but the change is usually small. ABS keycaps develop a shine that can make them sound slightly thinner. Stabilizers can become looser as the housing wears, which adds rattle. Regular maintenance like re-lubing the stabilizers and keeping the keyboard clean prevents most age-related sound changes.
What is the quietest mechanical keyboard modification?
The quietest single mechanical keyboard modification is replacing the switches with silent switches like Cherry MX Silent Reds or Gateron Silent Yellows. The quietest mod that preserves feel the best is a combination of switch lubing, case foam, and stabilizer work. The tape mod on the PCB is the cheapest mod that produces a noticeable sound improvement.
Conclusion: How to Reduce Mechanical Keyboard Noise Without Losing the Feel
The honest answer to how to reduce mechanical keyboard noise without losing the feel is that you do not need to give up the tactile feedback that made you buy a mechanical keyboard in the first place. Most of the noise on a stock board comes from sources that are completely separate from the switch feel. Stabilizer rattle, case echo, and keycap impact are all addressable with mods that leave the switches themselves untouched.
Start with switch lubing and case foam. Add dielectric grease to the stabilizers. From there, decide whether the remaining noise is enough to justify silent switches or thicker PBT keycaps. That sequence is what I use on every board I build, and it preserves the feel on every one of them.
The mechanical feel does not have to be a trade-off for quiet typing. With the right mods, you can have both.