
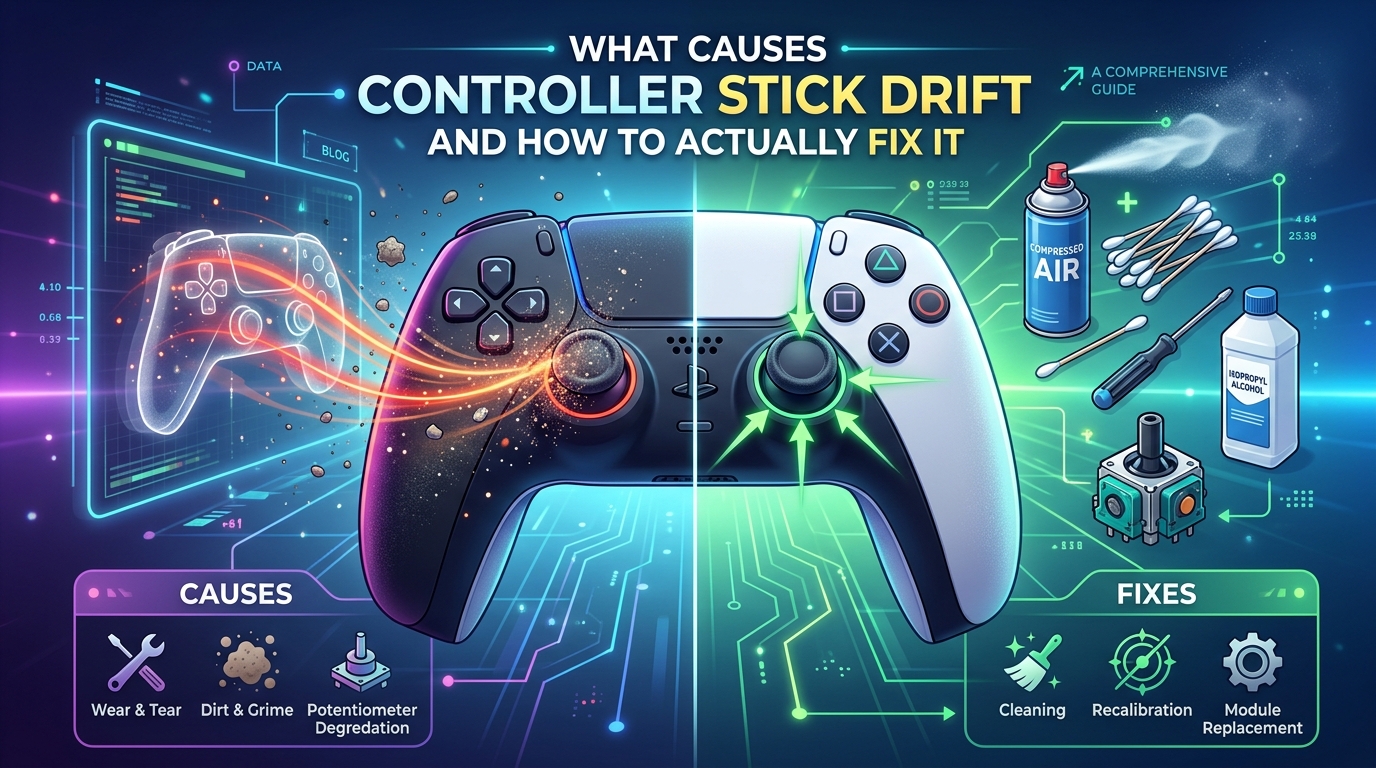
You are mid-match, lined up for the perfect shot, and your crosshair slowly slides off target on its own. No fingers on the stick. No input from you. That is controller stick drift, and it is one of the most frustrating hardware failures a gamer can face in 2026.
The good news is that stick drift is rarely a death sentence for your controller. In many cases you can fix it yourself in under five minutes with tools you already own. This guide covers every working method, ranked by difficulty and permanence, and applies equally to PS5 DualSense, Xbox Series controllers, Nintendo Switch Joy-Cons and Pro controllers, and PC gamepads.
If you want the short version: controller stick drift happens when dust, wear, or oxidation interferes with the potentiometer inside the joystick module, causing the controller to register false center-position inputs. Fix it by resetting the controller, recalibrating, cleaning the stick with compressed air or isopropyl alcohol, or, for a permanent solution, upgrading to a Hall Effect controller with contactless magnetic sensors.
We spent weeks comparing every method, scouring repair forums and Reddit threads, and testing fixes across all four major platforms. Below is the complete picture of what causes controller stick drift and how to actually fix it.
Table of Contents
What Is Controller Stick Drift?
Controller stick drift is a phenomenon where a game controller’s analog thumbstick registers movement without being touched. Your character walks, your camera pans, or your aim shifts even though your thumb is completely off the stick. These unintended signals are also called phantom inputs or ghost inputs.
Stick drift is not the same as a sticky thumbstick that fails to snap back to center. A sticky stick is a mechanical spring issue. Drift is an electrical sensing issue. The controller’s hardware incorrectly believes the stick is being pushed when it is sitting perfectly still.
Drift can appear in one direction or all directions. It may be constant, or it may trigger only in certain games where the dead zone is set tighter. Most players first notice it in first-person shooters, where even a tiny phantom input throws off aim. Racing game players notice it when their car veers on straights. Platformer fans notice it when their character slowly creeps toward a ledge.
The symptom is always the same: the controller sends a movement signal the player never intended. Understanding what causes that false signal is the first step to fixing it.
What Causes Controller Stick Drift?
Stick drift has five main root causes: dust and debris buildup, potentiometer wear, oxidation of internal contacts, physical damage to the joystick module, and calibration or firmware errors. Most drifting controllers suffer from at least two of these at once.
Every modern analog stick (except Hall Effect models) uses the same basic mechanism to sense position. Understanding that mechanism explains why drift is so common and why some fixes only work temporarily.
Dust and Debris Buildup
The number one cause of controller stick drift is dust, skin cells, pet hair, and food crumbs working their way inside the joystick module. Every thumbstick has a small gap where the shaft enters the controller housing. That gap is wide enough for microscopic particles to enter.
Inside the module, those particles land on the resistive track of the potentiometer. The track is what the controller reads to determine stick position. Even a single grain of dust on that track changes the electrical resistance, and the controller interprets that change as movement.
This is why drift often appears gradually. It builds up over weeks and months of play. Gamers who eat while playing, have pets, or live in dusty environments tend to develop drift faster. Compressed air and isopropyl alcohol dislodge this debris, which is why cleaning is the first fix most people should try.
Potentiometer Wear (Why Standard Controllers Eventually Drift)
To understand why potentiometer wear causes permanent drift, you need to know how an analog stick actually works. Inside each joystick module are two small potentiometers, one for the horizontal axis and one for the vertical. Each potentiometer is a tiny variable resistor.
Each potentiometer contains a resistive track, a thin strip of carbon or conductive plastic printed onto a small board. A spring-loaded contact called a wiper slides across that track as you move the stick. The controller measures the voltage at the wiper’s position to figure out where the stick is.
Every time you move the stick, the wiper scrapes across the resistive track. Over thousands and thousands of movements, that scraping physically wears away the carbon coating. The center position gets worn first because that is where the stick sits most of the time.
Once the resistive track wears thin, the voltage at center drifts away from the calibrated value. The controller no longer reads a clean center signal. It interprets the worn spot as a slight push in one direction. This is mechanical, electrical drift, and it cannot be cleaned away. The potentiometer is permanently degraded.
This is also why drift often appears just after warranty expires. Standard potentiometer-based joystick modules are rated for roughly 500,000 to 2 million cycles. Heavy gamers can hit those numbers in 6 to 12 months. The component is, by design, a wear part.
Oxidation and Corrosion
The third major cause is oxidation. The metal contacts inside the potentiometer, including the wiper and the connection points on the circuit board, are exposed to air and humidity. Over time, a thin layer of oxidation forms on those metal surfaces.
Oxidation acts as an insulator. It changes the electrical resistance between the wiper and the track, which the controller reads as a false stick position. This is why drift sometimes appears in controllers stored in humid environments, even if they have barely been used.
Isopropyl alcohol can dissolve light oxidation and restore the connection, which is one reason alcohol cleaning works better than compressed air for stubborn drift. Heavily oxidized contacts, however, need physical replacement.
Physical Damage and Spring Fatigue
Drops, hard clicks, and aggressive stick clicks all damage the joystick module. The internal spring that returns the stick to center can weaken or bend. The plastic housing can crack. The wiper can be knocked out of alignment with the resistive track.
Spring fatigue is a slower failure. Every time the stick returns to center, the spring compresses. After years of use, the spring loses tension and no longer returns the stick to a perfect zero position. The stick might look centered visually but actually sit a fraction of a millimeter off, enough to register drift.
If your controller has been dropped, the module itself may have cracked solder joints where it connects to the main board. Those hairline cracks cause intermittent electrical connections that produce random drift-like inputs.
Calibration and Firmware Errors
Not all drift is hardware. Sometimes the controller’s calibration data gets corrupted or out of sync. Calibration is the process where the controller learns what raw sensor values correspond to a centered stick. If that calibration drifts, the controller can register false center-position inputs even on perfectly healthy hardware.
Firmware bugs can cause the same effect. A botched firmware update can leave the controller misreading its own potentiometer values. Outdated firmware may also fail to apply the correct dead zone, allowing tiny sensor noise to pass through as inputs.
Software-caused drift is the easiest to fix. A reset, recalibration, or firmware update usually clears it. This is why you should always try software fixes before opening your controller.
Quick-Reference: Fix Methods Compared
No single fix works for every case of controller stick drift. The right method depends on what caused the drift in the first place. Here is how the main fix methods stack up against each other.
Controller Reset. Difficulty: trivial. Cost: free. Time: 30 seconds. Permanence: low. Fixes software glitches only. Try this first because it costs nothing.
Firmware Update. Difficulty: trivial. Cost: free. Time: 5 minutes. Permanence: low to medium. Fixes drift caused by known firmware bugs.
Compressed Air Cleaning. Difficulty: easy. Cost: under $10 for a can. Time: 2 minutes. Permanence: low to medium. Fixes dust-caused drift temporarily.
Isopropyl Alcohol Cleaning. Difficulty: easy. Cost: under $5. Time: 10 minutes including drying. Permanence: medium. Fixes dust and light oxidation.
The 10-Second Pressure Technique. Difficulty: easy. Cost: free. Time: 10 seconds. Permanence: low. Reddit favorite for temporary relief.
Dead Zone Adjustment. Difficulty: easy. Cost: free. Time: 2 minutes. Permanence: hides drift, does not fix it. Useful for buying time.
Joystick Module Replacement. Difficulty: hard (requires soldering). Cost: $8 to $15 for the part. Time: 1 to 2 hours. Permanence: high, but uses another potentiometer module that will eventually drift again.
Hall Effect Joystick Upgrade. Difficulty: hard (requires soldering) or buy a Hall Effect controller. Cost: $12 for the module, $50 to $200 for a full Hall Effect controller. Time: 1 to 2 hours for the mod, instant if buying new. Permanence: effectively permanent, no physical contact to wear out.
How to Fix Controller Stick Drift: Software Methods
Start with software fixes. They are free, take minutes, and rule out non-hardware causes before you start disassembling anything. Work through these in order, testing your sticks after each step.
Step 1: Reset Your Controller
A soft reset clears temporary glitches. A hard reset restores factory calibration data. Always try both.
PS5 DualSense: Look for the small reset button on the back of the controller near the L2 shoulder button. Use a straightened paperclip to press and hold it for 5 seconds while the controller is on. Then connect the controller to the PS5 with a USB cable and press the PS button to pair it again.
Xbox Series and Xbox One: Hold the Xbox button for 6 seconds to power the controller off. Wait 10 seconds, then press the Xbox button to power it back on. For a deeper reset, remove the batteries, hold the Xbox button for 15 seconds to drain residual charge, then reinsert the batteries and re-pair.
Nintendo Switch Joy-Cons and Pro Controller: System Settings, then Controllers and Sensors, then Disconnect Controllers. Hold the sync button on each controller until the lights stop flashing, then re-pair them.
PC controllers: Disconnect the controller, uninstall it in Windows Device Manager, restart your PC, and reconnect. For Bluetooth controllers, unpair and re-pair them.
Step 2: Recalibrate the Sticks
If a reset does not help, recalibrate the sticks manually. This re-teaches the controller where the true center is.
PS5: The PS5 does not expose a manual stick calibration tool in the system menu, but resetting the controller as described above forces a recalibration on re-pairing. Third-party tools like DualSenseX on PC offer deeper calibration if you connect the controller over USB.
Xbox: The Xbox Accessories app (free from the Microsoft Store) includes a calibration wizard under the Configure tab. Follow the on-screen prompts to rotate each stick in a full circle and release to center.
PC: Windows Game Controllers (press Windows key, type joy.cpl) lets you see raw stick values. If the crosshair does not sit perfectly centered when the stick is released, calibration is off. Use the Settings, Calibrate wizard to walk through recalibration.
Step 3: Update Firmware
Outdated firmware is a known cause of drift on multiple platforms, especially right after console updates.
PS5: Settings, Accessories, Controllers, Wireless Controller Device Software. The PS5 installs firmware updates silently in the background, but manually checking ensures you have the latest build.
Xbox: Open the Xbox Accessories app while the controller is connected over USB. If an update is available, the app prompts you to install it. Keep the controller plugged in until the update finishes.
Switch: System Settings, Controllers and Sensors, Update Controllers. The console updates each paired controller individually.
Step 4: Adjust Dead Zone Settings
The dead zone is a small range of stick movement the controller ignores. If your dead zone is set too small, even tiny phantom inputs register as movement. Increasing the dead zone can mask mild drift without fixing the underlying hardware problem.
Adjusting the dead zone is a workaround, not a repair. It reduces stick sensitivity, which hurts precision in competitive games. Use it as a stopgap while you decide whether to clean, repair, or replace the controller.
Per-console dead zone: Some consoles and controllers let you adjust the inner dead zone globally. The Xbox Accessories app on Series X and S allows custom profiles with adjustable dead zones. PS5 does not expose a system-level dead zone, but many games do.
Per-game dead zone: Most competitive shooters include a dead zone or stick sensitivity setting in the options menu. In Call of Duty, look under Controller Options for Left Stick and Right Stick Dead Zone. In Fortnite, the setting is under Wireless Controller options. Raising the dead zone by 5 to 10 percent often eliminates visible drift.
Racing games: Titles like Forza Horizon and Gran Turismo include steering dead zones. If your car veers on straights, increase the steering center dead zone to absorb the drift.
How to Fix Controller Stick Drift: Physical Methods
If software fixes do not solve the drift, the problem is inside the joystick module. Physical cleaning methods remove the dust, debris, and oxidation causing the false signals. These fixes take minutes and require only basic supplies.
The 10-Second Pressure Technique
This is the fix Reddit users swear by and most major guides gloss over. It takes 10 seconds and costs nothing, so there is no reason not to try it first.
Push the drifting stick gently to one side, then rotate it in a slow, full circle while keeping light pressure. Repeat in the opposite direction. The idea is to wipe the wiper across the entire resistive track, dislodging dust from the worn center spot and spreading any debris away from the active contact zone.
Many Reddit users in r/DualSense and r/playstation report that this technique temporarily clears drift for hours or even days. It works because most drift is caused by debris sitting on the center position. Rotating the wiper across the full track physically pushes that debris aside.
This is not a permanent fix. The debris is still inside the module and will settle back. But it is the fastest possible relief and a useful diagnostic. If pressure rotation clears your drift, you have confirmed the cause is debris, and a deeper cleaning will help.
Cleaning with Compressed Air
Compressed air is the second-easiest physical fix. It works for dust and loose debris that has not yet bonded to the resistive track.
Step 1: Power off the controller and remove any batteries.
Step 2: Pull the stick away from the controller body to expose the gap where the shaft enters the housing.
Step 3: Insert the compressed air straw into that gap at an angle. Do not push it in forcefully or you may damage the dust seal.
Step 4: Spray short 1-second bursts while slowly rotating the stick in a full circle. Repeat for 10 to 15 seconds.
Step 5: Let the controller sit for 5 minutes to allow any moisture from the propellant to evaporate. Test the sticks.
Never shake the can while spraying. The propellant can spray as liquid, which leaves residue inside the module. Always hold the can upright.
Cleaning with Isopropyl Alcohol
Isopropyl alcohol (90 percent or higher) is the most effective non-invasive cleaning method. It dissolves oxidation and bonded grime that compressed air cannot reach.
Step 1: Power off the controller and disconnect it from any device.
Step 2: Dip a cotton swab or use an eyedropper to apply 2 to 3 drops of isopropyl alcohol directly into the base of the drifting stick, where the shaft meets the housing.
Step 3: Move the stick in slow circles for 30 seconds to work the alcohol inside the module and across the potentiometer track.
Step 4: Let the controller dry for at least 15 minutes, or up to an hour if you applied several drops. Isopropyl alcohol evaporates completely, but water-based contaminants take longer.
Step 5: Test the sticks. Repeat once if drift persists.
Use 90 percent or higher isopropyl alcohol. Lower concentrations contain too much water and can damage the circuit board. Never use rubbing alcohol with additives, and never submerge the controller.
Alcohol cleaning typically lasts weeks to months depending on how fast dust reaccumulates. It is the best non-permanent fix available, but the drift will eventually return because the underlying potentiometer wear remains.
Advanced Fix: Replacing the Joystick Module
When cleaning no longer works, the potentiometer is permanently worn and the only fix is replacing the joystick module itself. This is advanced repair territory and requires soldering.
You need a few tools before starting: a Phillips screwdriver sized for controller screws (usually PH00 or PH1), a plastic spudger for prying clips, a soldering iron with a fine tip, solder wick or a solder sucker, replacement joystick modules, and optionally flux and tweezers.
Replacement joystick modules cost $5 to $15 each and are sold online under names like ALPS RKJXV or generic equivalents. Verify the exact module for your controller model before buying. PS5 DualSense, Xbox Series, and Switch Pro all use different physical modules.
The basic replacement process is the same for most controllers. Open the controller shell, disconnect the battery and ribbon cables, locate the joystick module on the circuit board, desolder the 14 or so pins holding the old module in place, remove the old module, solder the new module in, reassemble, and recalibrate.
If you have never soldered before, this is not the project to learn on. The pins on joystick modules are tightly packed and the circuit board can be damaged by overheating. Practice on scrap electronics first, or watch multiple video walkthroughs for your specific controller model.
A popular upgrade at this stage is replacing the worn potentiometer module with a Hall Effect joystick module. This takes the same soldering effort but uses contactless magnetic sensing that will not drift from physical wear. Several aftermarket kits are available for PS5, Xbox, and some Switch controllers.
Professional repair shops charge roughly $30 to $50 for joystick replacement, which is often close to the cost of a new controller. If you are paying for labor, ask whether they install standard potentiometer modules or Hall Effect modules. The Hall Effect upgrade is usually worth the small price difference.
Hall Effect Controllers: The Permanent Solution
Hall Effect controllers use contactless magnetic sensors instead of physical potentiometers. A small magnet sits inside the joystick shaft, and a Hall Effect sensor on the circuit board detects the magnetic field to determine position. Because nothing physically touches anything else, there is no wear track to degrade.
This is the same technology used in high-end racing simulator pedals and aircraft joysticks. It is the only technology that effectively eliminates potentiometer-based drift permanently. A Hall Effect controller can still drift if the magnet or sensor is damaged, but under normal use the failure rate is a tiny fraction of what potentiometer-based sticks see.
Major controller manufacturers have been slow to adopt Hall Effect sensors, partly because the components cost a few dollars more per unit and partly because potentiometer modules have a predictable lifespan that drives replacement sales. Third-party brands have filled the gap.
If you game heavily and are tired of replacing drifting controllers, a Hall Effect controller is the most cost-effective long-term solution. Even at a higher upfront price, it outlasts multiple standard controllers that would each develop drift within a year or two.
For technically inclined gamers, Hall Effect joystick modules can also be soldered into existing controllers as an upgrade, giving you drift-proof sticks in a shell you already own.
Repair vs Replace: Cost Breakdown
One of the most common questions on Reddit repair forums is whether it makes financial sense to fix a drifting controller or just buy a new one. The answer depends on what is causing the drift and what kind of controller you own.
DIY cleaning. Effectively free if you already own compressed air or isopropyl alcohol. Always try this first.
DIY joystick replacement. About $8 to $15 for the replacement module plus your time. Requires soldering skill. Worth it if you already own the tools.
Professional repair. Typically $30 to $50 for a standard joystick swap. Repair shops can often install Hall Effect modules for a small upcharge. Compare this to the cost of a new first-party controller.
New standard controller. Retail price for a new DualSense or Xbox Series controller. If drift is going to recur within a year on the same potentiometer technology, this is a repeating cost.
New Hall Effect controller. Higher upfront cost than a standard controller but eliminates the recurring drift problem. Over a three to five year horizon, this is usually the cheapest path for heavy gamers.
As a rule of thumb: if cleaning fixes the drift, keep the controller. If the potentiometer is worn out and you cannot solder, compare professional repair cost to the price of a new controller. If repair is more than 60 percent of replacement cost, replacing is usually the better value, especially if you upgrade to Hall Effect.
Warranty Coverage and Consumer Rights
Before opening your controller, check whether it is still under warranty. Sony, Microsoft, and Nintendo all offer one-year limited warranties covering manufacturing defects, which includes drift caused by faulty components.
The catch is that drift often appears just after the 12-month warranty expires, which is a source of frustration many Reddit users have raised. If your controller is within warranty, contact the manufacturer for a repair or replacement rather than opening it yourself. Opening the controller voids the warranty in most cases.
In some regions, consumer protection laws extend beyond the manufacturer warranty. The UK, EU, and parts of Australia have statutory rights that cover goods expected to last longer than the warranty period. If you bought an expensive controller and it developed drift within two years, you may have a valid claim against the retailer even after the manufacturer warranty lapses.
Document the drift with a short video showing the unintended movement. Keep your proof of purchase. These strengthen any warranty or consumer-rights claim.
How to Prevent Controller Stick Drift
Prevention is cheaper than repair. A few habits dramatically extend the life of a potentiometer-based controller.
Keep dust and food away. Most drift is caused by debris entering the joystick module. Do not eat while playing, store controllers in a drawer or cabinet when not in use, and keep pets away from gaming setups. A clean environment is the single biggest predictor of long controller life.
Store controllers properly. Do not leave controllers on the floor, in direct sunlight, or in humid rooms. Avoid wrapping the cable tightly around the controller, which stresses internal connections. Use a controller stand or a dedicated storage case.
Avoid clicking the thumbsticks. Many games map sprint or melee to L3 and R3, which means you click the sticks hundreds of times per session. Each click stresses the joystick module and the wiper. Remap those functions to shoulder buttons or triggers in games that allow it.
Do not grip the sticks too hard. Excessive force on the thumbstick increases wear on the potentiometer track. A light touch extends component life.
Clean the sticks regularly. A 10-second compressed air burst around each stick every couple of weeks prevents dust buildup before it causes drift.
Avoid humidity and temperature swings. Oxidation accelerates in humid environments. If you store controllers in a basement or garage, consider a dehumidifier or move them to a climate-controlled room.
Consider Hall Effect from the start. If you are buying a new controller and drift has been a recurring problem for you, skip the potentiometer technology entirely. Hall Effect controllers cost more upfront but eliminate the prevention cat-and-mouse game.
FAQs
Can stick drift actually be fixed?
Yes, most stick drift can be fixed. Software-caused drift responds to resets and firmware updates. Dust-caused drift responds to compressed air or isopropyl alcohol cleaning. Potentiometer wear requires replacing the joystick module or upgrading to Hall Effect. Only a small fraction of drift cases are truly unfixable.
How do you fix stick drift on a controller?
Start with a controller reset, then recalibrate the sticks, update firmware, and clean around the joystick with compressed air or 90 percent isopropyl alcohol. If drift persists, try the 10-second pressure rotation technique. For permanent drift caused by potentiometer wear, replace the joystick module or upgrade to a Hall Effect controller.
Is controller stick drift permanent?
It depends on the cause. Drift from dust and oxidation is temporary and responds to cleaning. Drift from worn potentiometers is permanent on standard controllers because the resistive track has physically degraded. The only permanent fix for worn potentiometers is replacing the joystick module or switching to Hall Effect technology.
Can stick drift be unfixable?
Stick drift becomes unfixable when the joystick module is physically cracked, the circuit board has damaged traces, or the controller has been exposed to liquid that corroded the contacts. In those cases the repair cost exceeds the value of the controller and replacement is the only practical option.
Why does stick drift happen after less than a year of use?
Standard potentiometer-based joystick modules are rated for roughly 500,000 to 2 million movement cycles. Heavy gamers, especially competitive FPS players, can hit those numbers in 6 to 12 months. Dusty environments and aggressive play accelerate wear further.
Does compressed air fix stick drift permanently?
No. Compressed air dislodges loose dust and debris, which clears drift temporarily, but the potentiometer is still worn and dust will reaccumulate. Cleaning typically lasts weeks to months. Only replacing the joystick module or switching to Hall Effect provides a long-term fix.
Are Hall Effect controllers worth it for drift?
For gamers who have experienced recurring drift, yes. Hall Effect controllers use contactless magnetic sensors that do not wear out, eliminating the primary cause of stick drift. They cost more upfront but outlast multiple standard controllers that would each develop drift.
Is controller stick drift covered under warranty?
Sony, Microsoft, and Nintendo all cover manufacturing defects including drift under their one-year limited warranties. Contact the manufacturer for a free repair or replacement if drift appears within the warranty period. Some regions also have consumer protection laws extending coverage beyond one year.
Conclusion
Controller stick drift is caused by dust, potentiometer wear, oxidation, physical damage, or software errors. Most cases are fixable at home with a reset, recalibration, firmware update, compressed air, or isopropyl alcohol cleaning. The 10-second pressure technique is a free, fast fix worth trying before anything else.
When cleaning no longer works, the potentiometer is permanently worn. At that point your options are soldering in a replacement module, paying for professional repair, or upgrading to a Hall Effect controller with contactless magnetic sensing. Hall Effect is the only technology that effectively eliminates drift long-term.
Work through fixes in order of cost and difficulty. Most drifting controllers can be saved without buying a replacement. Knowing what causes controller stick drift and how to actually fix it puts you back in control of your hardware instead of replacing it on a manufacturer’s schedule.