
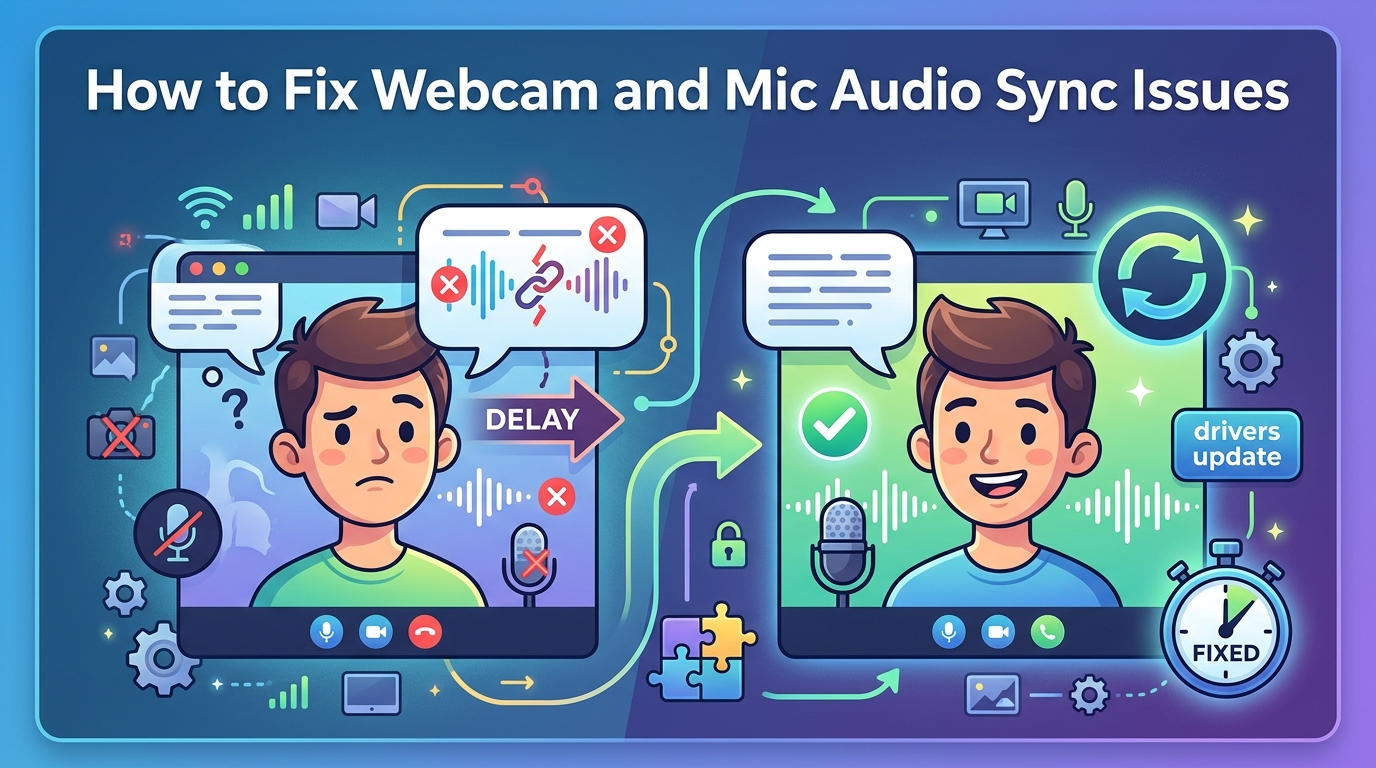
Audio drift between your webcam and microphone is one of the most frustrating problems in video production. You hit record, deliver a clean performance, and discover that your lips move 300 milliseconds after your voice comes through. Sometimes the gap stays steady, and sometimes it keeps growing the longer you record. I have lived through this exact pain with my own streaming setup, and I built this guide so you do not have to spend weeks digging through forum threads. By the end, you will know how to fix webcam and mic audio being out of sync while recording on Windows, Mac, OBS, Camtasia, and Zoom, and you will know how to keep the drift from coming back next session.
This guide is built from real forum reports (including the long-running OBS facecam sync thread) and from hands-on testing across OBS Studio, Camtasia, Zoom, and Mac utilities. Where the answer is “set your framerate to 59.94 instead of 60,” I will show you exactly where to click. Where the answer is “swap your USB webcam for an HDMI capture path,” I will explain when that is worth it and when it is overkill. Let’s get your audio and video locked together.
Table of Contents
What Causes Webcam and Microphone Audio to Go Out of Sync
Audio and video desync happens because your microphone and your camera travel through different hardware and software pathways. Each pathway adds its own processing delay, called latency, and those delays are rarely identical. Your webcam might buffer frames for 80 milliseconds while your USB microphone delivers audio in 20 milliseconds, so the two streams end up offset from the moment they reach your recording software. This is the static delay problem, and it is the easier of the two to fix.
The harder problem is progressive drift, where the gap keeps growing the longer you record. A user on the OBS forum with a 2019 iMac i9, 24GB of RAM, and a Radeon Pro 580X reported that the delay between his Logitech StreamCam and his RODE NT-USB microphone grew from 300ms to 700ms to over a full second during a 35-minute stream. High-end hardware did not save him. The root cause was that he was recording at 60fps when the NTSC standard is 59.94fps, and the slight speed mismatch between video and audio playback was compounding every second.
Static Delay Versus Progressive Drift
Static delay is a fixed offset. The audio is consistently 100ms ahead of (or behind) the video for the entire recording. Progressive drift means the offset keeps growing, so a recording that starts in sync ends up badly off by the end. Distinguishing the two matters because the fixes are different. Static delay is solved by a one-time sync offset slider. Progressive drift is solved by matching your framerate to a true NTSC rate, fixing sample rate mismatches, or replacing USB bottlenecks with a more direct capture path.
Framerate Mismatch and Why 60fps Causes Drift
Most cameras and webcams advertise 24fps, 30fps, and 60fps, but those numbers are rounded. The actual NTSC standard rates are 23.976, 29.97, and 59.94 frames per second, and they exist because of how color was added to broadcast television in the 1950s. Audio, on the other hand, plays at a fixed sample rate, usually 44.1kHz or 48kHz, with no equivalent rounding. If your video plays back at 60.000fps but your audio timeline expects 59.94fps, the two will drift apart at roughly 0.1% per second. After ten minutes you are 600ms off, and the gap only gets worse. This is the single most common cause of progressive drift, and the OBS forum expert confirmed it is the reason so many streamers with flagship hardware still see sync issues.
USB Latency, Driver Issues, and System Resources
USB webcams, USB microphones, and USB capture cards all share bandwidth on the same controller. When your CPU is busy encoding video and applying effects, the USB polling cycle can stretch from 1ms to 8ms or more. That extra delay is enough to push audio out of sync, especially when combined with a microphone on a different USB bus. Driver bugs make this worse. Outdated webcam drivers, conflicting audio drivers, and broken USB drivers can each add unpredictable latency. System resource exhaustion is the third common cause: when your processor or GPU cannot keep up with both video encoding and audio processing, one stream drops frames while the other keeps going, and they desync.
How to Test If Your Audio Is Out of Sync (Clap Test)
Before you start changing settings, you need to measure the actual offset. The fastest way is the clap test. Hold an object (a book, a phone, anything solid) in front of your webcam so it is visible in the frame, then clap your hands once, sharply, so the sound of the clap lines up with the visible impact. Record five to ten seconds. Play it back. If the sound of the clap arrives at the same moment as the visual impact, you are in sync. If the sound lands before the impact, your microphone is leading the video. If it lands after, your microphone is lagging.
To measure the gap in milliseconds, open your recording in a video editor with a frame-accurate timeline. Zoom in on the clap, find the video frame where your hands make contact, then find the audio waveform peak. Count the frames between them and multiply by the frame duration. At 30fps each frame is 33.3ms, so two frames of offset equals 66.6ms. At 60fps each frame is 16.6ms, so two frames equals 33.2ms. That number is your sync offset, and you will use it in the software fixes below.
Quick Fix: Adjust Sync Offset in Your Recording Software
The fastest fix for a static delay is to add a sync offset in your recording software. This tells the program to delay either the audio or video track by a fixed amount so they line up. It will not fix progressive drift, but for one-off recordings it can save your session in under a minute.
OBS Studio Sync Offset
Open OBS Studio, click the Edit menu, then Advanced Audio Properties. Find the audio source that is out of sync (usually your microphone or webcam audio) and change the “Sync Offset” field. Enter a positive value to delay the audio, or a negative value to delay the video. The offset is in milliseconds, so the 100ms gap you measured in the clap test becomes a “Sync Offset” of 100. Click Close, then test the result with another short recording. If the gap has flipped sides, you overcorrected. Most users land on the correct value within two or three attempts.
Camtasia Audio Sync Adjustment
In Camtasia, drag both the video and audio clips onto the timeline. Click the audio clip, then look for the “Audio Sync” option in the Properties panel. You can shift the audio in 10ms increments using the arrow buttons, or type a specific value. Camtasia also has a “Sync Audio and Video” wizard that listens for a clap and aligns the tracks automatically, which works well for tutorial-style recordings.
Zoom Audio Sync Settings
Zoom does not expose a sync offset slider in its main controls, so the workaround is to use the “Use Original Sound” option in the audio settings. Enable it, then disable all of Zoom’s built-in noise suppression features. The “High fidelity music mode” under “Meeting Settings” can also help. For recorded Zoom sessions, the cleanest fix is to record the meeting locally with “Record to Computer” rather than to the cloud, because the local recording keeps the audio in the original timeline.
Fix 1: Match Framerate to Standard NTSC Rates
If your audio drifts over time, framerate is almost certainly involved. The fix is to set your recording framerate to a true NTSC rate (23.976, 29.97, or 59.94) instead of a clean 24, 30, or 60. This forces the video timeline to match the rate at which audio is sampled, eliminating the slow drift.
In OBS Studio, go to Settings, then Video, and change the “FPS Value” from 60 to 59.94. In Camtasia, open the recording settings and select “Custom framerate” then type 59.94. On your camera or webcam, dig into the video format menu. Logitech StreamCam users find this under “Video Settings” by choosing 1080p at NTSC 59.94 instead of “60.” DSLR and mirrorless cameras have the option buried in their movie mode menus, usually labeled “NTSC” or “59.94p.” The OBS forum expert specifically called out this fix and multiple users confirmed it stopped the drift within a single test recording.
Fix 2: Set the Correct Sample Rate (44.1kHz vs 48kHz)
Sample rate is how many audio snapshots your system takes per second. A mismatch between your webcam, your microphone, and your recording software forces the audio driver to resample on the fly, which adds delay and sometimes drops samples. The two safe choices are 44.1kHz (the CD standard) and 48kHz (the video production standard). Pick one and use it everywhere.
On Windows, right-click the speaker icon in your system tray, choose “Sound settings,” then “More sound settings.” Click the Playback tab, select your default device, click Properties, and switch to the Advanced tab. Uncheck “Allow applications to take exclusive control” and “Give exclusive mode applications priority,” then pick 24-bit, 48000Hz from the dropdown. Do the same for the Recording tab.
On Mac, open Audio MIDI Setup (search for it in Spotlight). Select your audio device, then choose 48000Hz from the Format dropdown. If you are using a USB microphone or audio interface, the device itself may have a hardware sample rate, so check the manufacturer’s control panel as well. In your recording software, set the project sample rate to match. OBS uses the system rate automatically. Camtasia, Premiere Pro, and DaVinci Resolve each have a project-level audio sample rate setting in their preferences or project settings.
Fix 3: Update Webcam and Audio Drivers
Outdated drivers cause sync issues in two ways. First, they ship with bugs that were later fixed in updates, and those bugs often manifest as inconsistent buffering. Second, drivers for newer devices are tuned to work with newer operating system kernels, and an old driver on a new OS can introduce timing quirks. I have personally fixed sync issues simply by updating the webcam driver, and the Camtasia support team lists it as their Option 1 recommendation.
On Windows 11, open Device Manager, expand “Cameras,” right-click your webcam, and choose “Update driver.” Repeat under “Audio inputs and outputs” for your microphone, and under “Sound, video and game controllers” for your audio interface. For best results, also visit the manufacturer’s website. Logitech users should download Logitech G Hub or Logi Tune. RODE users should install RODE Central. Elgato users should install Elgato 4K Capture Utility and Game Capture HD. On Mac, the system handles most drivers, but you should still run the manufacturer’s app to make sure the firmware on the device is current.
Fix 4: Disable Audio Enhancements in Windows
Windows audio enhancements are post-processing effects like “Loudness Equalization,” “Bass Boost,” and “Voice Cancellation.” They run on your audio stream in real time and add processing delay, which is exactly what you do not want during recording. The Camtasia support article specifically calls these out as a common cause of sync issues after recording.
To disable enhancements, right-click the speaker icon, choose “Sound settings,” then “More sound settings.” Click the Recording tab, double-click your microphone, and switch to the Enhancements tab. Check “Disable all enhancements” and click Apply. Repeat for your speakers on the Playback tab if you are monitoring audio through them. If you use a USB headset or USB microphone, the manufacturer’s driver may add its own enhancements. Open the manufacturer’s control panel (Realtek Audio Console, Nahimic, ICE Sound, and so on) and disable any “audio effects,” “3D audio,” or “acoustic enhancement” options.
Fix 5: Adjust Hardware Acceleration and GPU Settings
Hardware acceleration normally improves performance, but on weaker machines it can cause the GPU to fall behind on video encoding while the audio runs ahead. The result is exactly the kind of progressive drift we are trying to eliminate. If you have updated your drivers and matched your framerate but still see sync issues, try switching to a software encoder or to the Microsoft Basic Render adapter.
In OBS, go to Settings, then Output, and change the encoder from “Hardware (NVENC, AMF, or QuickSync)” to “Software (x264).” Software encoding is slower but it removes the GPU from the timing path. In Camtasia, go to Tools, then Options, and check “Use Microsoft Basic Render.” This forces Camtasia to draw previews on the CPU instead of the GPU, which Camtasia’s own support team recommends as Option 4 for sync issues. You can also tell Windows to use your high-performance GPU for Camtasia, OBS, and Zoom. Open Settings, then Display, then Graphics, click “Browse,” find the app, click Options, and choose “High performance.”
Fix 6: Sync Multiple Audio Sources (Camera, Mic, System)
Recording from a camera, an external mic, and system audio at the same time is the most complex sync scenario. Each source has its own clock and its own latency, so the three of them will almost never line up by default. The key is to pick one device as the master clock and route everything else through it.
The cleanest setup uses an audio interface (like a Focusrite Scarlett or RODE AI-1) as the master clock. Plug your external microphone into the interface, then route system audio through the interface using a loopback cable or a virtual audio device like VB-Cable (Windows) or BlackHole (Mac). Set the interface’s sample rate to 48kHz and lock everything else to match. Your camera audio, if you want it, should be recorded separately and aligned in post.
On Mac, the iShowU Audio Capture utility creates a virtual audio device that captures system audio without resampling. On Windows, the VoiceMeeter Banana application does the same thing and gives you a fader to balance system audio against your microphone. Both tools have their own latency, so test with the clap test before each session. Multiple users on the r/VideoEditing subreddit confirmed that running system audio through a virtual device without locking the sample rate was the cause of their drift, and the fix was matching everything to 48kHz and disabling any “auto” sample rate switching.
Fix 7: Post-Recording Sync in Your Video Editor
If you have already recorded and the audio is off, you can still fix it in post. Every major video editor has tools for sliding audio tracks to align with video, and several have automatic waveform matching.
In Adobe Premiere Pro, right-click the audio clip, choose “Modify,” then “Audio Channels.” Use the “Time Remapping” tool to stretch or compress the audio to match the video length. In DaVinci Resolve, use the “Sync Bin” feature to align clips by waveform. In Final Cut Pro, drag both clips into a project, then use the “Synchronize Clips” command (Command-Y on Mac) to auto-align by audio waveform. In Camtasia, right-click the audio track and choose “Separate Audio and Video” so you can slide the audio independently.
For the best results, record a visual sync marker at the start of every session. Snap your fingers in front of the camera, or clap once loudly, so you have a clean reference point to align to. Trying to align audio to speech is much harder because lips and voice naturally have a 100-200ms offset in real life, which is a perceptual fact rather than a sync problem.
Platform-Specific Quick Reference: OBS, Camtasia, Zoom, Mac
Here is a side-by-side summary of the best fix for each platform. Use this as a quick lookup when you know which tool you are using but do not want to read through the full section.
OBS Studio (Windows and Mac): Set framerate to 59.94 (or 29.97), set sample rate to 48kHz system-wide, and use the Advanced Audio Properties sync offset for static delays. Update the OBS install to the latest stable build, because the team fixes sync-related bugs in nearly every release.
Camtasia (Windows): Update webcam and audio drivers, reduce capture framerate, switch to Microsoft Basic Render, and disable Windows audio enhancements. If the issue persists, edit the registry key AllowMfAudioCapture as documented in the Camtasia support article.
Zoom (all platforms): Enable “Use Original Sound,” disable noise suppression, and record locally with “Record to Computer” rather than the cloud. Use high-fidelity music mode for music content.
Mac (general): Open Audio MIDI Setup and lock sample rate to 48kHz. Use iShowU Audio Capture for system audio routing. Avoid cheap USB hubs; plug webcams and microphones directly into the Mac’s own ports.
DaVinci Resolve / Premiere Pro (post-production): Use the “Synchronize” or “Merge Clips” command to align by waveform. Set the project sample rate to 48kHz and the project framerate to match your camera (23.976, 29.97, or 59.94).
Pre-Recording Checklist to Prevent Audio Sync Issues
Most sync problems are easier to prevent than to fix. Run through this ten-step checklist before every recording session and you will almost never see drift again.
- Match your camera framerate to a true NTSC rate (23.976, 29.97, or 59.94).
- Match your sample rate to 48kHz in Windows Sound settings, Mac Audio MIDI Setup, and your recording software.
- Update webcam, microphone, and audio interface drivers to the latest version.
- Disable Windows audio enhancements on every input and output device.
- Plug your webcam and microphone into separate USB buses, or use a USB hub with its own power supply.
- Close background apps that compete for CPU or USB bandwidth (browser tabs, cloud sync, antivirus scans).
- Do a 30-second clap test recording and verify the offset in your editor before starting the real session.
- If you use OBS, set the encoder to x264 software encoding for tests, then try hardware encoding for the actual recording to compare.
- If you record system audio, route it through VoiceMeeter Banana (Windows) or iShowU Audio Capture (Mac) at the same sample rate.
- Save a backup of your working settings (export the OBS profile, save the project file) so you can quickly roll back if a driver update breaks things.
Following this list once is good. Following it every time becomes second nature. I keep a printed copy next to my streaming PC for the days when I am tempted to skip the test recording.
Frequently Asked Questions
How to fix audio being out of sync?
Set your camera framerate to a true NTSC rate (59.94, 29.97, or 23.976) and lock the sample rate to 48kHz across Windows or Mac system settings, your recording software, and your audio interface. For a static delay, use the sync offset slider in OBS Advanced Audio Properties, in Camtasia’s Audio Sync settings, or in your video editor’s clip alignment tools.
Why is my screen recording audio out of sync?
Screen recording audio goes out of sync when the system cannot process video frames and audio samples at the same rate, usually because of framerate mismatch, sample rate mismatch, USB bandwidth issues, or outdated drivers. Start by setting the framerate to 59.94, the sample rate to 48kHz, and updating all drivers.
How to fix an out of sync video after recording?
Open the recording in Premiere Pro, DaVinci Resolve, Final Cut Pro, or Camtasia. Use the Synchronize Clips or Merge Clips command to align the audio track to the video track by waveform. For precise control, slide the audio in 10ms increments while watching the waveform peak align with the visual impact of a clap or finger snap recorded at the start of the session.
How to sync camera and microphone for recording?
Connect your microphone through an audio interface set to 48kHz, set your camera to record at 59.94fps, and route system audio through a virtual device (VB-Cable on Windows, BlackHole or iShowU on Mac) at the same sample rate. Do a 30-second clap test, then use the sync offset in OBS or your editor to fine-tune. For multiple audio sources, pick one device as the master clock and route every other source through it.
Final Thoughts on Keeping Your Webcam and Microphone in Sync
Fixing webcam and mic audio being out of sync while recording is a matter of understanding the two failure modes. Static delay is a calibration problem solved by a sync offset slider. Progressive drift is a clock problem solved by matching your framerate to a true NTSC rate and your sample rate across every device and application. Once you have those two settings locked, the rest of the fixes (driver updates, enhancement disables, hardware acceleration tweaks) are icing on the cake. Run through the pre-recording checklist before each session, and you will spend your time creating content instead of debugging it.