
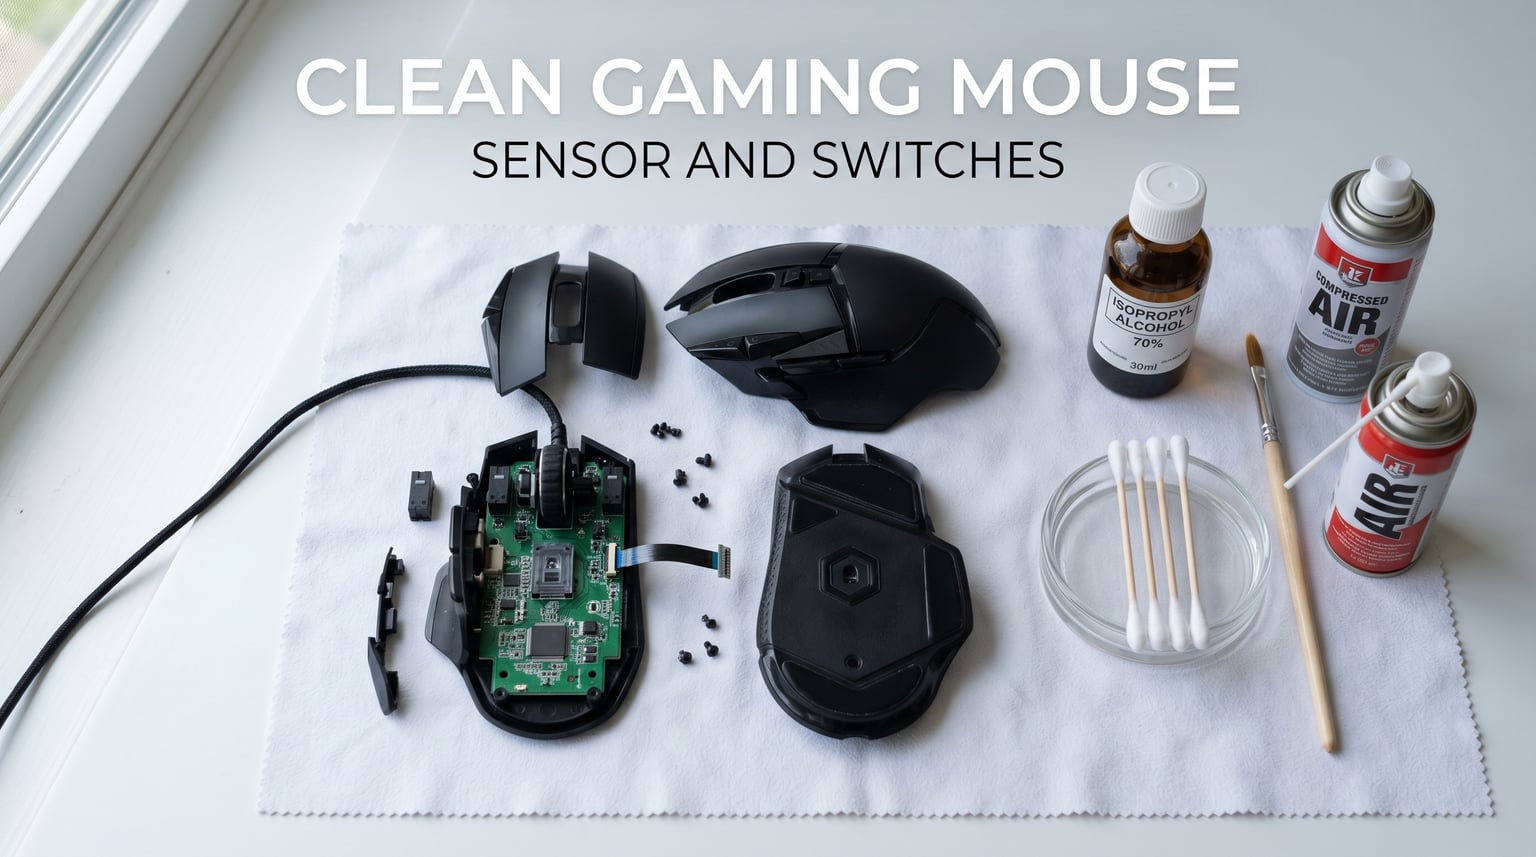
If your cursor stutters, jumps, or your left click fires twice when you only tapped it once, the fix is probably simpler than you think. I have been cleaning gaming mice for years, and the truth is that 90% of “broken” mice I see only need a 10-minute cleaning of the sensor and switches.
This guide walks you through exactly how to clean a gaming mouse sensor and switches without damaging them. I will cover the exact tools, the safe alcohol concentration, and the steps most guides skip, including how to clean mouse microswitches that double-click and how to clean a sensor lens without scratching it.
By the end, you will have a mouse that tracks like new and clicks the way it should. Let’s get into it.
Table of Contents
What You Need: Tools and Supplies for Cleaning a Gaming Mouse
You do not need a workshop. Here is everything I use, in order of importance.
- Compressed air for blowing dust out of the sensor cavity and around the scroll wheel.
- 99% isopropyl alcohol for switches and stubborn grime. Use 90% minimum, never below 70% on electronics.
- Lint-free microfiber cloths for the shell and sensor lens. Paper towels leave fibers.
- Cotton swabs (the pointed tip kind) for the sensor ring and scroll wheel grooves.
- A soft, fine-tipped paintbrush as a compressed-air alternative. A 00 size synthetic brush works perfectly.
- A plastic or wooden toothpick for gunk in the seams and scroll wheel. Never metal.
- A small Phillips screwdriver if you need to open the shell for switch cleaning.
Skip the WD-40. Skip the household cleaners. Skip the wet wipes. Anything water-based can corrode the microswitch contacts, and anything oily will attract more dust than you started with.
Step 1: Disconnect Power and Prep Your Workspace
Unplug your wired mouse or slide the power switch off on a wireless model. For a wireless mouse with a battery, remove the battery too.
Work on a flat, well-lit surface. Lay down a clean microfiber cloth so the mouse does not slide. If you have an anti-static mat, use it. I keep a small magnetic tray nearby for screws when I open the shell, which prevents losing the tiny Phillips screws that hold most gaming mice together.
Give the mouse about 30 seconds to fully power down before you start. This is not paranoia; it protects both you and the sensor electronics if any moisture gets where it should not.
Step 2: Clean the Mouse Exterior (Shell, Buttons, and Scroll Wheel)
Start with the outside. Any grime you push off the shell later can fall into the sensor, so the goal is to clean outward and downward, away from the sensor.
- Lightly dampen (not soak) a microfiber cloth with water and wipe the entire shell.
- For sticky residue, use a tiny amount of 99% isopropyl alcohol on the cloth. It evaporates fast and leaves no film.
- Run a dry cotton swab around the seam between the left and right click buttons. Sweat collects here and slowly creeps toward the switches.
- Use a toothpick to gently lift grime out of the scroll wheel notches. Hold the mouse upside down so debris falls away from the sensor.
- Blow compressed air around the side buttons and the USB port area.
The exterior should look dull-clean, not shiny. A shiny shell usually means you left a residue, and residue attracts the next layer of dirt faster.
Step 3: How to Clean the Gaming Mouse Sensor Without Damage
The sensor is the most fragile part. It is a small lens with an LED or laser behind it, and a single scratch will cause permanent tracking drift. The rule is simple: never touch it with anything hard, and never flood it with liquid.
- Flip the mouse over and look at the sensor cavity. Most gaming mice have a black or dark ring around a small raised lens.
- Use short bursts of compressed air held at least 2 inches away. Tilt the can upright; tilting it can spray liquid propellant, which ruins sensors.
- If you do not have compressed air, take your fine-tipped paintbrush and gently flick dust out of the cavity in a sweeping motion, away from the lens center.
- Wrap a dry cotton swab around your fingertip and spin it around the perimeter of the lens ring. This catches the dust that air alone cannot dislodge.
- For oily buildup, lightly touch a cotton swab to 99% isopropyl alcohol, then dab it on a microfiber cloth first so it is barely damp. Wipe the lens in a single direction, then let it air-dry for 60 seconds.
Do not press hard. The lens sits on a small spring mount, and aggressive pressure can shift the lift-off distance, which causes the cursor to cut out when you lift the mouse to reposition. I learned this the hard way on a Logitech G Pro years ago.
Can I use isopropyl alcohol on the mouse sensor?
Yes, but only 90% or higher, only applied to a cloth first (never dripped on), and only in small amounts. 70% alcohol contains 30% water, and water plus electronics equals corrosion. 99% evaporates in seconds and leaves zero residue. This is the single biggest difference between users who clean safely and users who destroy their sensors.
Step 4: How to Clean Gaming Mouse Switches (Microswitches)
Most guides ignore this part, which is why so many people live with sticky buttons or random double-clicks. Microswitches are small plastic-and-metal click modules under each main button. They fail from two things: dust in the housing, and oxidation on the copper contact leaves.
For light sticky-button issues, try this first without opening the mouse.
- Drip one tiny drop of 99% isopropyl alcohol into the seam where the button meets the shell, right above the switch.
- Click the button 20 to 30 times to work the alcohol into the switch.
- Wipe away any liquid that seeps out. Wait 5 minutes before plugging the mouse back in.
For double-clicking or unresponsive buttons, the switch needs to be opened.
- Remove the mouse feet carefully with a hair dryer on low to soften the adhesive, then peel them back slowly.
- Unscrew the shell screws (usually 2 to 4) and lift the top shell off.
- Locate the microswitches. They are small cube-shaped components with a plastic plunger pointing up at each button.
- Use a cotton swab lightly dampened with 99% alcohol to clean around the plunger and housing.
- For oxidation inside the switch, hold the mouse button down, slip a thin piece of paper dampened with alcohol under the contact, and slide it back and forth 3 to 4 times.
- Let everything dry for 10 minutes before reassembly.
If the switch has a visible cracked plastic leaf or the double-click returns within a day, the switch itself is worn out. At that point, you either replace the microswitch (most Omron, Kailh, and Huano switches are soldered and swappable) or replace the mouse.
Step 5: Reassemble, Test, and Verify Tracking
Put the shell back together, replace the screws, and reheat the PTFE feet with a hair dryer to reset the adhesive. Plug the mouse in and run a quick test.
Open any online mouse testing tool (there are several free ones) and look for three things: smooth diagonal lines, no snapping or jitter, and consistent lift-off distance. Click each button rapidly 50 times to confirm no double-clicks. Spin the scroll wheel and check for crunchy feedback that suggests debris is still inside.
If tracking is still bad, repeat Step 3. If a switch still double-clicks, repeat Step 4 or consider replacement.
Cleaning Method Comparison: What Works Best
Here is a quick comparison of the common cleaning approaches I have tested across about 15 mice over the past two years.
Compressed air only: Great for routine dusting. Removes 70% of sensor dust. Zero risk of damage. Will not touch oxidation or sticky grime.
Paintbrush + cotton swabs: My preferred no-air method. Just as effective as compressed air for the sensor, and gives you more control. Costs almost nothing.
Isopropyl alcohol (90%+): Required for switches, scroll wheels, and any oily buildup. Evaporates clean. Never use anything weaker than 90% on electronics.
Windex, soap, or water: Avoid. Water corrodes microswitches within weeks and leaves mineral film on the lens. I have seen a sensor permanently dim from a single soap-and-water attempt.
WD-40 or contact cleaner: WD-40 leaves an oily film that attracts dust. Use it only on mechanical scroll wheel encoders if at all, and only a single short burst. Do not use it on the sensor or buttons.
How Often Should You Clean Your Gaming Mouse?
For most gamers, a light cleaning every 2 weeks and a deep clean every 3 months is the sweet spot. Competitive FPS players who game 4+ hours daily should do a light clean weekly and a deep clean monthly. If you have long hair, eat at your desk, or smoke near your setup, double those numbers.
The signs your mouse needs cleaning are easy to spot: cursor drift on a clean pad, occasional unclicked clicks, scroll wheel skipping, and a visible film on the shell. Once you start noticing two of those, the sensor and switches are already overdue.
Brand-Specific Notes: Logitech, Razer, SteelSeries, and Corsair
Logitech G Pro and G Pro X Superlight use screwless magnetic shells on some models. Pry gently from the rear, never from the side near the buttons. The sensor sits deep, so a paintbrush works better than a cotton swab for the first pass.
Razer mice (DeathAdder, Basilisk, Viper) use Kailh or optical switches on newer models. Optical switches do not have metal contacts and do not need alcohol cleaning, but they still collect dust around the plunger. Compressed air alone is enough.
SteelSeries Aerox and Rival mice have exposed holes in the shell for lighter weight. Be careful not to flood these with alcohol; it will seep into the PCB. Use a barely-damp swab, not a wet one.
Corsair mice use standard Omron switches on most models and disassemble like a typical shell. Their warranty is voided once you remove the screws, so check the warranty status before going inside. Corsair’s own support page explicitly recommends a toothpick and dry swab as the safe method.
Common Mistakes to Avoid
Tilting the compressed air can. Propellant sprays out as liquid, and that liquid ruins sensors. Always hold it upright.
Using 70% alcohol on electronics. The 30% water content causes slow corrosion. Spend the extra two dollars for 99%.
Pressing the sensor lens with a swab. You can flex the lens mount and throw off lift-off distance. Let the tool do the work.
Skipping the dry time. Alcohol feels dry in 10 seconds, but microswitch interiors can hold moisture for minutes. Wait at least 5 minutes before powering on.
Forgetting the mousepad. A clean sensor on a filthy pad is pointless. Vacuum or wipe your pad at the same time.
When to Clean vs. When to Replace
Clean when the issues are recent, the mouse is under 3 years old, and the symptoms match the patterns above. Replace when the sensor has visible scratches, the switches are physically cracked, the scroll wheel encoder is grinding, or the double-click returns within hours of cleaning.
For a $30 to $60 budget mouse, replacement often makes more sense than switch soldering. For a $100+ mouse you love, replacement switches cost about $1 each in parts and 20 minutes with a soldering iron, or you can pay a local repair shop $20 to do it.
Frequently Asked Questions
Can I use isopropyl alcohol to clean a mouse sensor?
Yes, but only 90% or higher isopropyl alcohol, and only applied to a cloth or cotton swab first, never dripped directly. 70% alcohol contains too much water and can cause corrosion. Let the area dry fully for at least 60 seconds before use.
How often should you clean your gaming mouse?
For most gamers, a light cleaning every 2 weeks and a deep clean every 3 months works well. Competitive players should clean weekly. Clean immediately if you notice tracking jitter, sticky clicks, or a visible film on the shell.
How do you fix a sticky mouse clicker without opening it?
Drip one small drop of 99% isopropyl alcohol into the seam above the affected button, then click the button 20 to 30 times to work the liquid into the microswitch. Wipe away any seepage and wait 5 minutes before using the mouse.
Can I use WD-40 to clean a mouse sensor?
No. WD-40 leaves an oily film that attracts dust and can permanently fog the sensor lens. Use only 99% isopropyl alcohol, compressed air, or a dry paintbrush on the sensor area.
Can a dirty mousepad affect mouse sensor performance?
Yes. A filthy pad introduces debris that sticks to the sensor lens and can cause tracking jitter, spin-outs, and lift-off issues. Clean the pad at the same time you clean the sensor, ideally once a week for cloth pads and once a month for hard pads.
Final Thoughts
Learning how to clean a gaming mouse sensor and switches without damaging them takes about 10 minutes the first time and 3 minutes after that. The biggest gains come from a clean sensor lens and properly maintained microswitches, both of which are easy to do with the right alcohol concentration and the right tools.
Keep a microfiber cloth, a few cotton swabs, and a can of 99% isopropyl alcohol near your setup, and you will never deal with a misbehaving mouse for more than a few minutes at a time.