
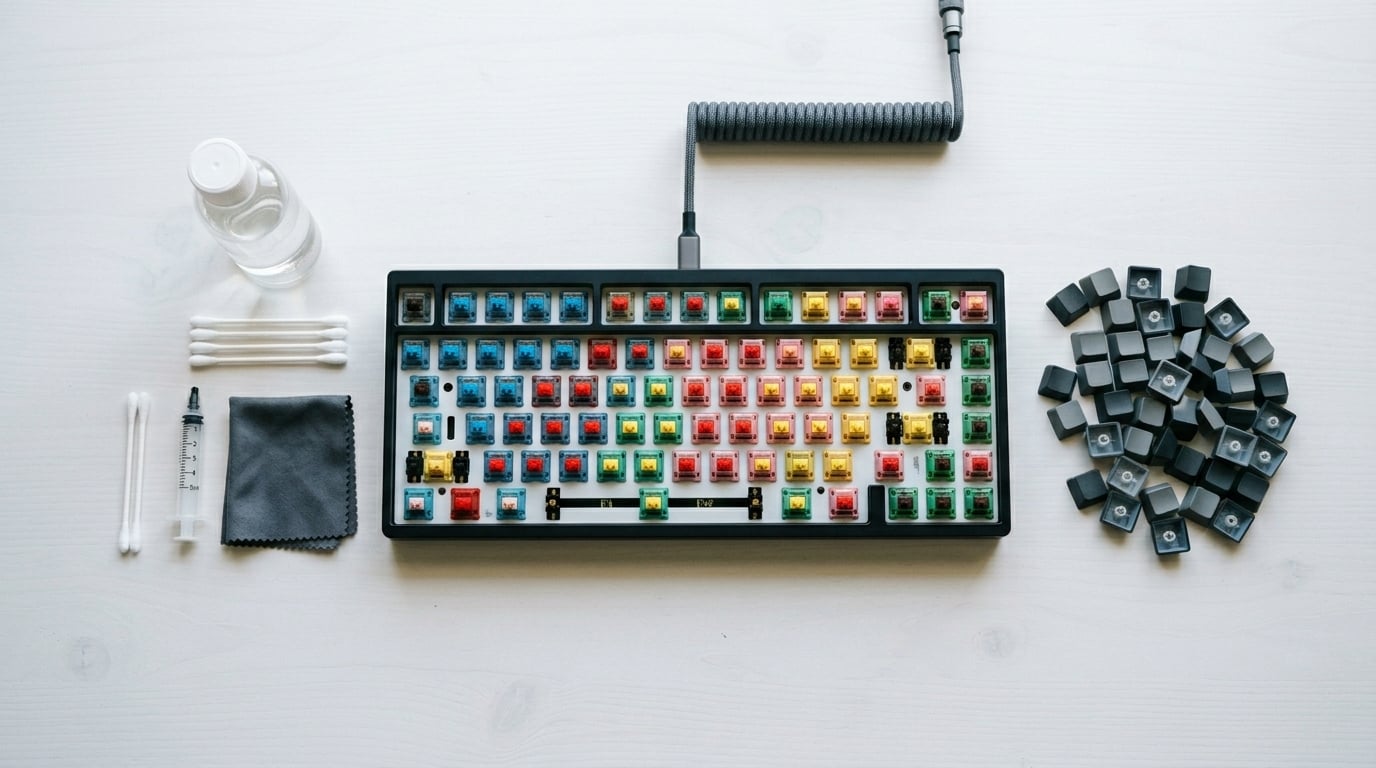
Few things ruin a typing session faster than a key that won’t bounce back. I learned this the hard way when a splash of mango juice hit my keyboard mid-afternoon, and three keys on the home row went from snappy to gummy in seconds. If you’re wondering how to fix sticky or mushy keys on a mechanical keyboard, the good news is that most cases can be solved at home in under an hour with a few simple supplies and a little patience.
This guide walks you through the exact process I use to revive stuck switches, from a quick surface clean to a full deep-clean. I’ll also explain the difference between a sticky key and a mushy one, tell you what to avoid (looking at you, WD-40), and share when it’s time to swap a switch entirely.
Table of Contents
What Causes Sticky or Mushy Keys on a Mechanical Keyboard
Sticky keys happen when something gets between the keycap and the switch stem, or inside the switch housing itself. The most common culprits are spilled drinks, crumbs, dust, pet hair, and the sticky factory lube residue that some switches ship with.
Mushy keys feel different. A mushy switch usually means the internal spring is worn, the plastic leaves are slightly bent, or the housing has loosened up. The key still moves, but the actuation feels soft, sluggish, or “thuddy” instead of crisp.
Sticky Keys vs Mushy Keys: What’s the Difference?
Sticky keys physically resist movement. You can feel grit, gunk, or drag as you press down. Mushy keys feel loose or dampened. The key travels fine but the tactile bump is gone, or the return feels slow and weak.
Here’s the practical test: if a key feels gritty or stuck at a certain point, it’s sticky debris. If the key feels soft throughout the entire press with no clear actuation point, it’s likely a worn or damaged switch.
Tools You’ll Need to Clean Mechanical Keyboard Switches
Before you start, gather these supplies. Most of them are cheap and worth keeping in a desk drawer.
- Isopropyl alcohol (90% or higher works best, 70% is acceptable)
- Cotton swabs and lint-free microfiber cloths
- A keycap puller (or a flat, thin tool in a pinch)
- Compressed air canister
- A small syringe or pipette for precision cleaning
- Soft-bristle brush (a clean toothbrush works)
- Paper towels
One thing worth noting: water alone won’t cut it for sugar-based spills. Soda, juice, and coffee all leave residue that needs alcohol to dissolve properly. I keep a dedicated bottle of 90% isopropyl alcohol on my desk at all times for this reason.
How to Fix Sticky or Mushy Keys on a Mechanical Keyboard: Step-by-Step
The exact method depends on how bad the stickiness is. Start with the gentlest approach first and only escalate if needed.
Quick Fixes for Minor Stickiness
For a single key that feels slightly off but still works, try this 5-minute method first.
- Unplug your keyboard and turn it upside down over a trash can.
- Give it a few gentle shakes to dislodge loose debris.
- Spray short bursts of compressed air around the affected key.
- Press the key 30 to 50 times to work the air through the mechanism.
- If stickiness remains, pull the keycap and inspect the stem for visible gunk.
- Dip a cotton swab in isopropyl alcohol and clean the stem and the top of the switch housing.
- Let it dry for 5 minutes before reattaching the keycap.
I tried this on a sticky ‘E’ key last month and the grit was a single dust bunny wedged in the housing. One blast of air and 40 presses later, the key felt brand new.
Deep Cleaning Method for Stubborn Keys
For liquid spills or keys that stay gummy after the quick fix, you’ll need to clean inside the switch itself. This is the method I used after that juice incident, and it brought all three affected keys back to life.
- Unplug the keyboard and remove all keycaps from the affected area.
- Use compressed air to blow out any loose debris from the exposed switches.
- Fill your syringe with 90% isopropyl alcohol.
- Hold the switch upright and drip 2 to 3 drops of alcohol into the gaps around the stem.
- Press the stem down repeatedly, around 100 times, to work the alcohol through the internals.
- Let the keyboard sit for at least 24 hours, some users recommend up to 4 days for full drying.
- Reattach the keycaps and test the keys once completely dry.
A word of caution based on my own spill experience. Sugar-based drinks like juice or soda are the trickiest because the sugar caramelizes inside the switch. You may need to repeat the alcohol flush 2 to 3 times for a full restore. Patience here saves you from replacing a perfectly good switch.
If your keyboard has hot-swappable switches, you can pull the switch out entirely and soak it in alcohol for 10 minutes, then let it air dry. For soldered PCBs, stick with the in-place syringe method to avoid a much bigger repair job.
What NOT to Use on Mechanical Keyboard Switches
This is the section I wish I’d read before my first keyboard repair. A few common household products can permanently damage switches.
Skip WD-40. It’s a petroleum-based lubricant that leaves residue, attracts dust, and can break down the plastic housing over time. The Reddit and Geekhack communities have debated this for years, and the consensus is clear: use proper switch lubricant or isopropyl alcohol, not WD-40.
Avoid household cleaners. Windex, bleach, and dish soap all leave residue that makes the problem worse. Stick with 90% or higher isopropyl alcohol for any contact with switch internals.
Avoid hand sanitizer. Yes, some forum posts recommend it, and it can work in a pinch. But the alcohol concentration is too low and the gels contain additives that gum up switches over time. Stick with pure isopropyl alcohol instead.
When to Clean vs Replace a Switch
Cleaning solves about 80% of sticky key problems. But sometimes a switch is just worn out, and no amount of alcohol will fix it. Here are the signs that replacement is your best bet.
- The key still feels mushy after multiple deep cleanings.
- The switch makes a scratchy or grinding sound on every press.
- The key registers double inputs (chatter) even after cleaning.
- The plastic housing is visibly cracked or warped.
- You’ve owned the keyboard for 3+ years and the issue affects multiple switches.
Hot-swappable keyboards make replacement painless. You pop out the old switch and click in a new one, no soldering required. For soldered boards, replacement is a more involved repair and might be a good moment to consider whether the keyboard is worth the effort.
Prevention: Keeping Your Mechanical Keyboard Clean
Once your keys are working again, a little prevention goes a long way. I run through this quick routine once a month.
- Keep drinks on a separate coaster or tray, not next to the keyboard.
- Wash your hands before long typing sessions.
- Cover the keyboard when not in use to keep out dust.
- Use compressed air monthly to clear out debris.
- Remove keycaps quarterly and clean them with mild soap and water.
If you’re setting up a new desk setup, our wrist rest guide for keyboard comfort covers ergonomic add-ons that pair well with a clean mechanical board.
Frequently Asked Questions
How to fix sticky mechanical keyboard keys?
Remove the keycap and clean the stem with a cotton swab dipped in 90% isopropyl alcohol. For debris inside the switch, drip 2-3 drops of alcohol into the housing and press the stem 100 times to work it through. Let it dry for 24 hours before testing.
Can you use WD-40 on a sticky keyboard?
No. WD-40 is petroleum-based and leaves residue that attracts dust and can degrade plastic switch housings. Use 90% isopropyl alcohol for cleaning and a proper switch lubricant like Krytox for lubrication.
How to get rid of Sticky Keys on your keyboard?
Unplug the keyboard, turn it upside down, and shake out loose debris. Spray compressed air around the affected keys, then press each key 30-50 times. For persistent stickiness, pull the keycap and clean the stem with isopropyl alcohol.
How to fix a sticky keyboard without removing keys?
Spray compressed air under the affected key and press the key repeatedly to work the air through. For liquid spills, drip 2-3 drops of 90% isopropyl alcohol around the stem without removing the keycap, press 100 times, and let dry for 24 hours.
Final Thoughts
Knowing how to fix sticky or mushy keys on a mechanical keyboard saves you time, money, and the frustration of typing on a board that doesn’t feel right. In most cases, a bit of 90% isopropyl alcohol, a syringe, and 24 hours of drying time is all you need.
Start with the quick fix, escalate to a deep clean if needed, and only consider replacement when the switch itself is physically worn. With a simple monthly maintenance habit, your mechanical keyboard can feel snappy and new for years to come.